Today I bring you one of the easiest, but highest payoff treats out there- Marshmallows. I’m sure many of you have seen the really fancy ones on blogs (made into animal shapes! woah!)- but this is my basic, no-fail method- AND you can totally bedazzle and extract them up to make them just as fancy as the ones on those other blogs (but with not a ton of effort). Pictured are coconut marshmallows and peppermint-chocolate marshmallows with SPRINKLES!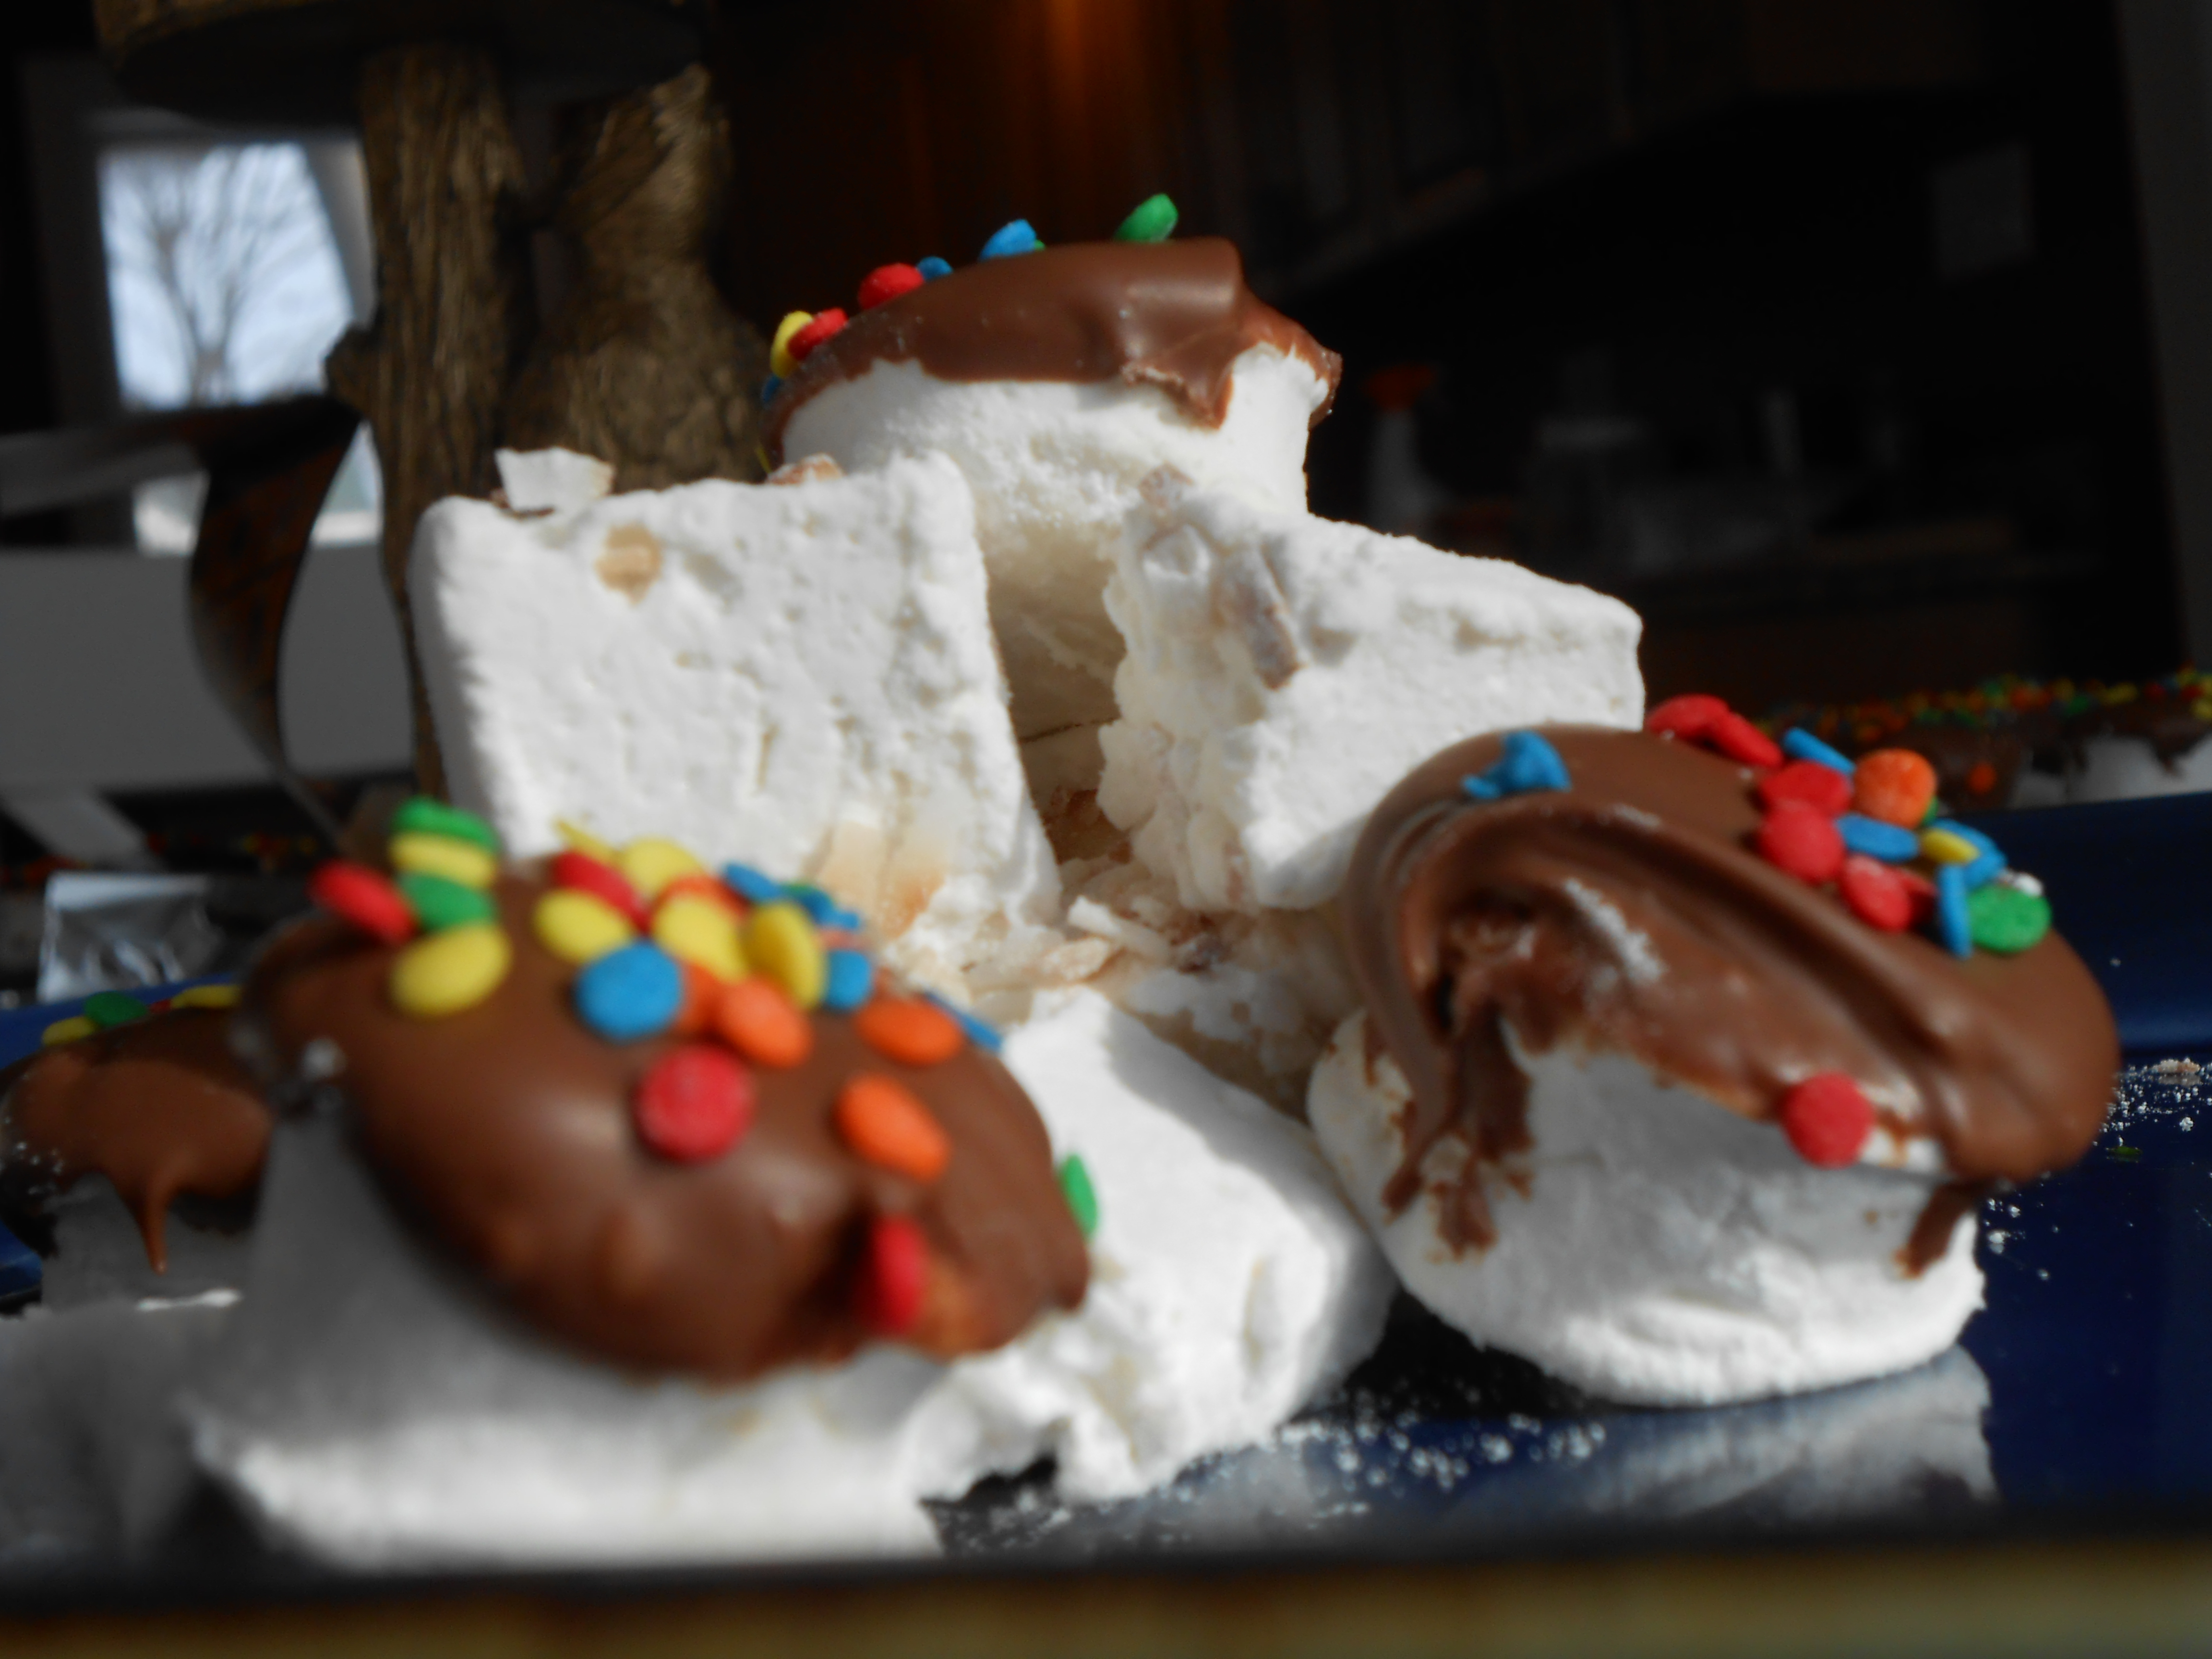 They start simply. You need sugar (duh), corn syrup (light), 3 packets of gelatin (per batch), flavor extract (if you want- vanilla would be fine, too!)- I made two batches and one I flavored with coconut extract and the other with peppermint.
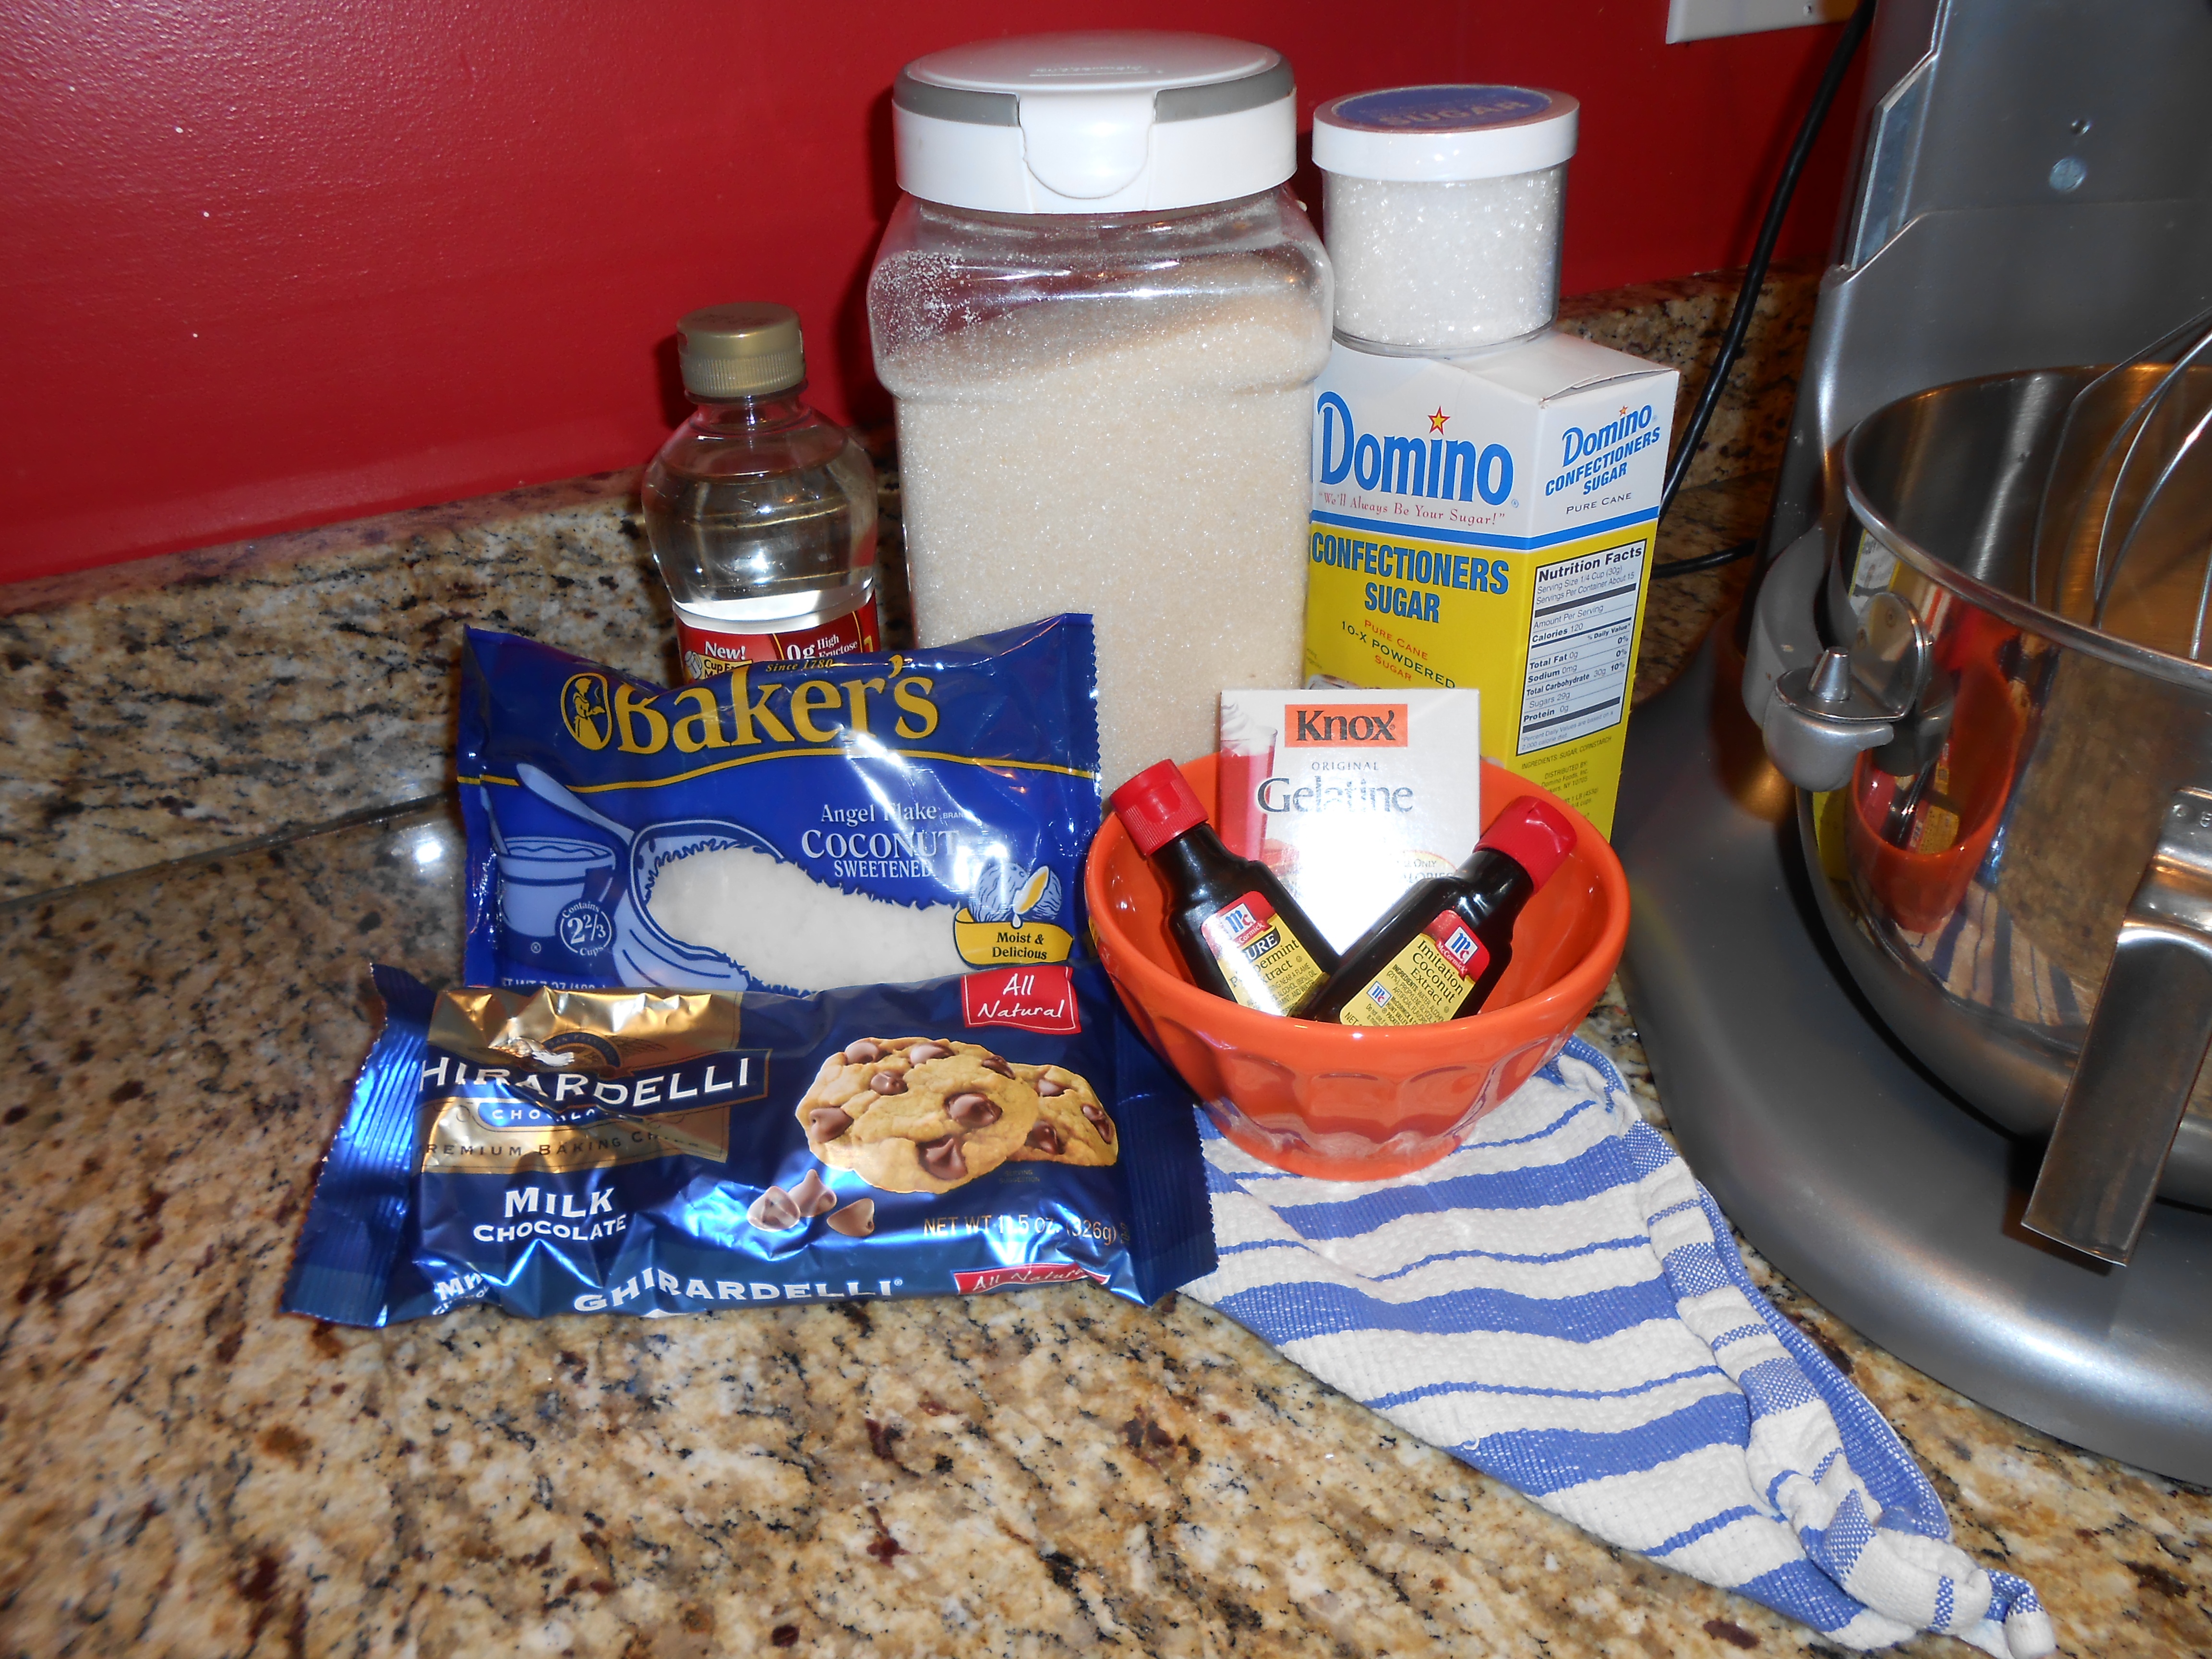
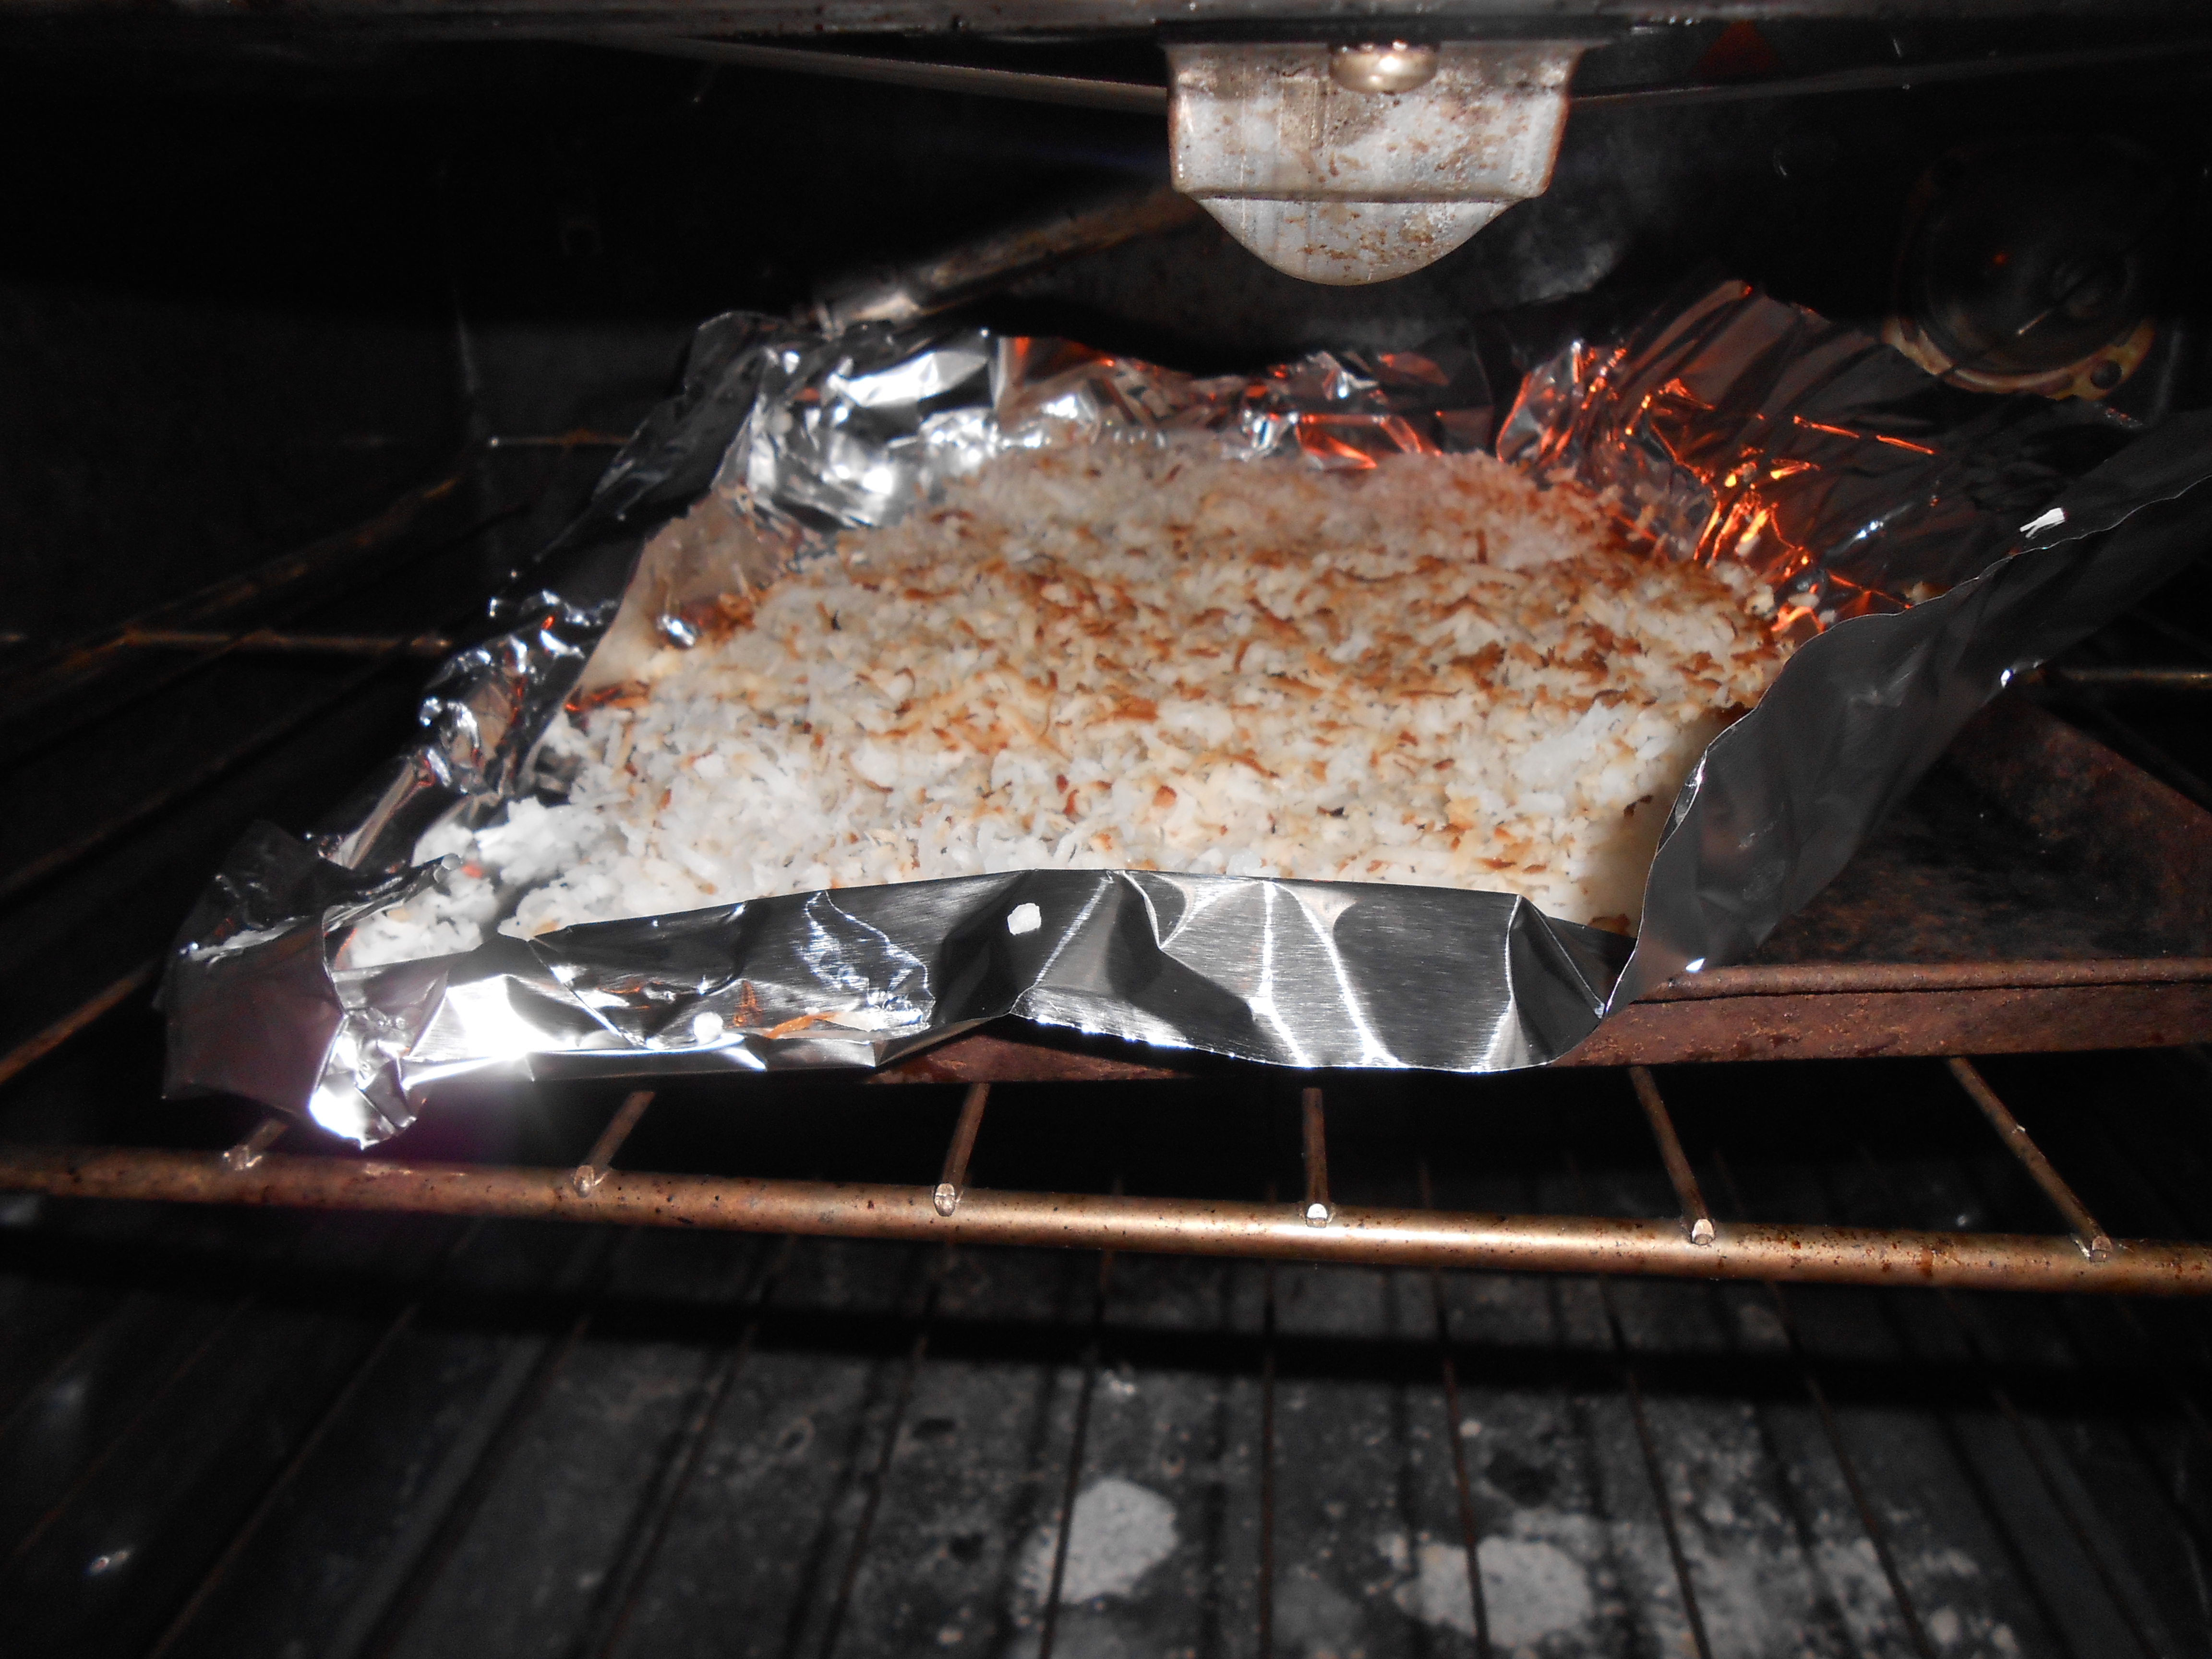
For the coconut version, I started by toasting about 7 oz of coconut. I did this in a 350 oven, and when I got impatient I used the broiler but babysat it like a hawk. Meanwhile, mix 1/2 cup cold water with the gelatin in the bottom of your stand mixer fitted with the whisk attachment.
 Next, measure the corn syrup- 1 cup. I use the handy-dandy Alton Brown recommended push measuring cup.
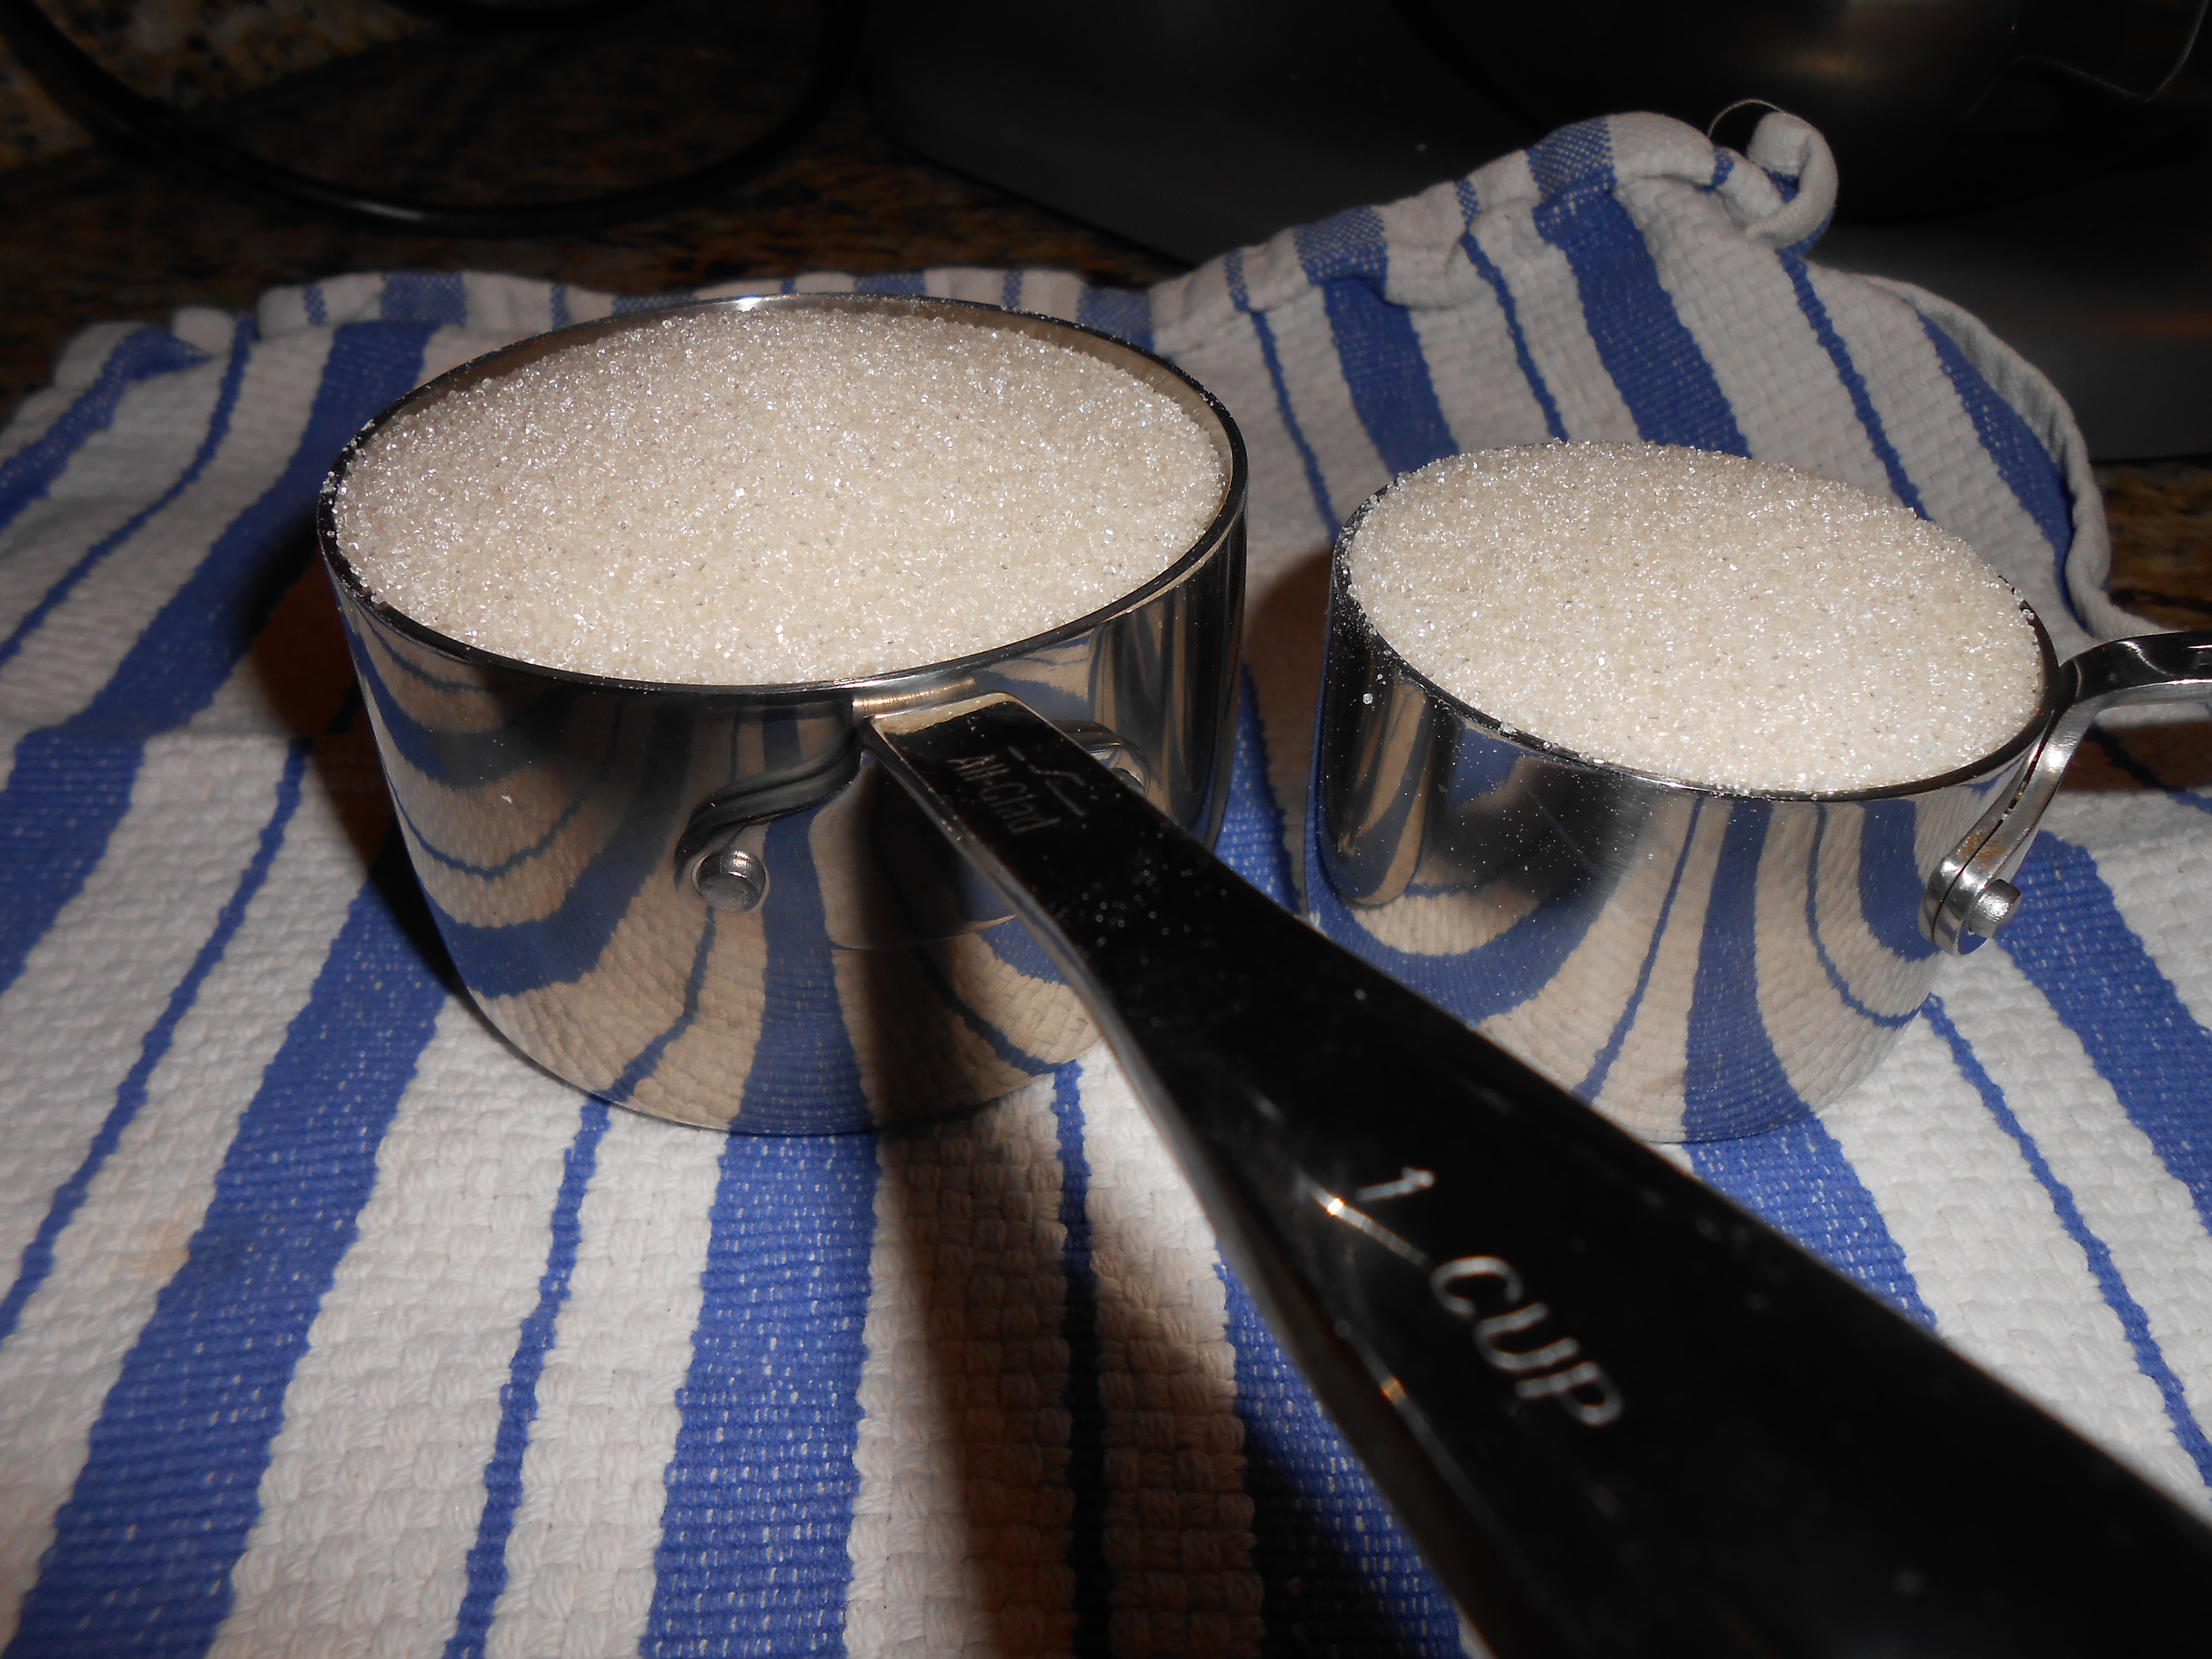 1.5 cups of granulated sugar (I used cane sugar, so my marshmallows are never snow-white)
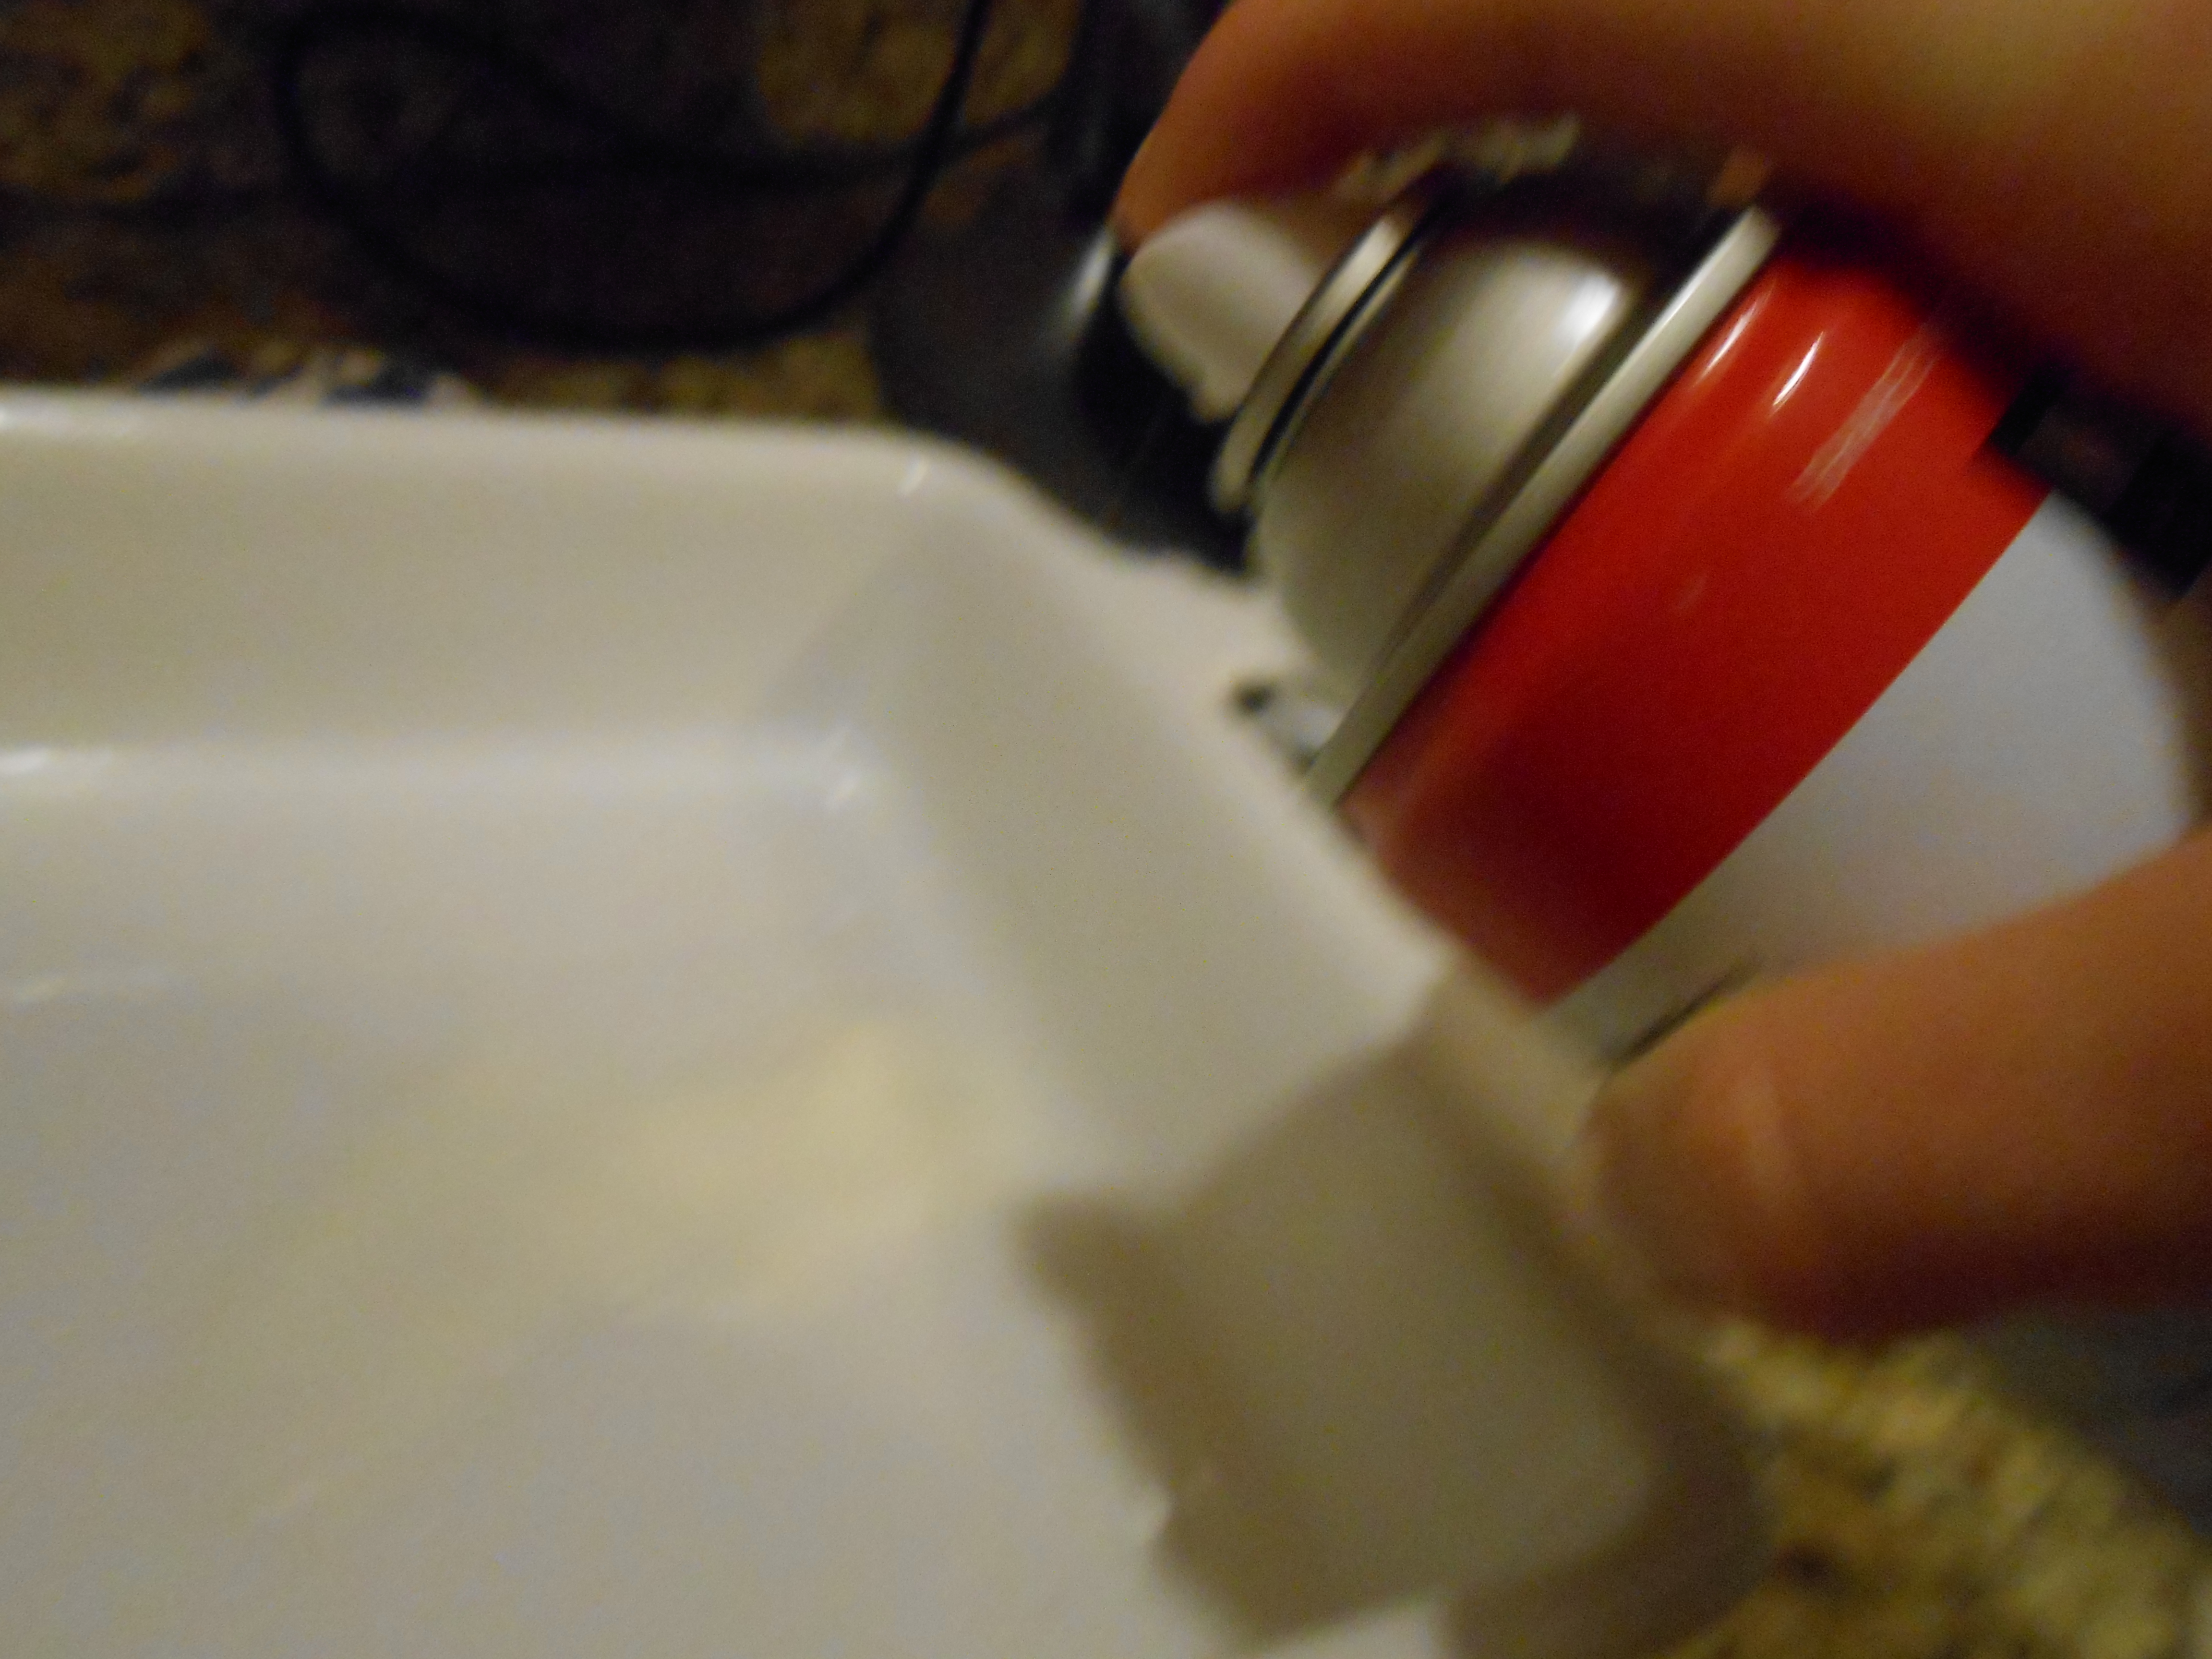
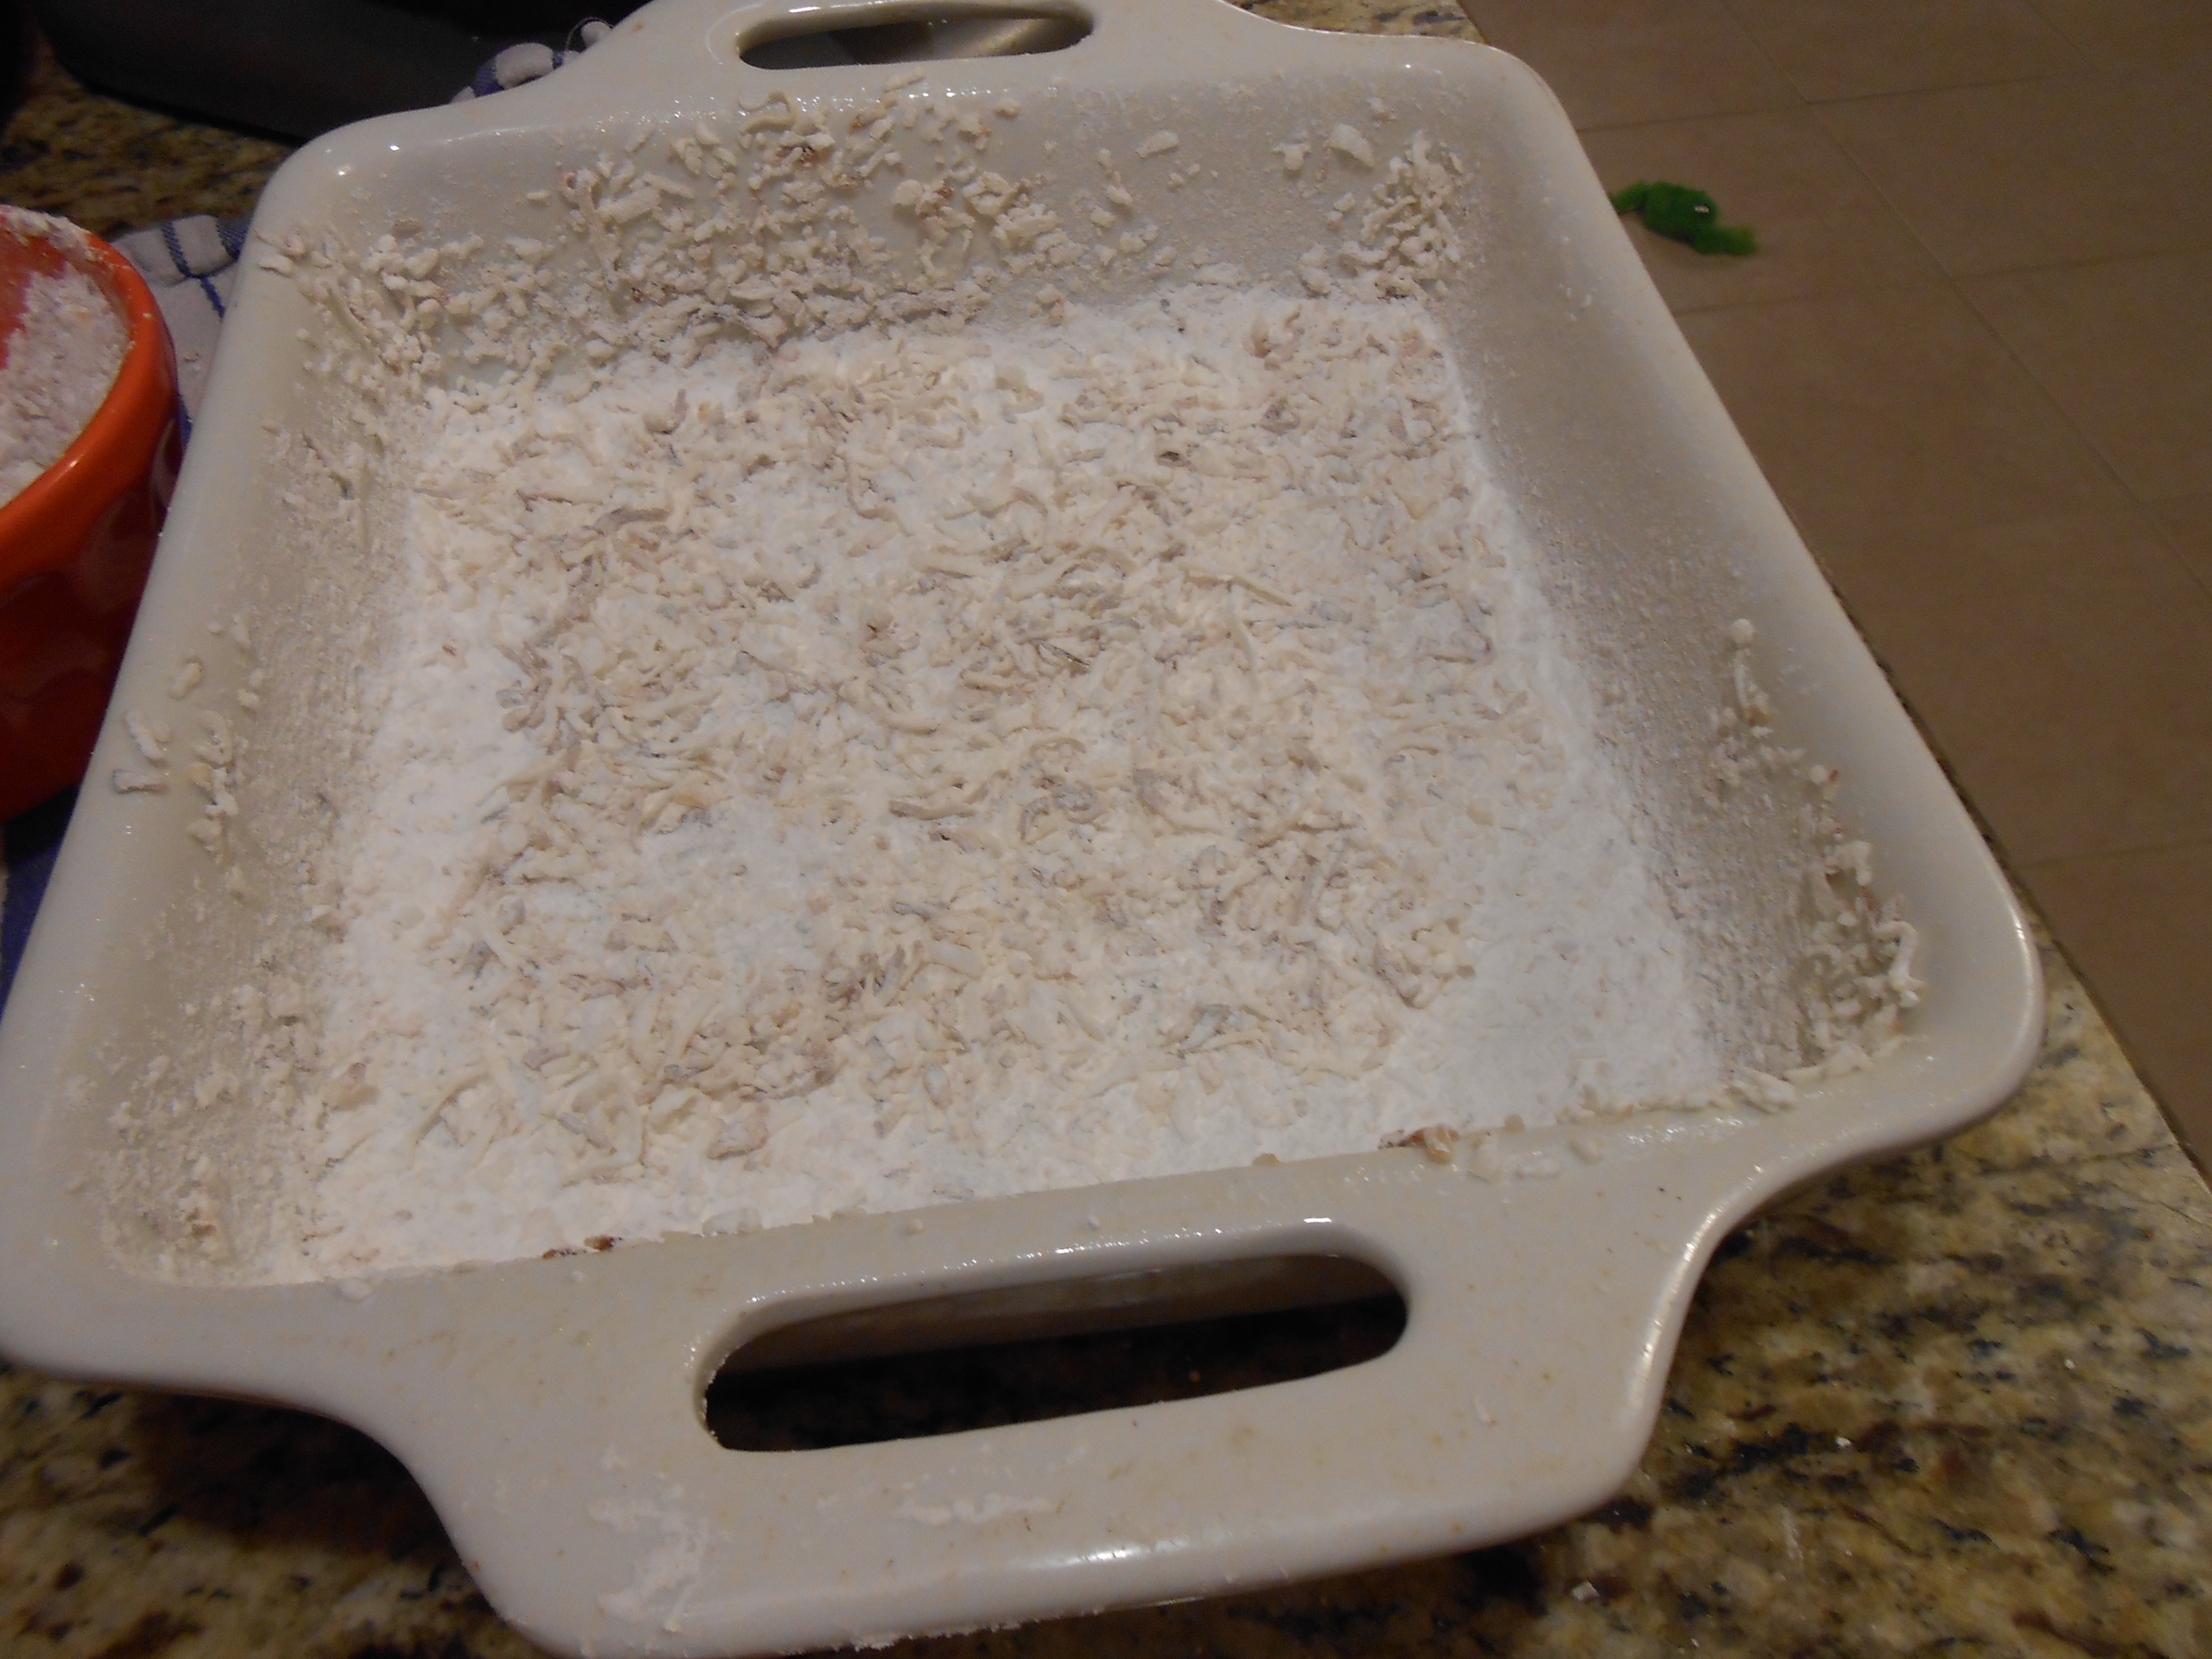
Before applying heat to anything, I prep my 8×8 pan. Marshmallow gloop gets spread into the 8×8 and then cures overnight. It is really sticky, so you need to spray the pan, and then coat with powdered sugar. For the coconut marshmallows, I mixed toasted coconut into the sugar and pressed it into the sides.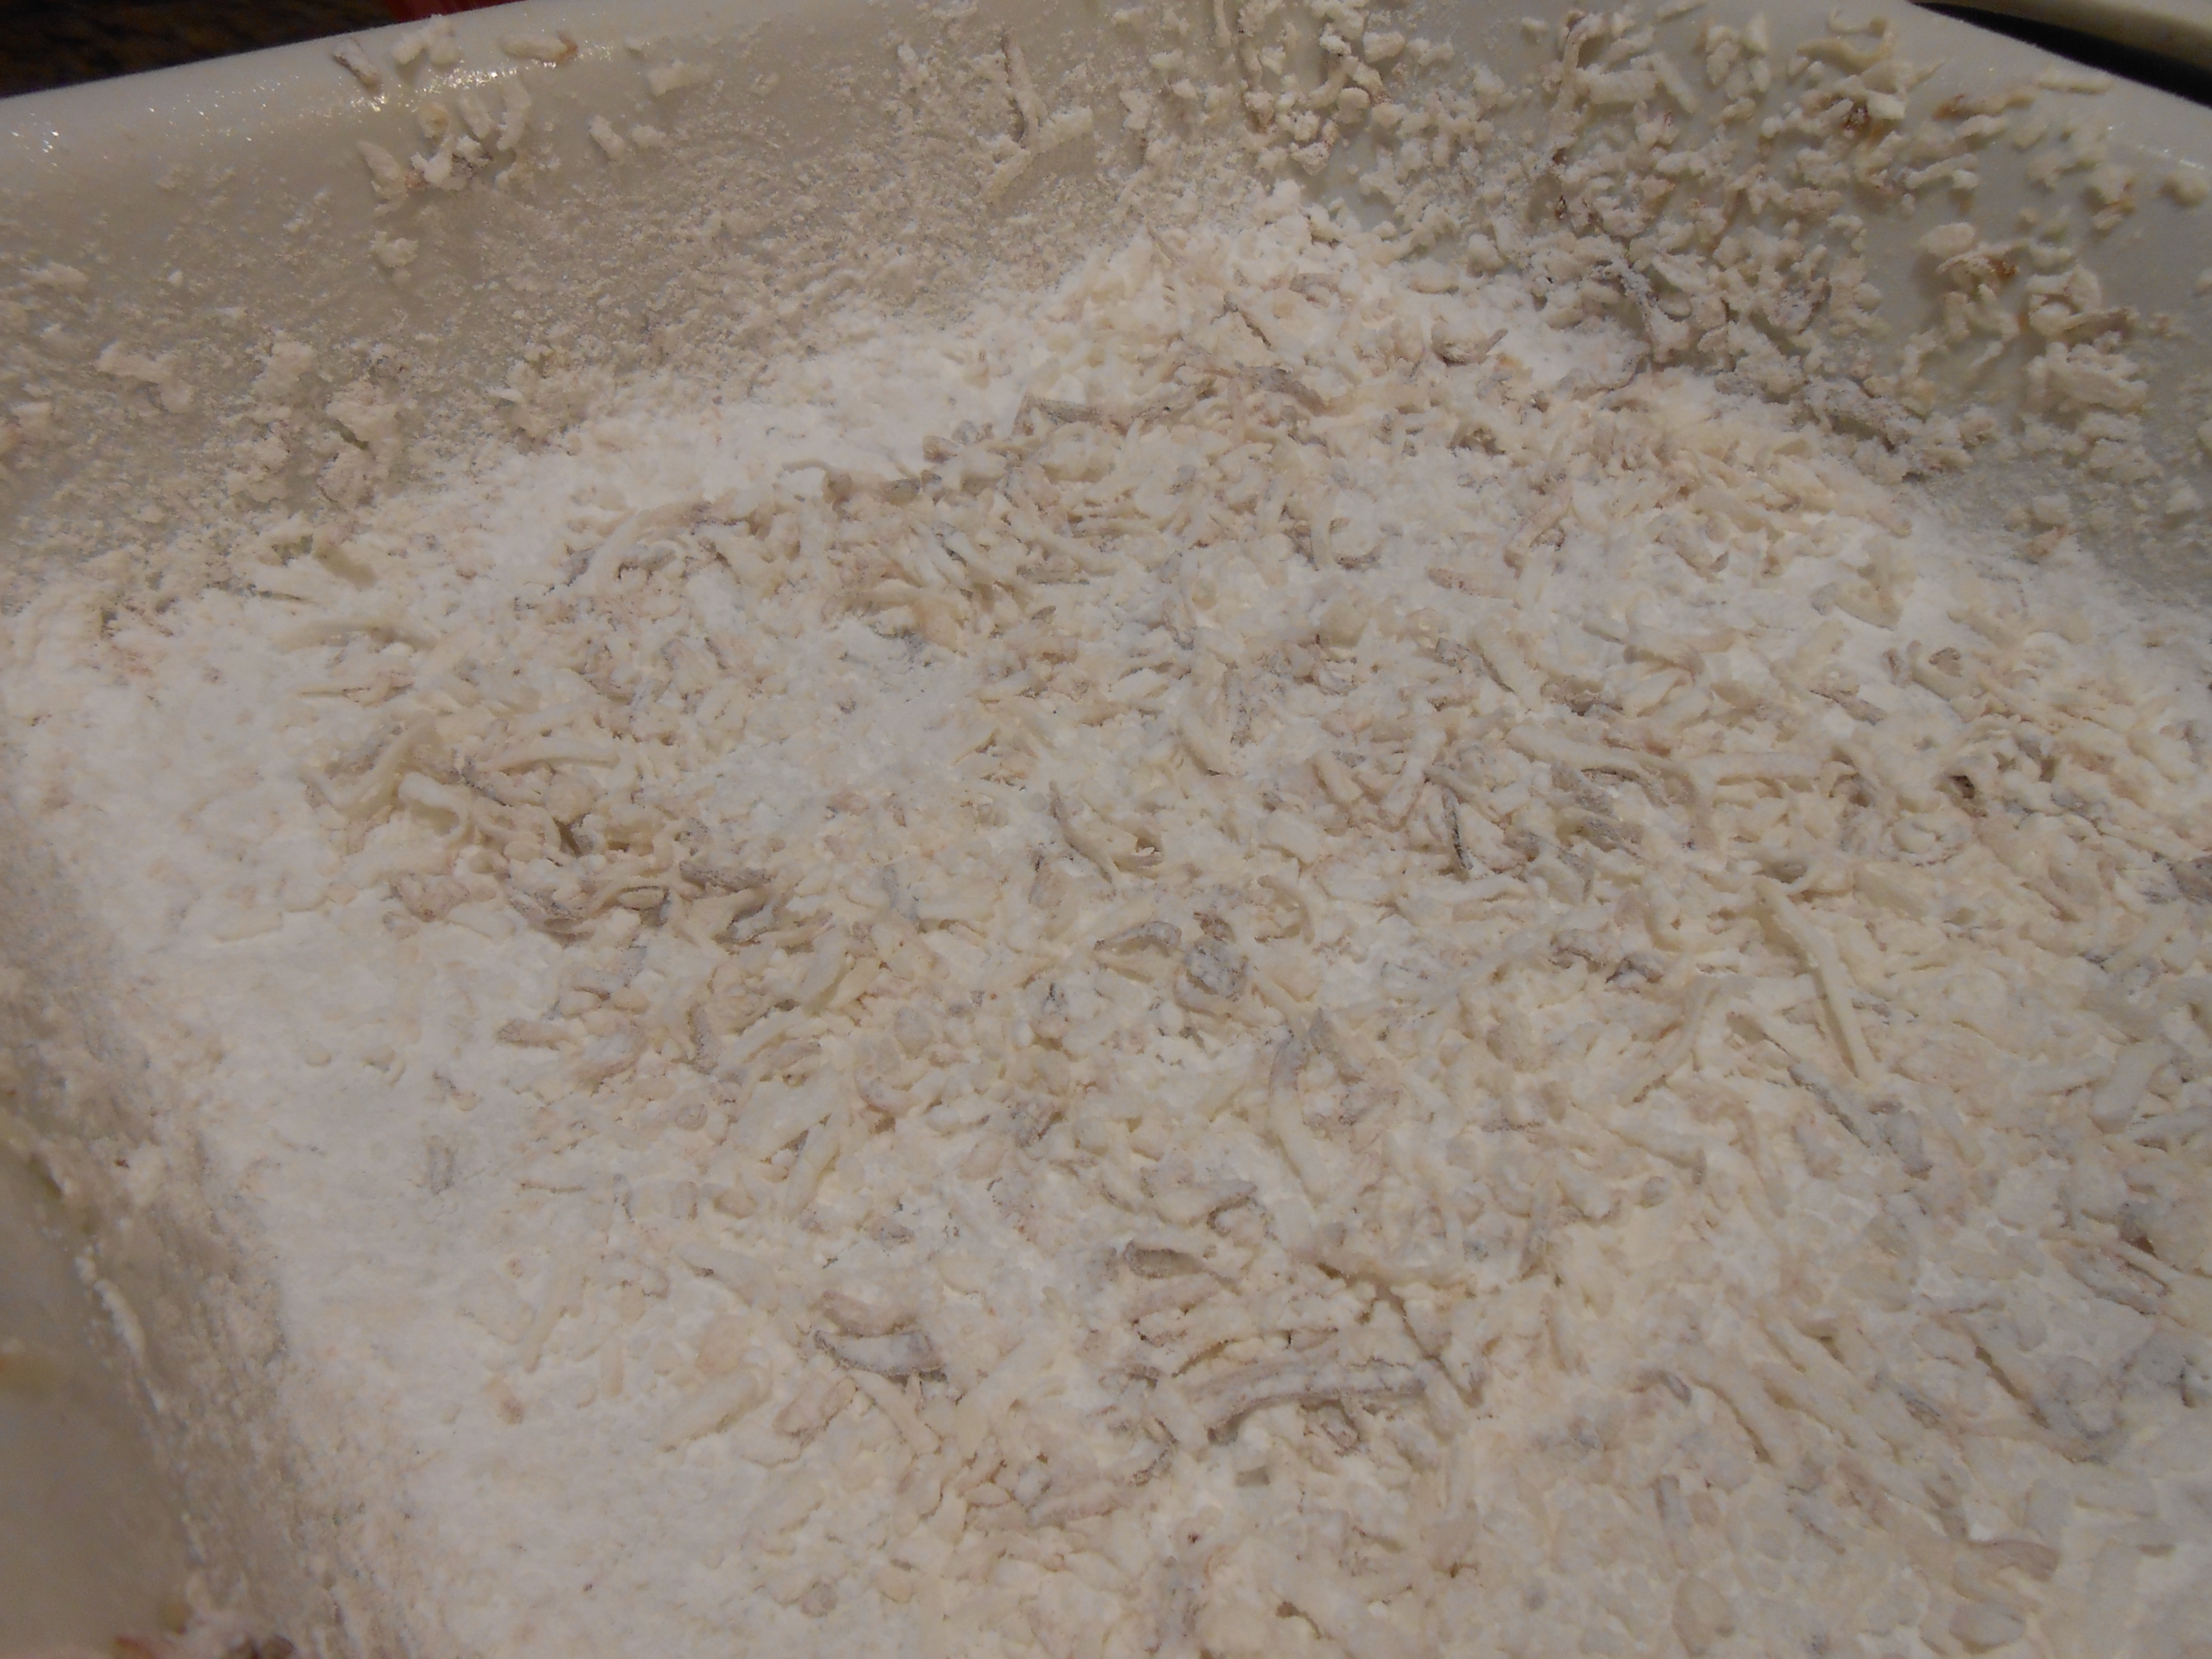
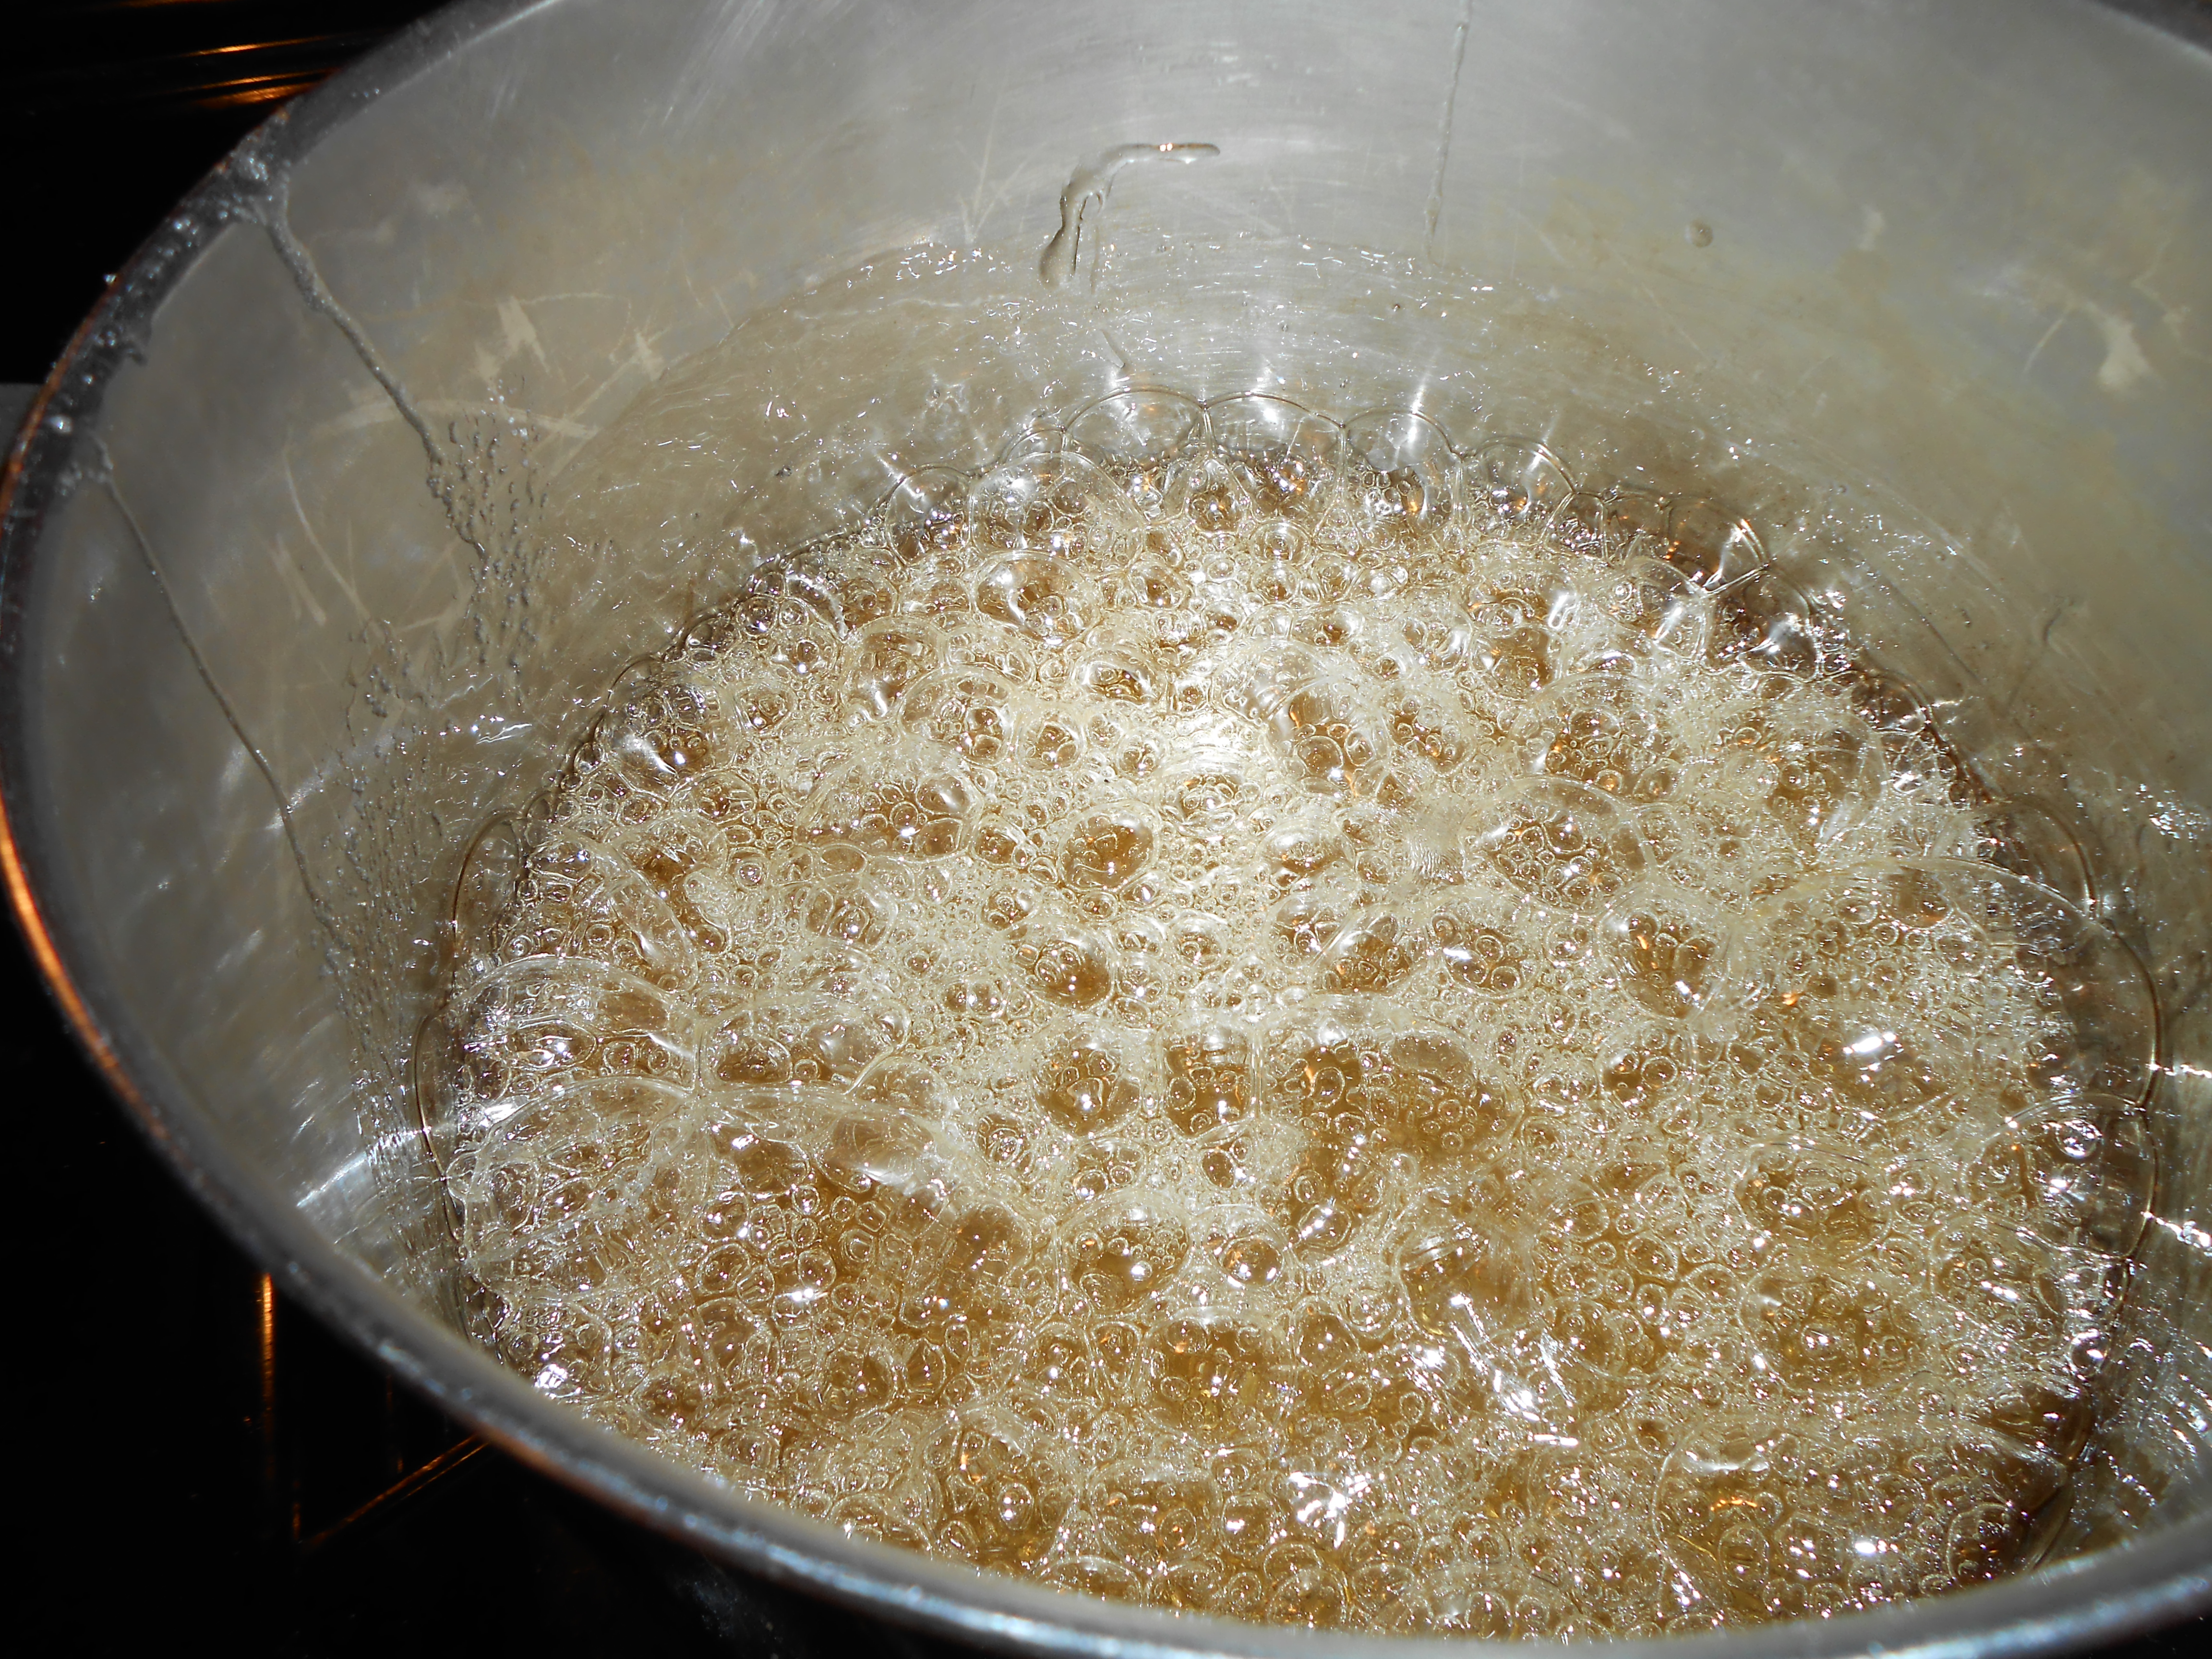
 OK. Time for heat. You are going to want a candy thermometer for this- no excuses. They are cheap at Target- just get one! Add the sugar, corn syrup, and another 1/2 cup of water to a saucepan. Cook over moderate heat, stirring to dissolve the sugar. You will end up bringing it to a bubble and cooking until the thermometer reads 240- or what is also known as the “soft ball” stage for candy cooking. (if you dropped some of the sugar into cold water at this stage, it would form a “soft ball”.
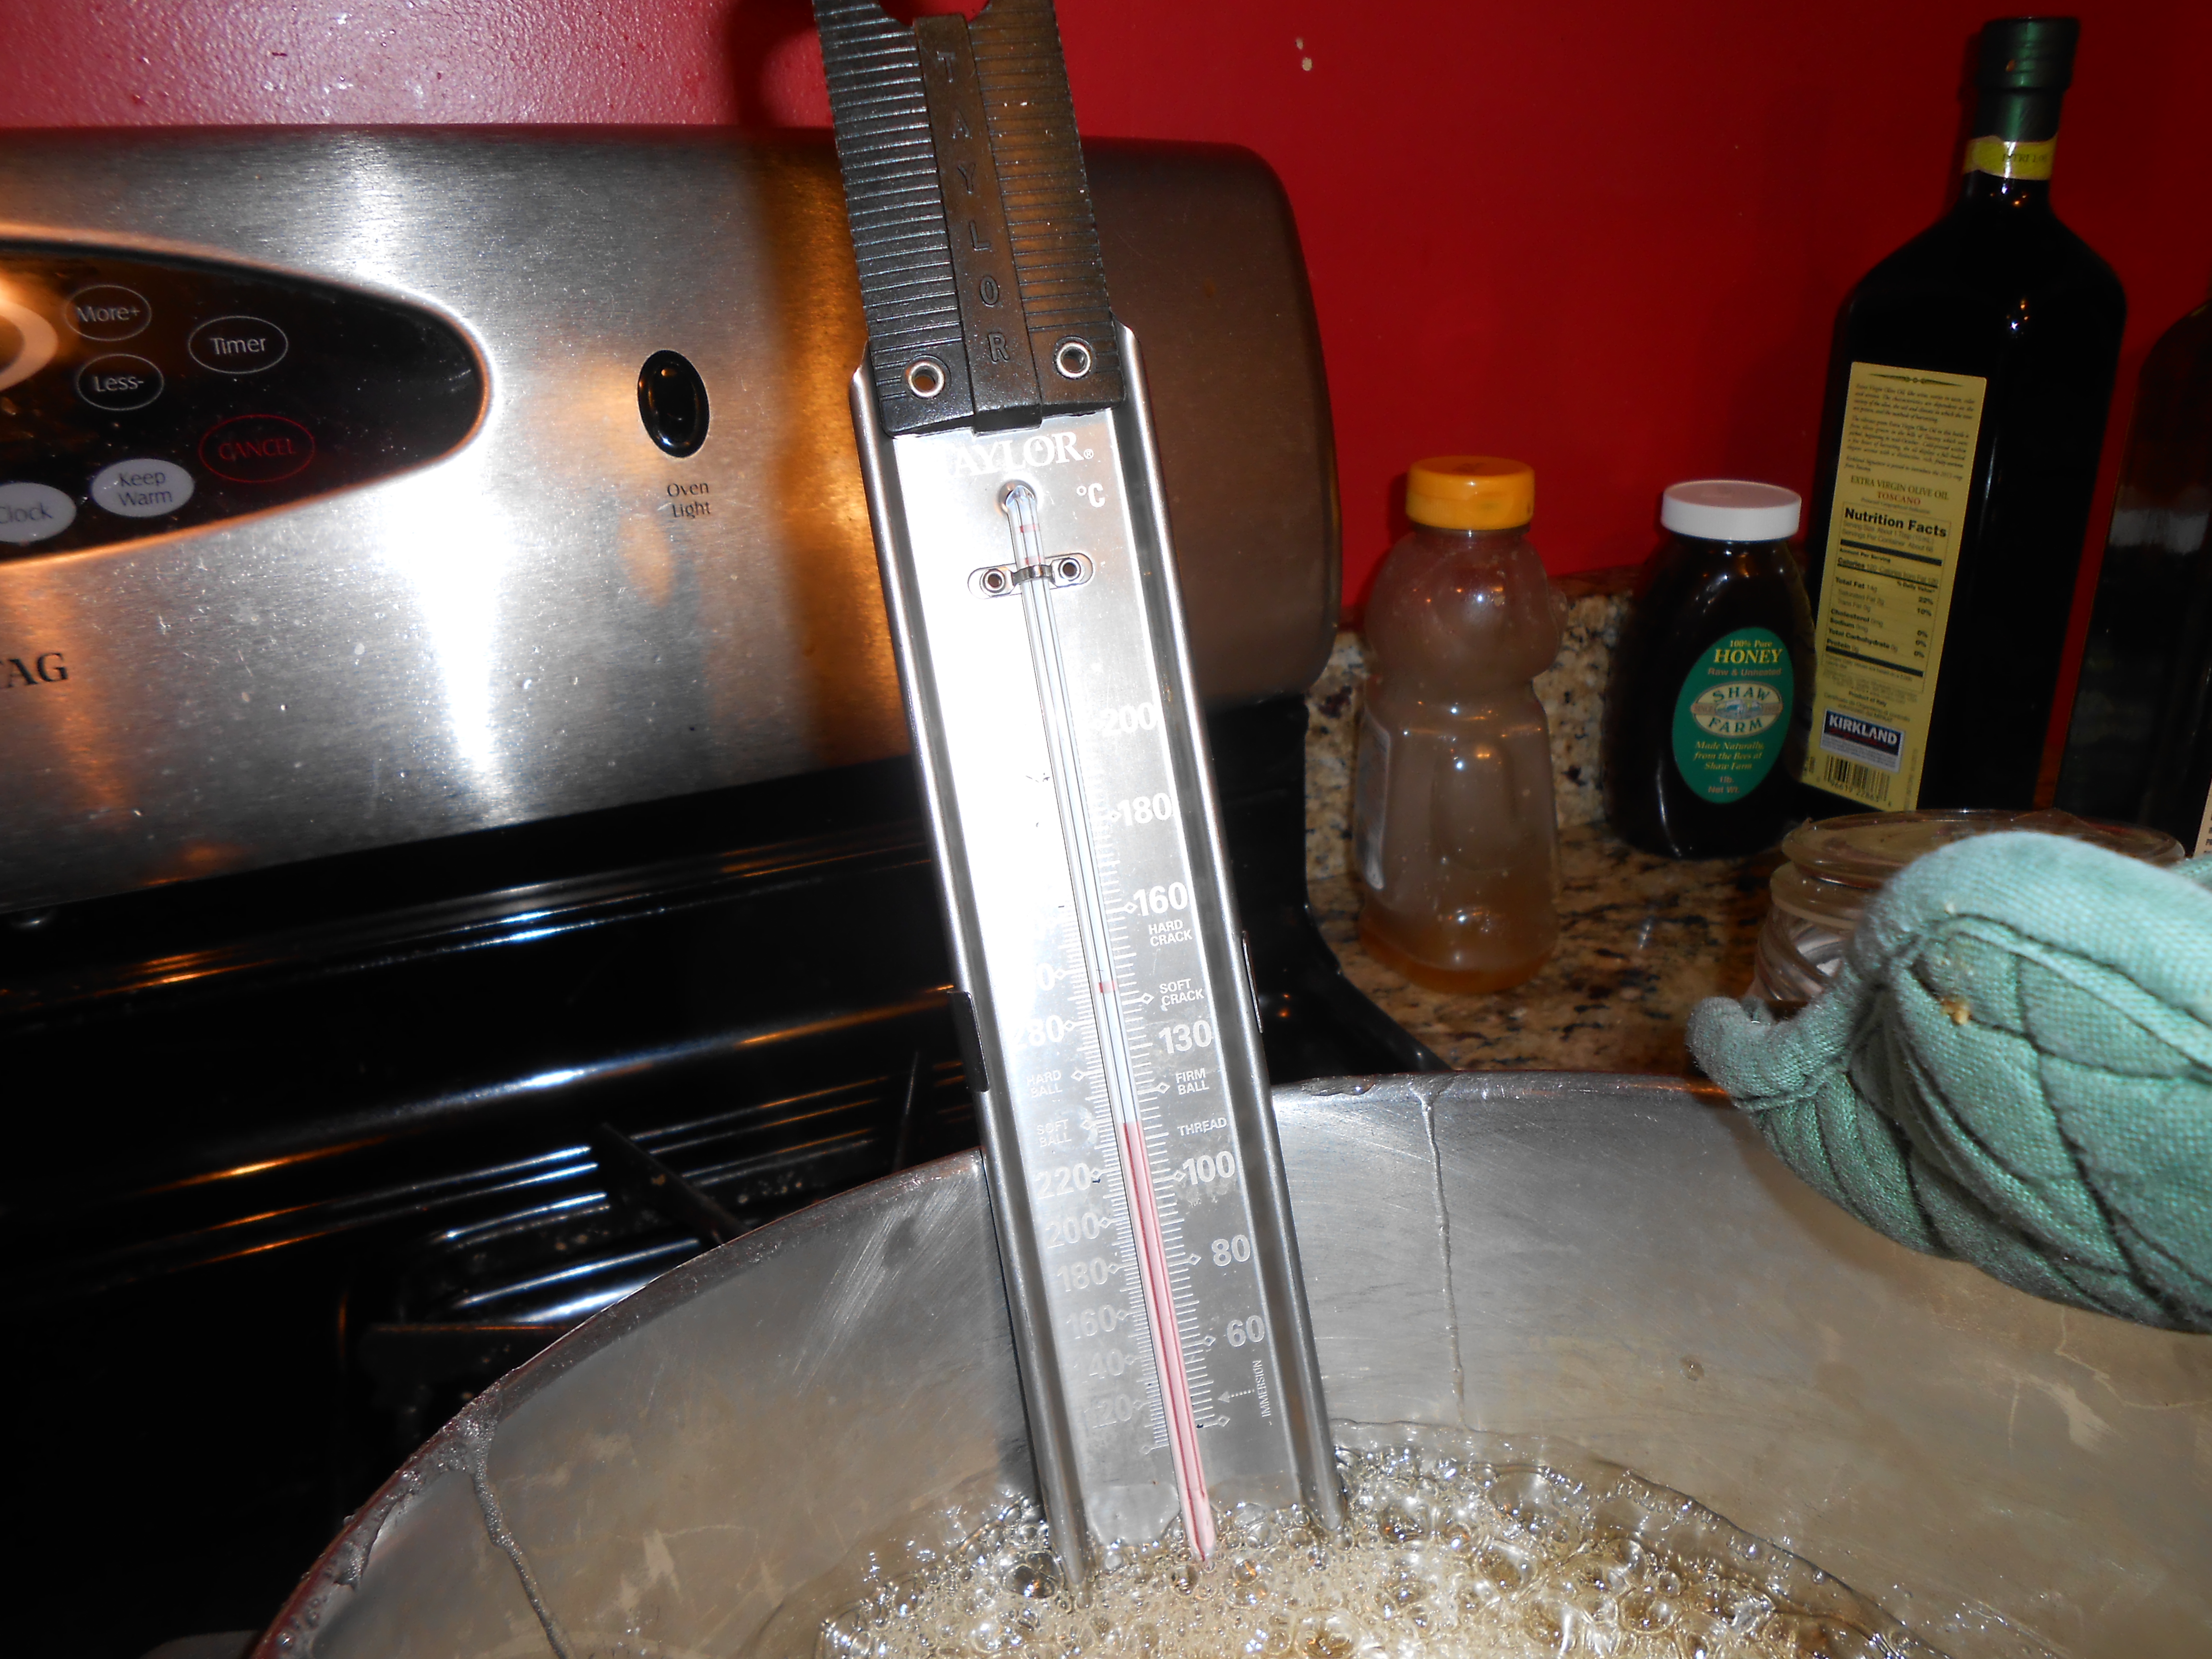
Once the sugar is at 240, turn the stove off. Clear a path to the stand mixer. Put on oven mitts, because we are going to pour the hot sugar into the mixture over the gelatin. 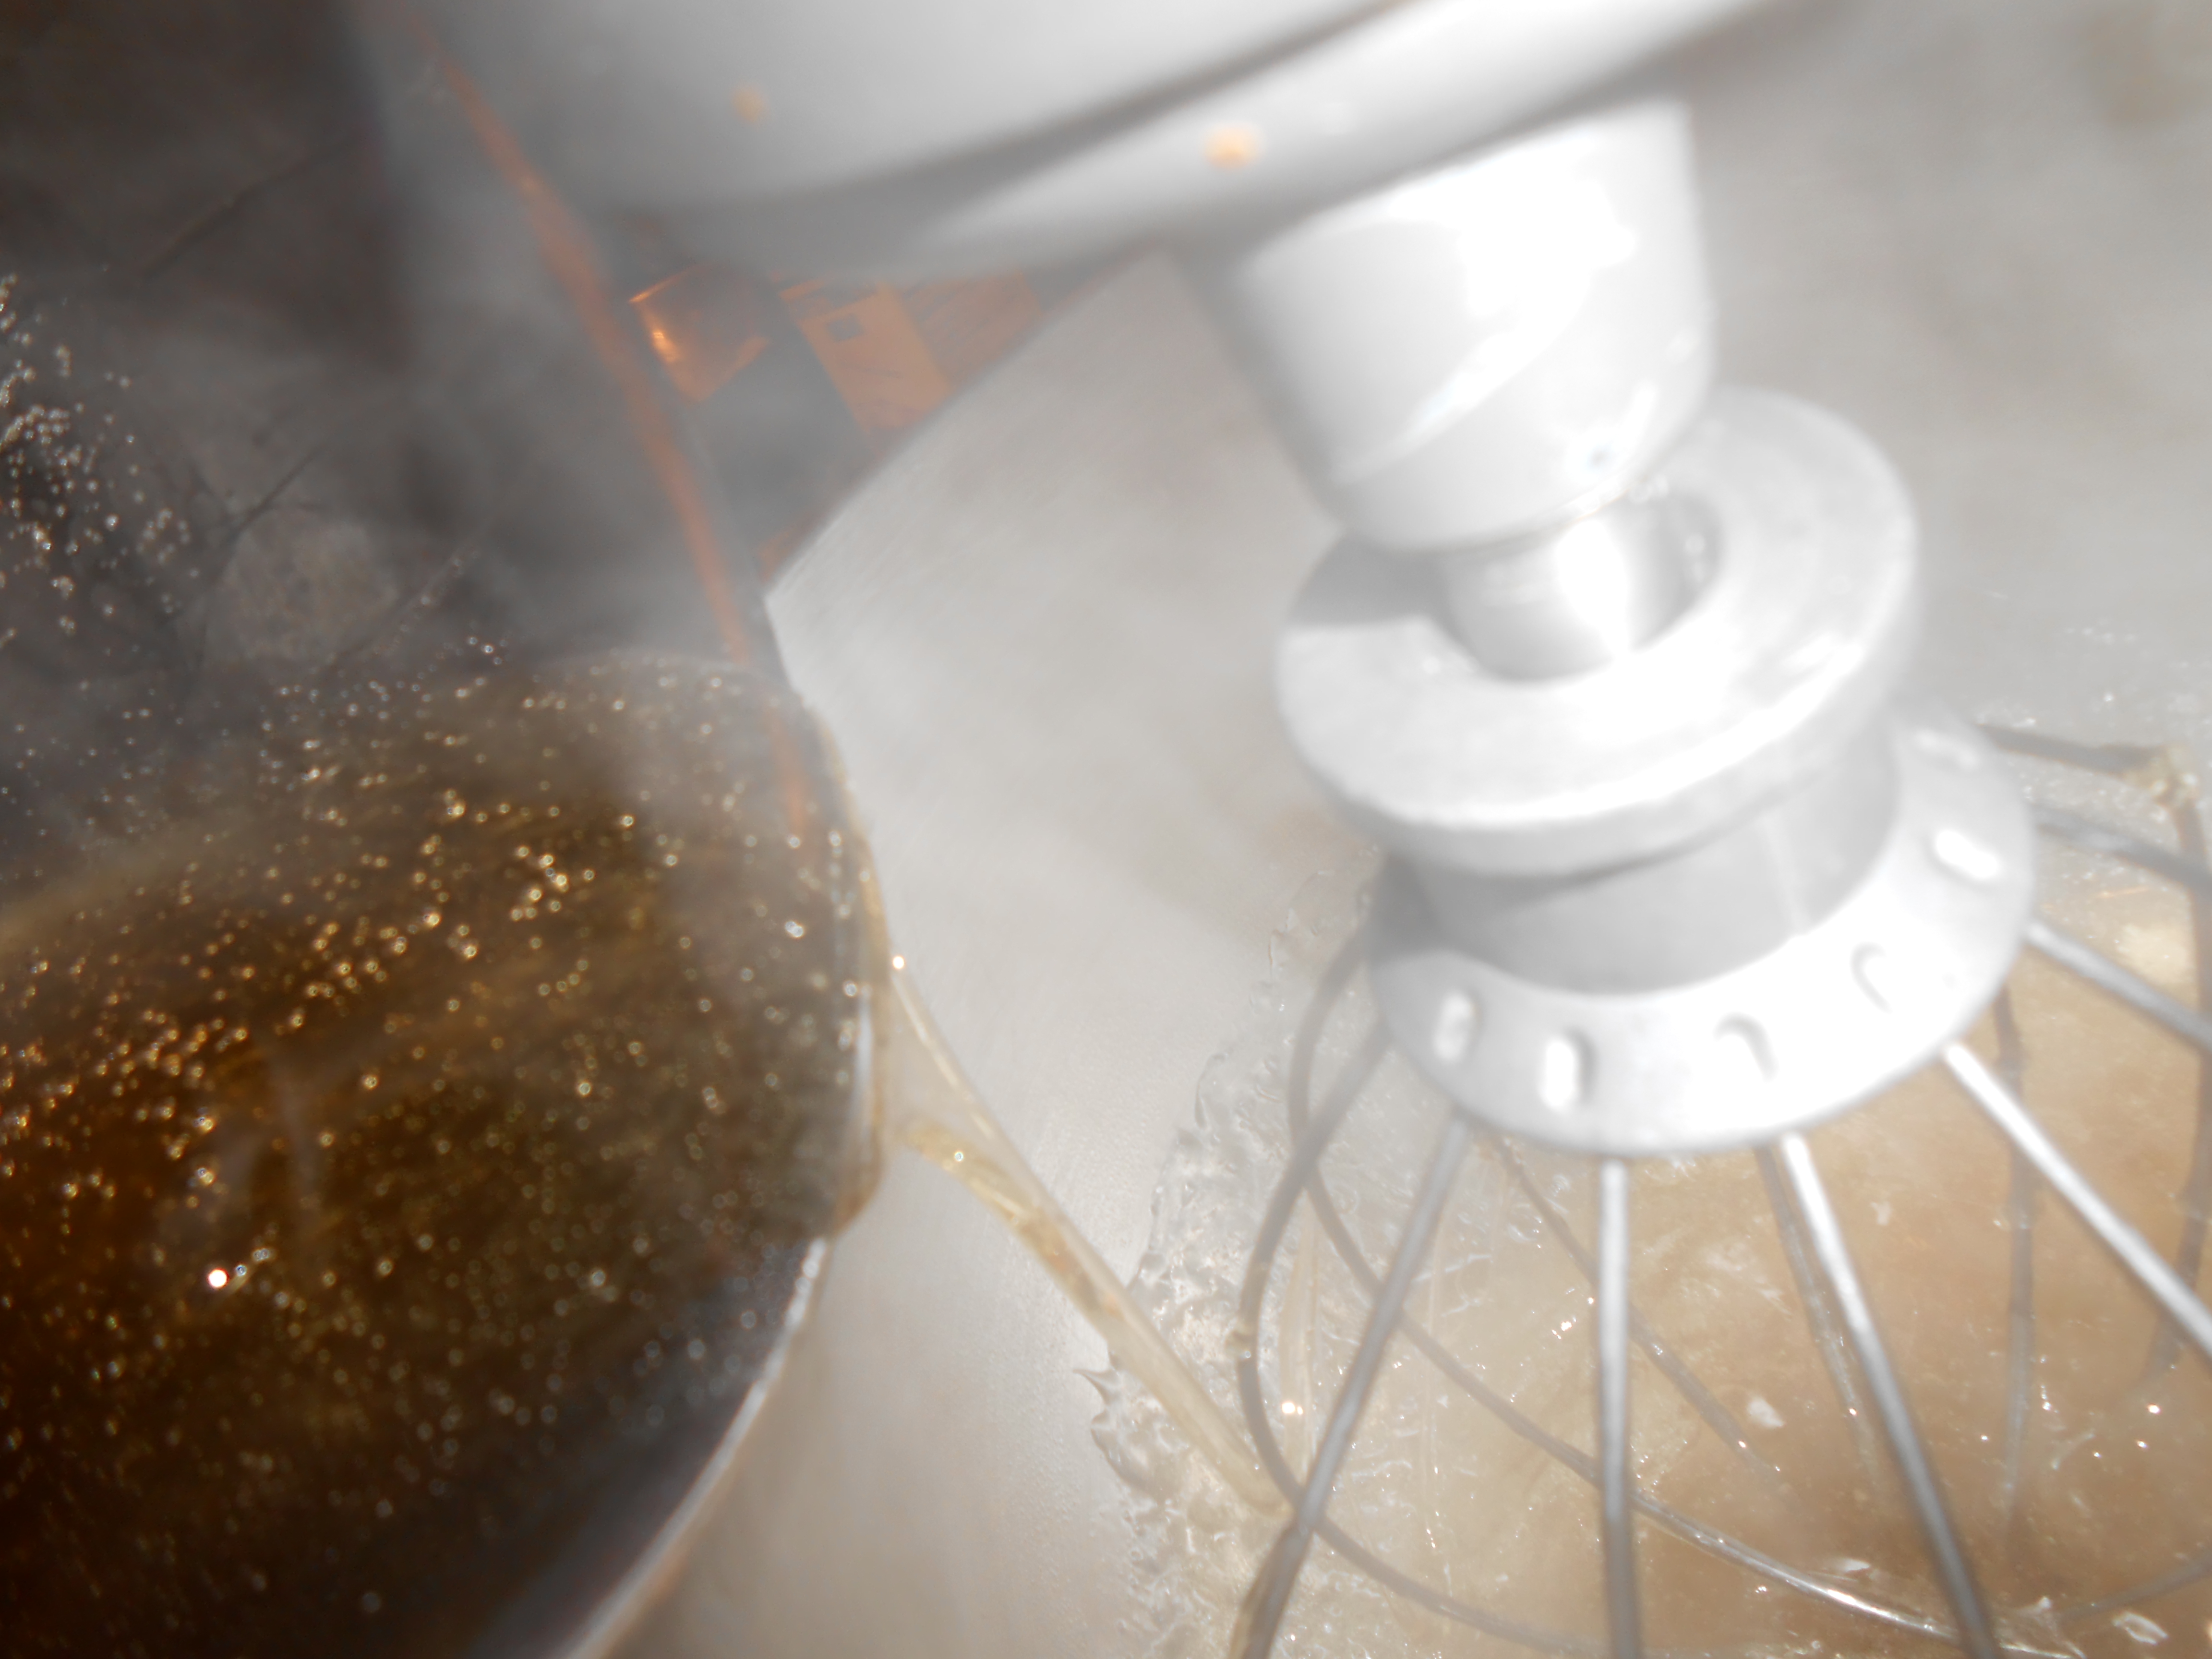
Turn the mixer on and watch the magic happen- begin slowly to dissolve the gelatin into the hot sugar, then crank it up to high. t this point, add a pinch of salt and your flavor extract. As a guide, whipping the sugar takes between 7 and 12 minutes. A It depends on how humid a day it is. Ina’s recipe, which mine is based off of, calls for 15 minutes and I have found this to be too much- the marshmallow is already so stiff it becomes really hard to get into the pan. As it is, you will lose some marshmallow to the bowl because as it cools it becomes relatively solid, fast.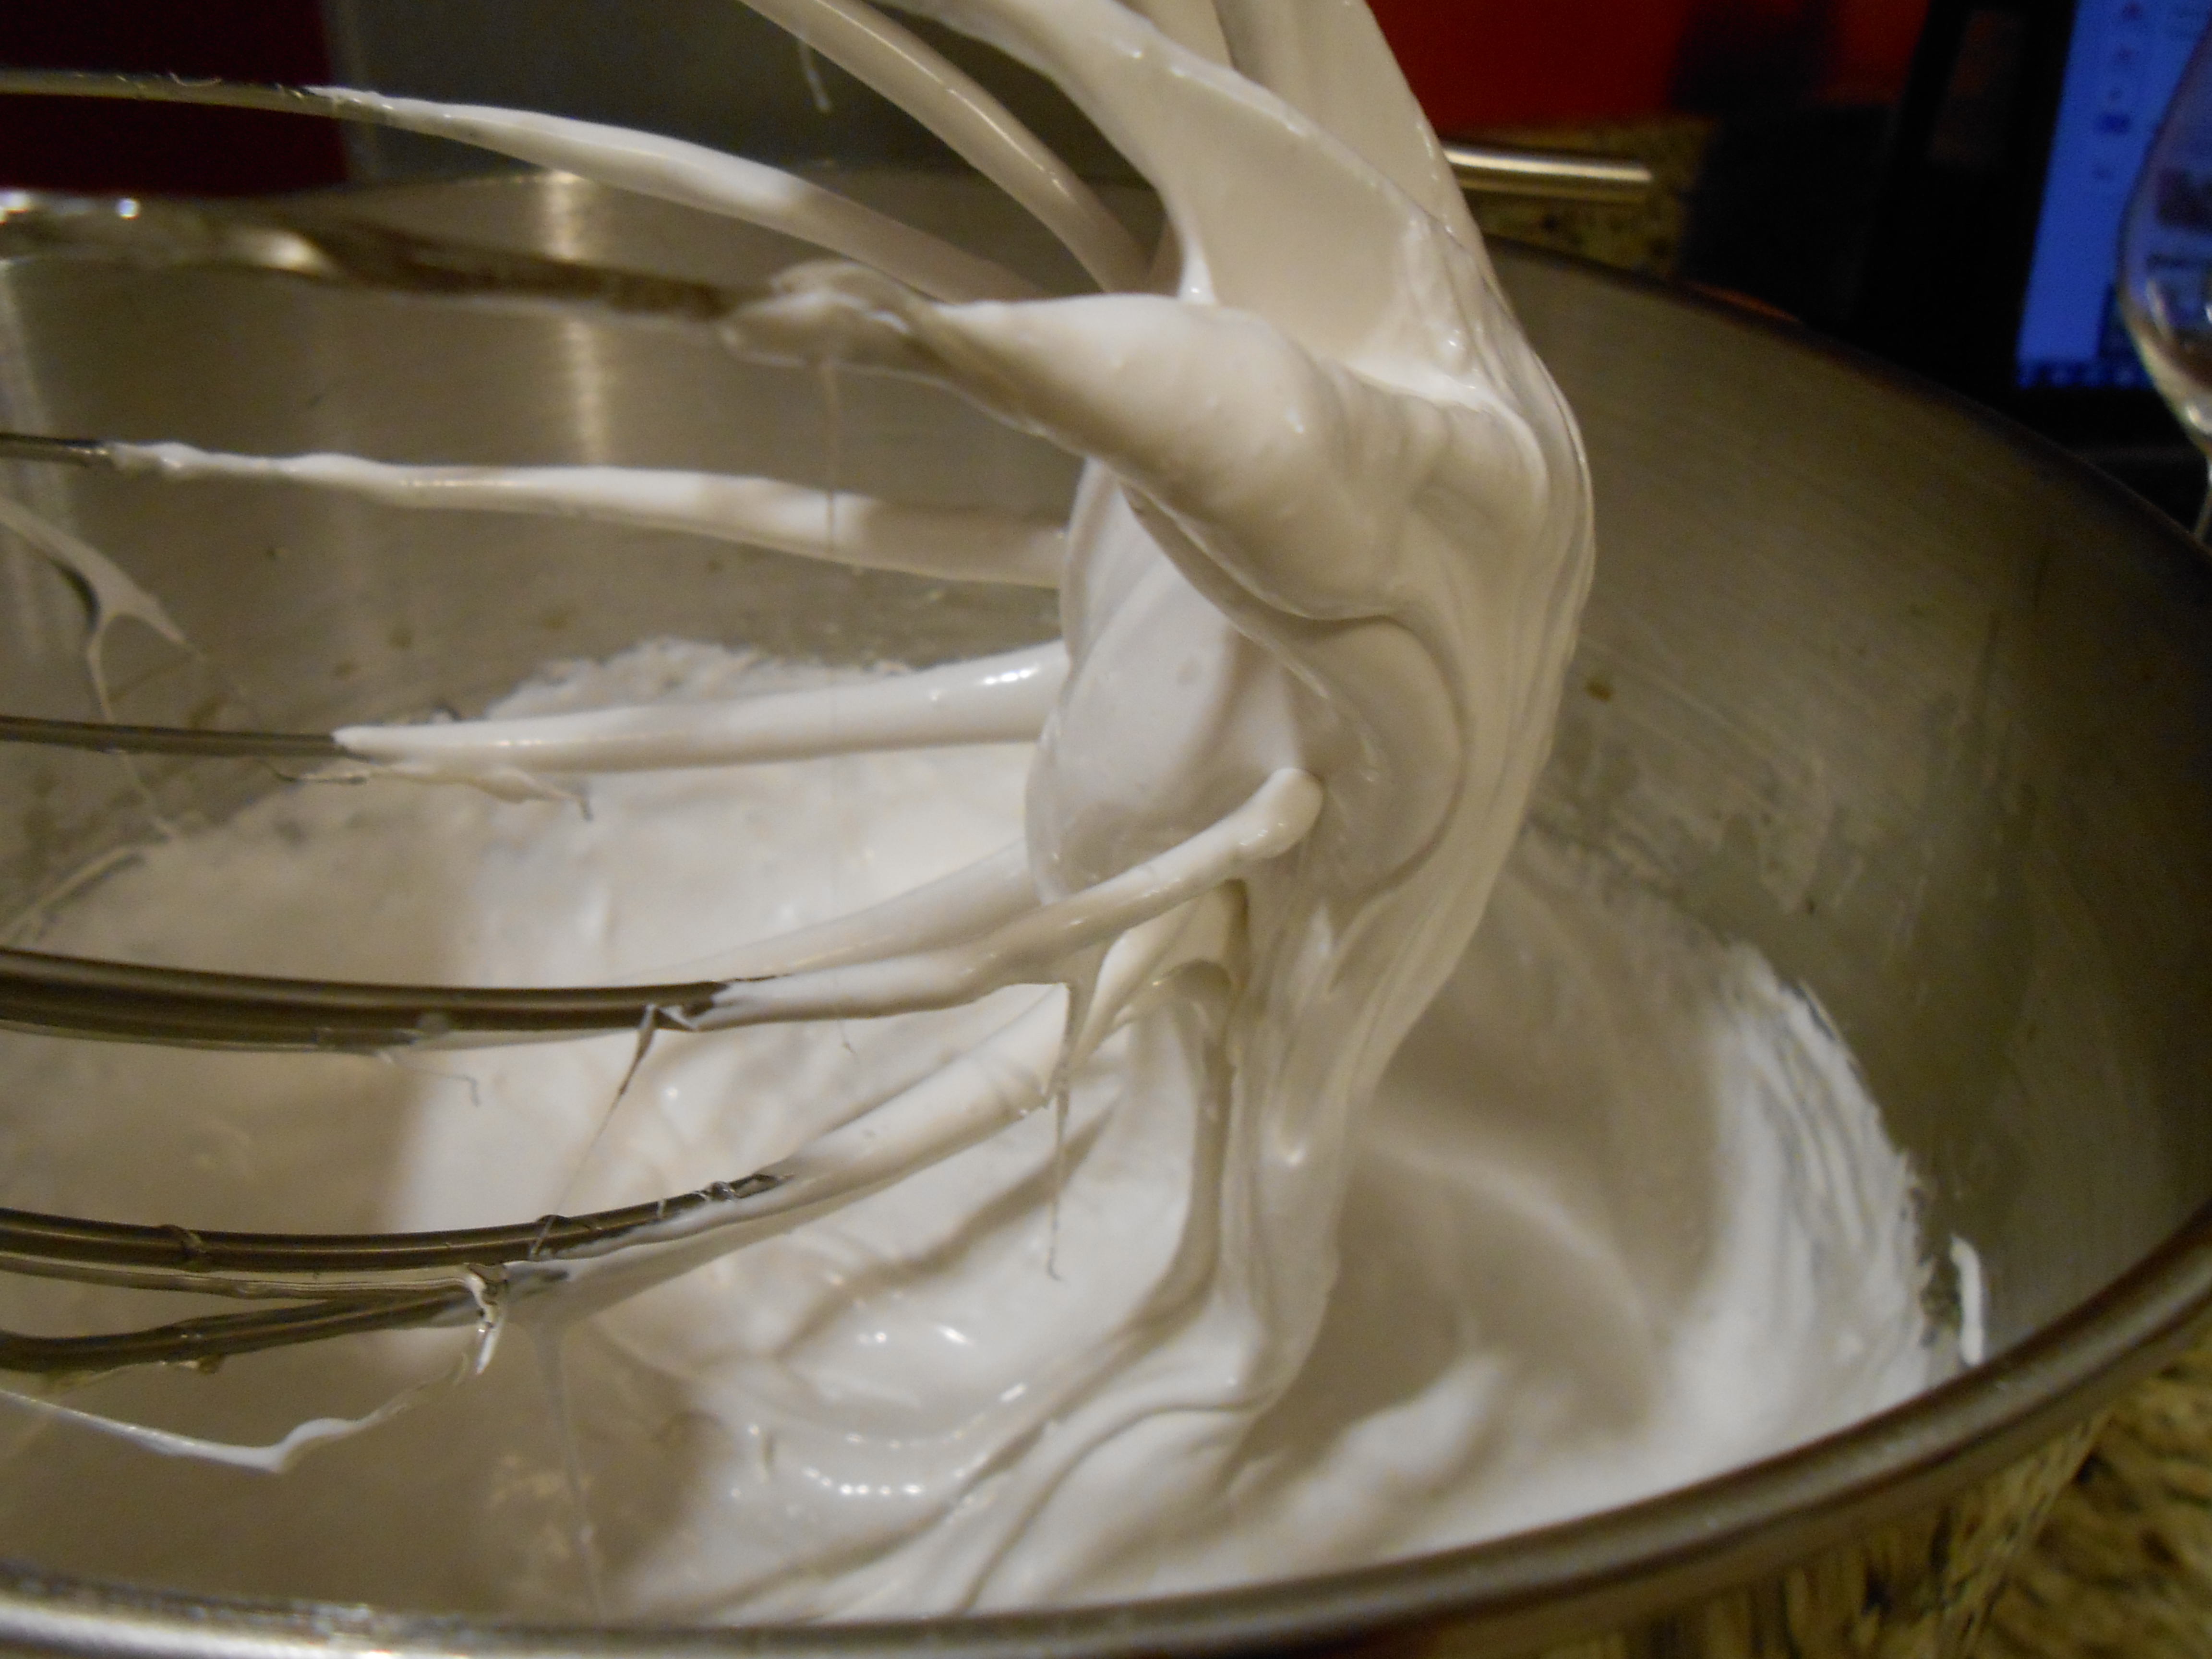 The marshmallow is done whipping when it holds stiff peaks (like when making meringue). Transfer the marshmallow to your prepared 8×8 pan. I sprayed my spatula with non-stick spray, and it sorta helped. Coat the marshmallow in powdered sugar (or sugar/coconut).
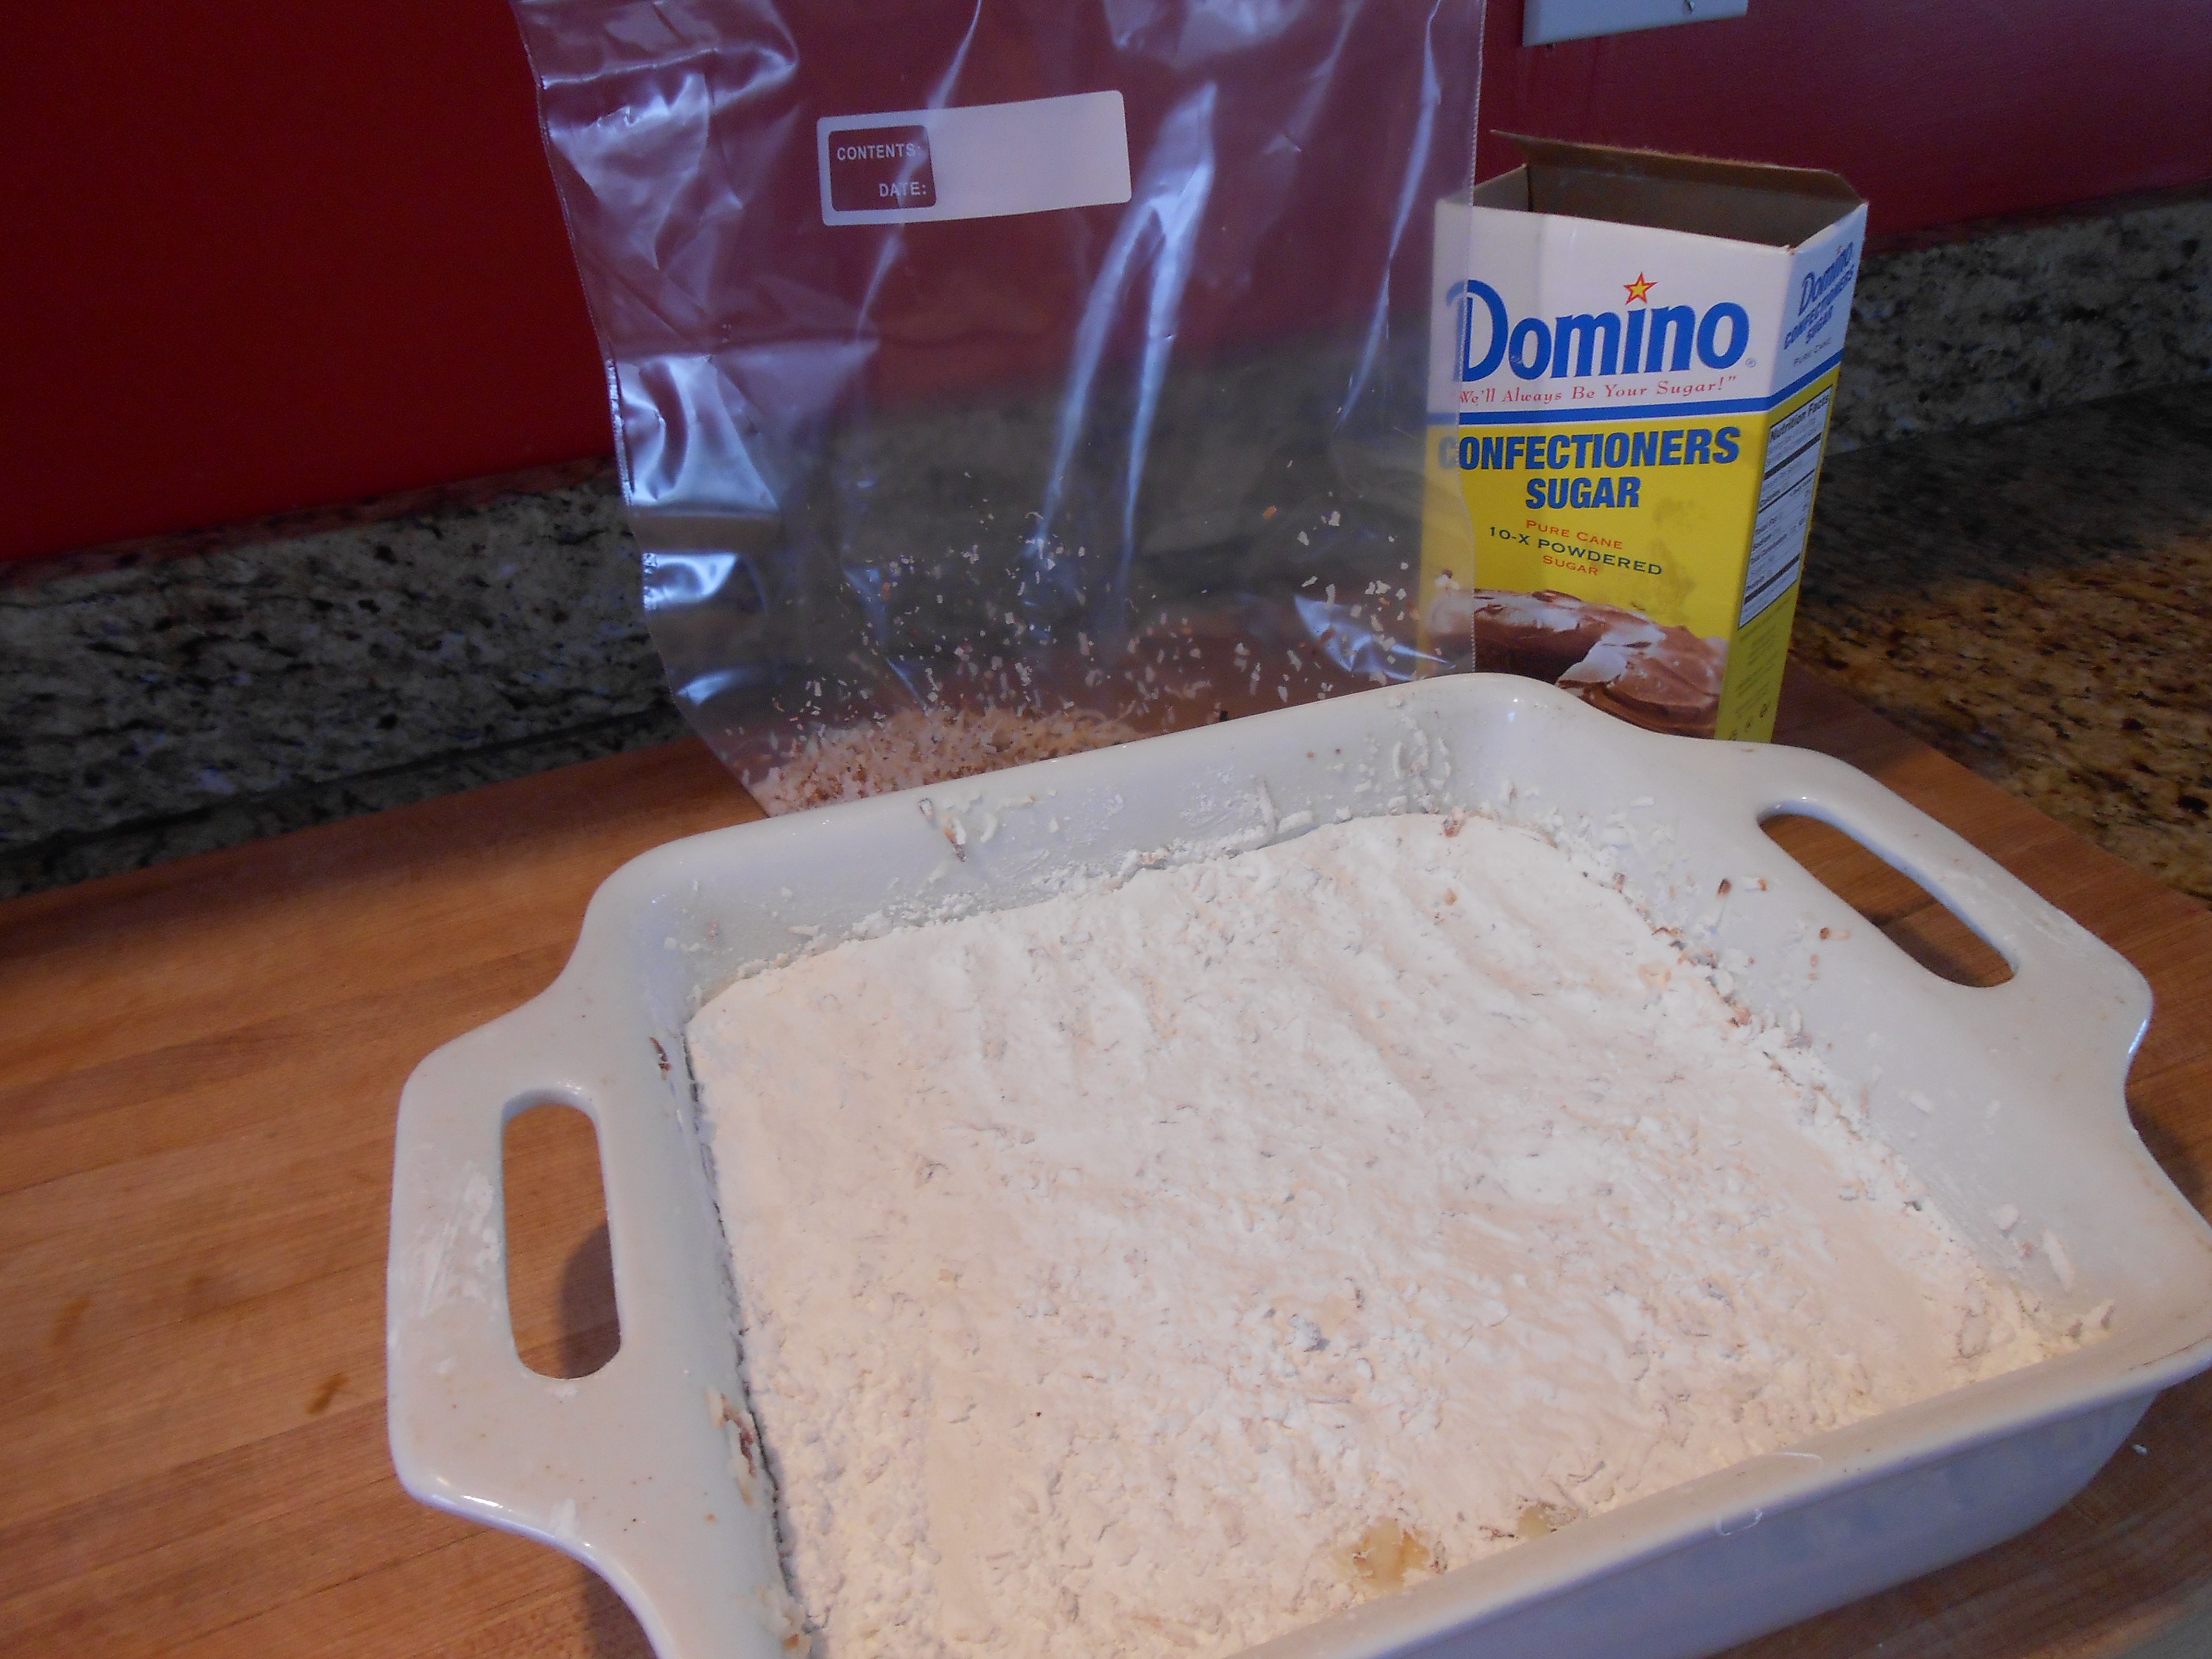
Leave it alone overnight! I don’t try to rush this- the “cure” is important for the texture. The next day, you should be able to flip the entire giant marshmallow out onto your cutting board to portion as you wish. (giant ones! small ones! whoo hoo!)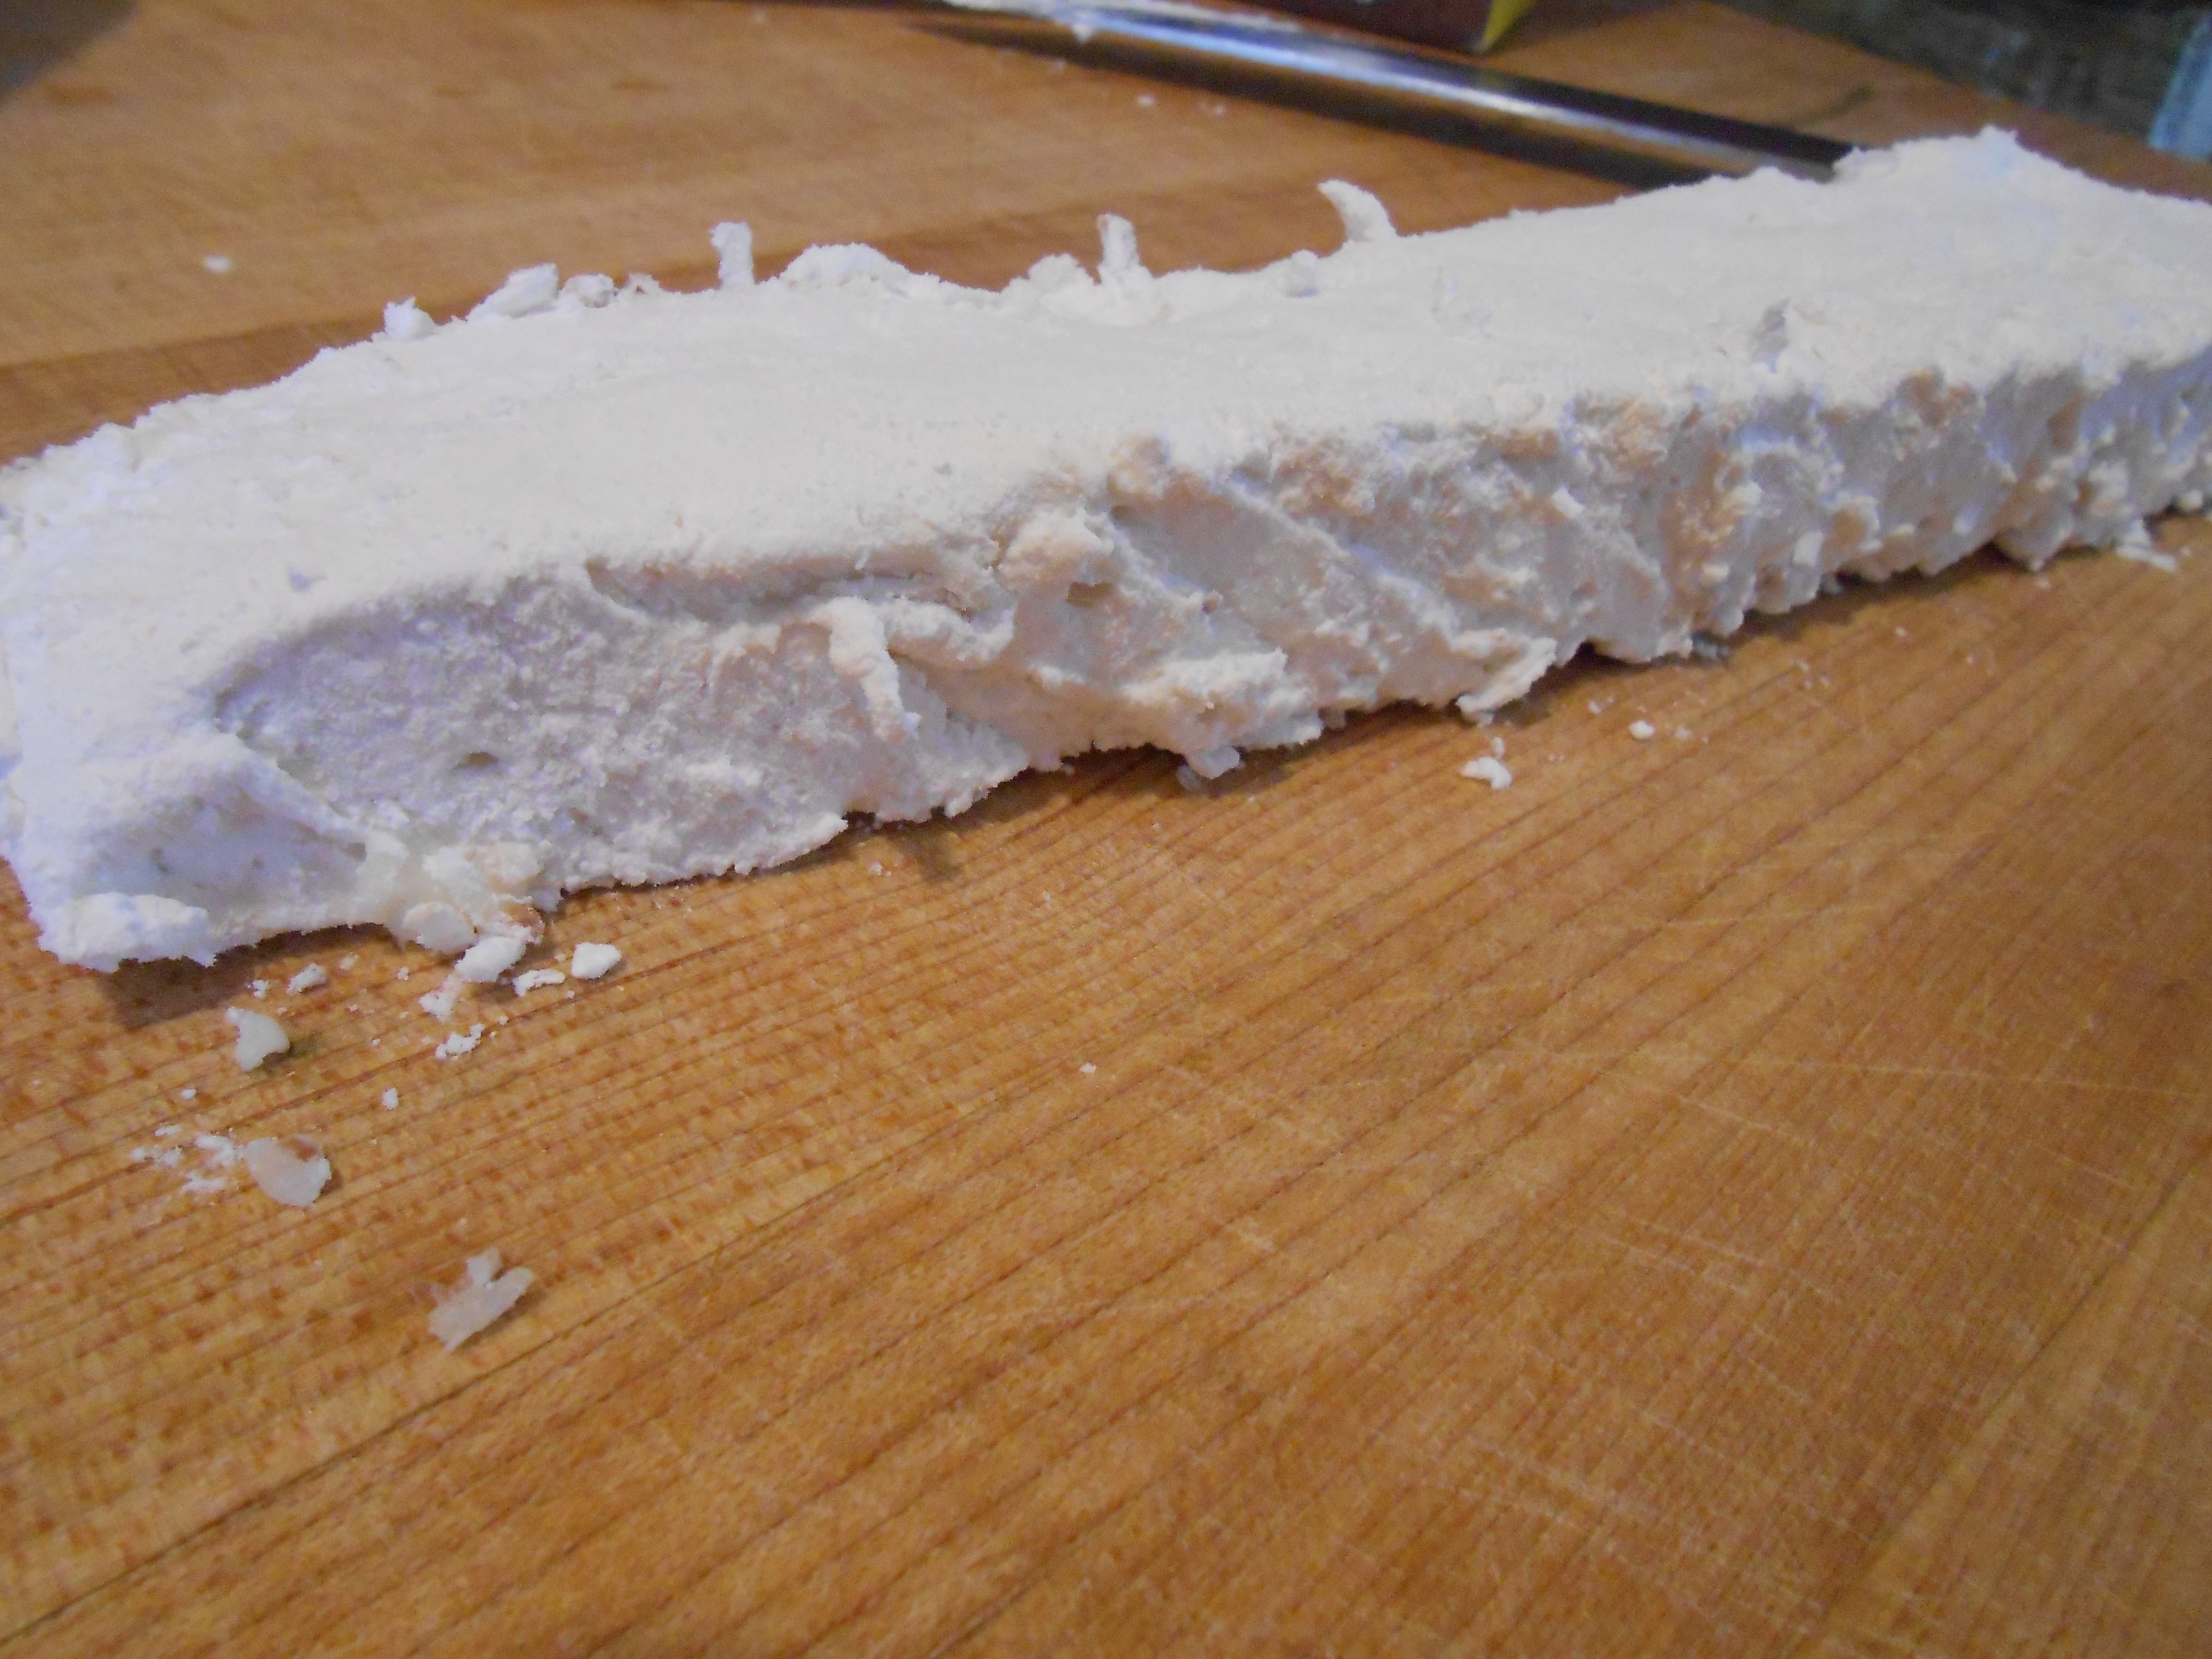 I use my Bialetti Pizza chopper to make straight, even cuts. It works SO well for this. Get one HERE . (this thing makes life easier for so many different tasks).
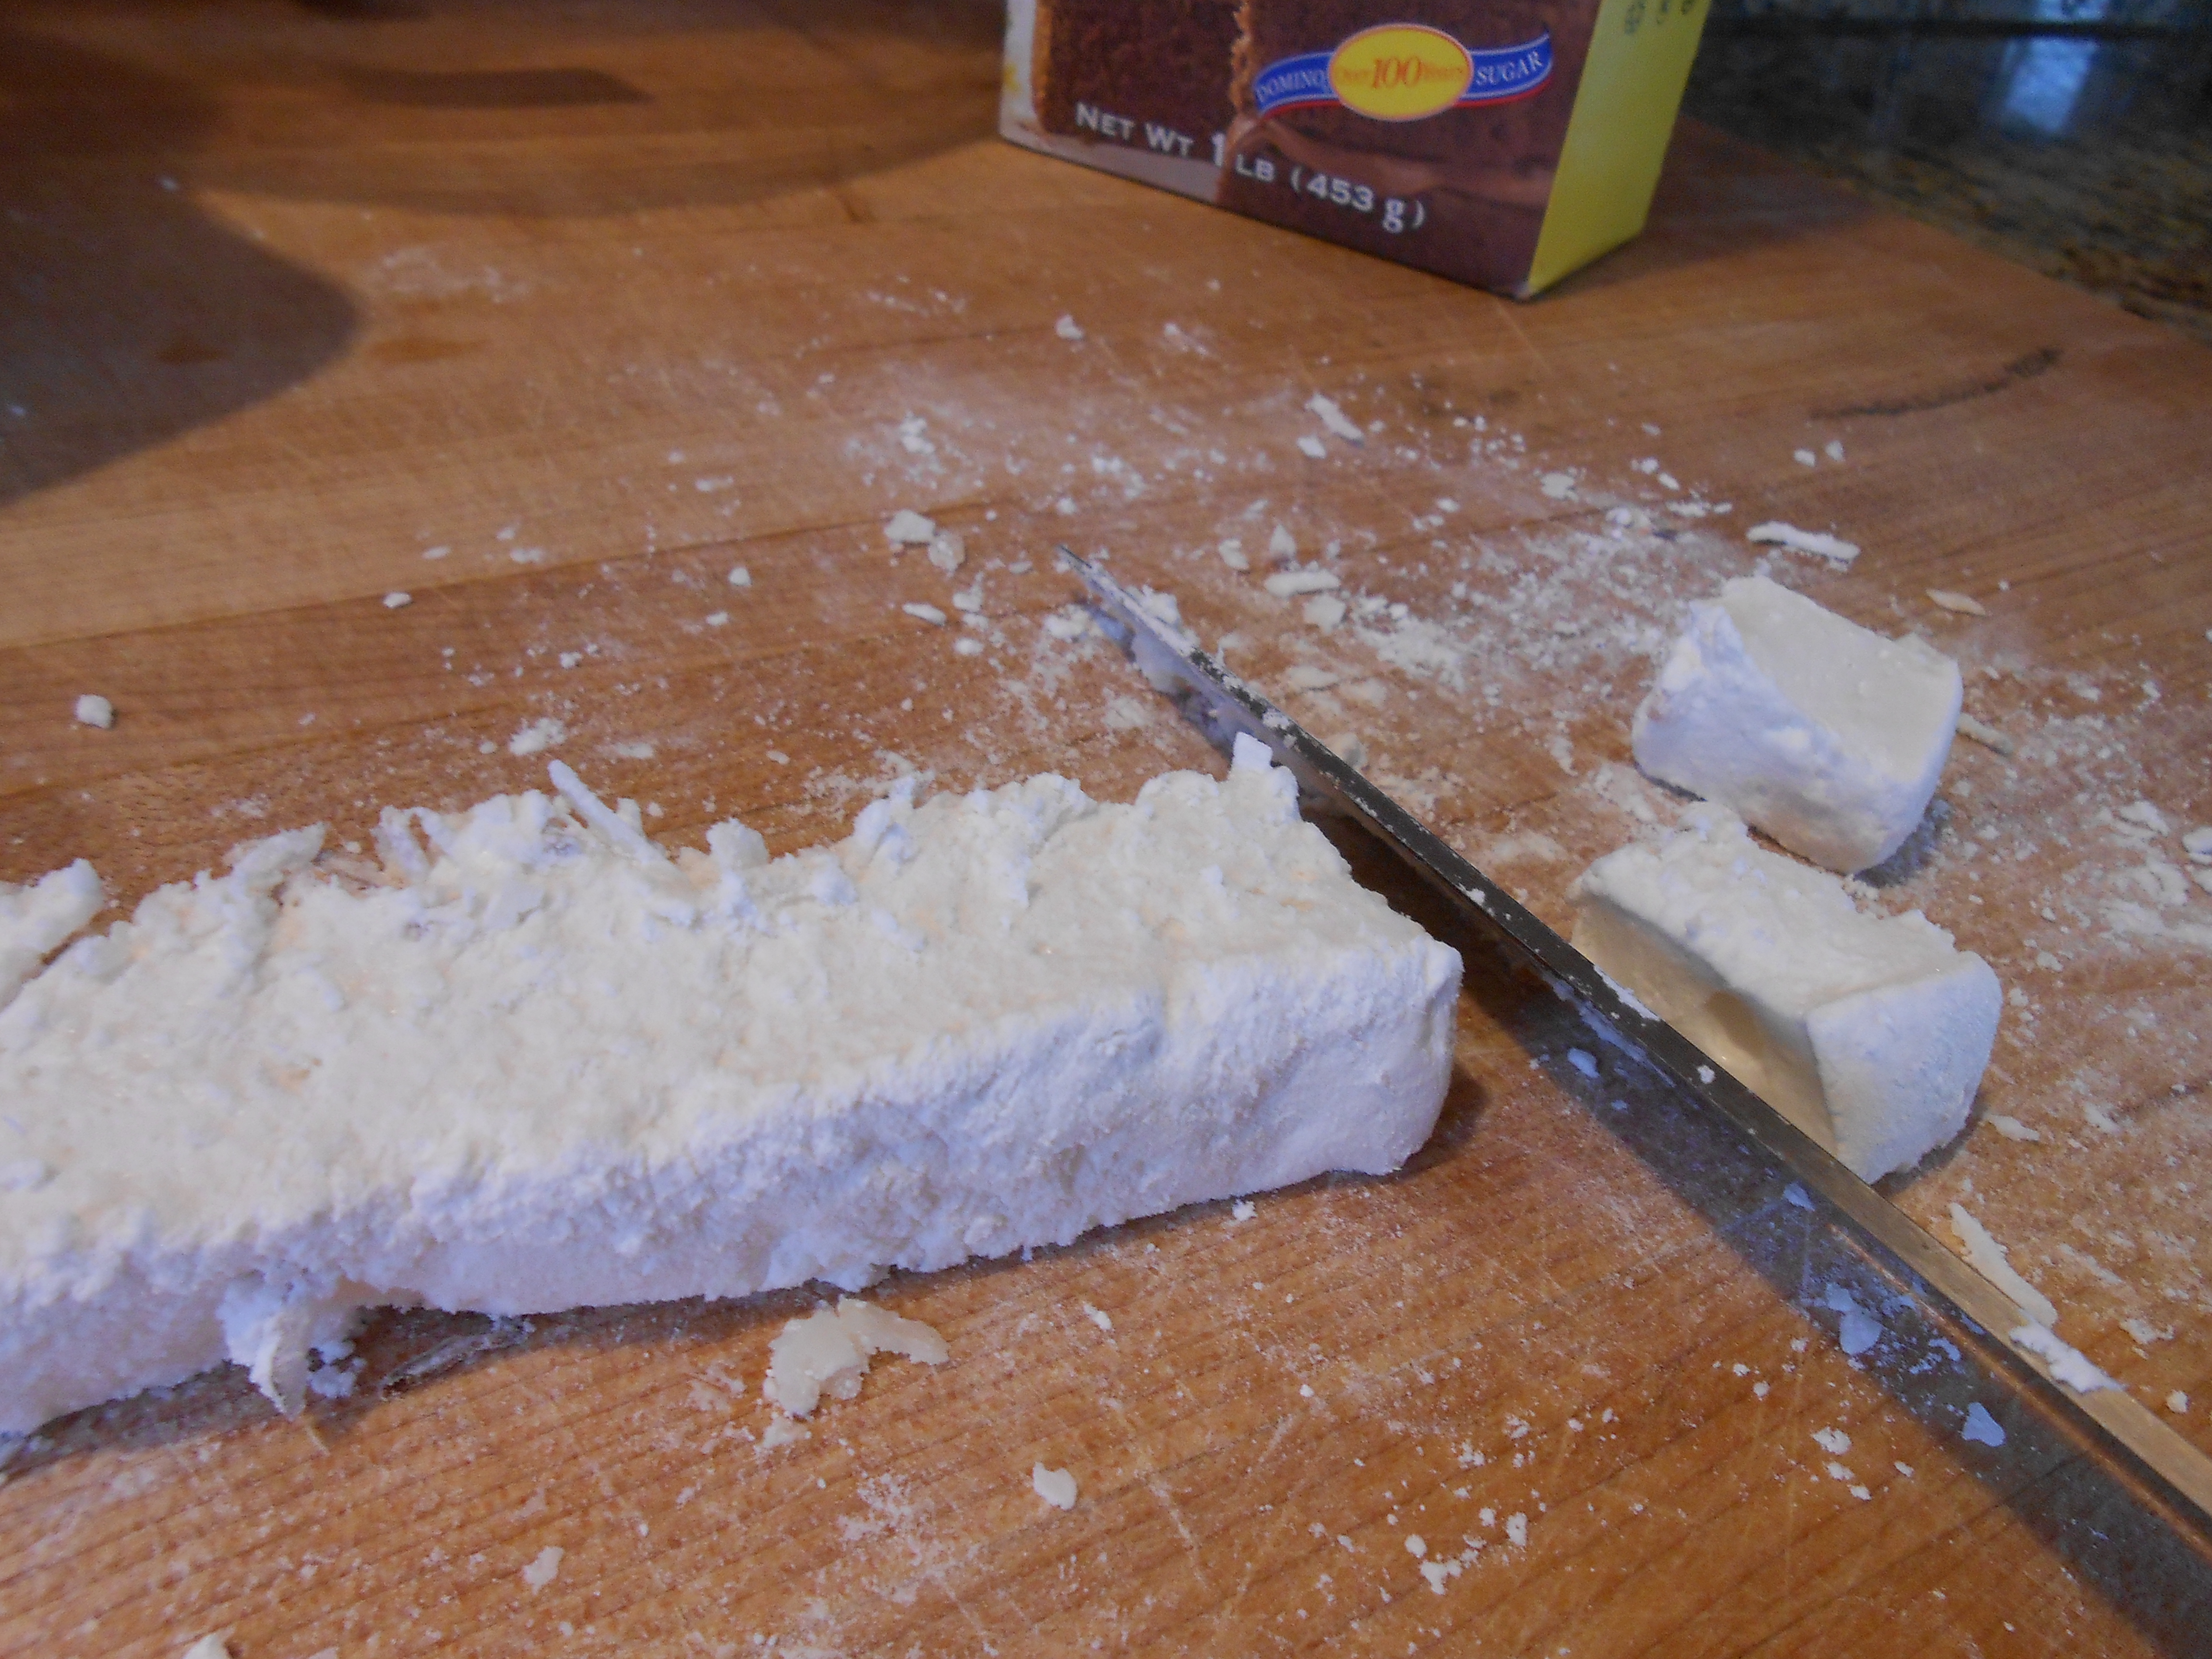 I used a regular knife to cut my strips into smaller portions. Really, you can divide them up however. The cut marshmallows are going to have some sticky sides- I tossed the coconut ones into a bag with more toasted coconut and some powdered sugar.
For the peppermint: Follow as above, except prepare the 8×8 with plain powdered sugar. For the extract, use 1 teaspoon peppermint extract (do not be tempted to use more, this is powerful stuff). Cure overnight. For round marshmallows, I painstakingly used a biscuit cutter to cut each one, dusting with powdered sugar in between. Obviously, you can cut them with a pizza chopper or knife.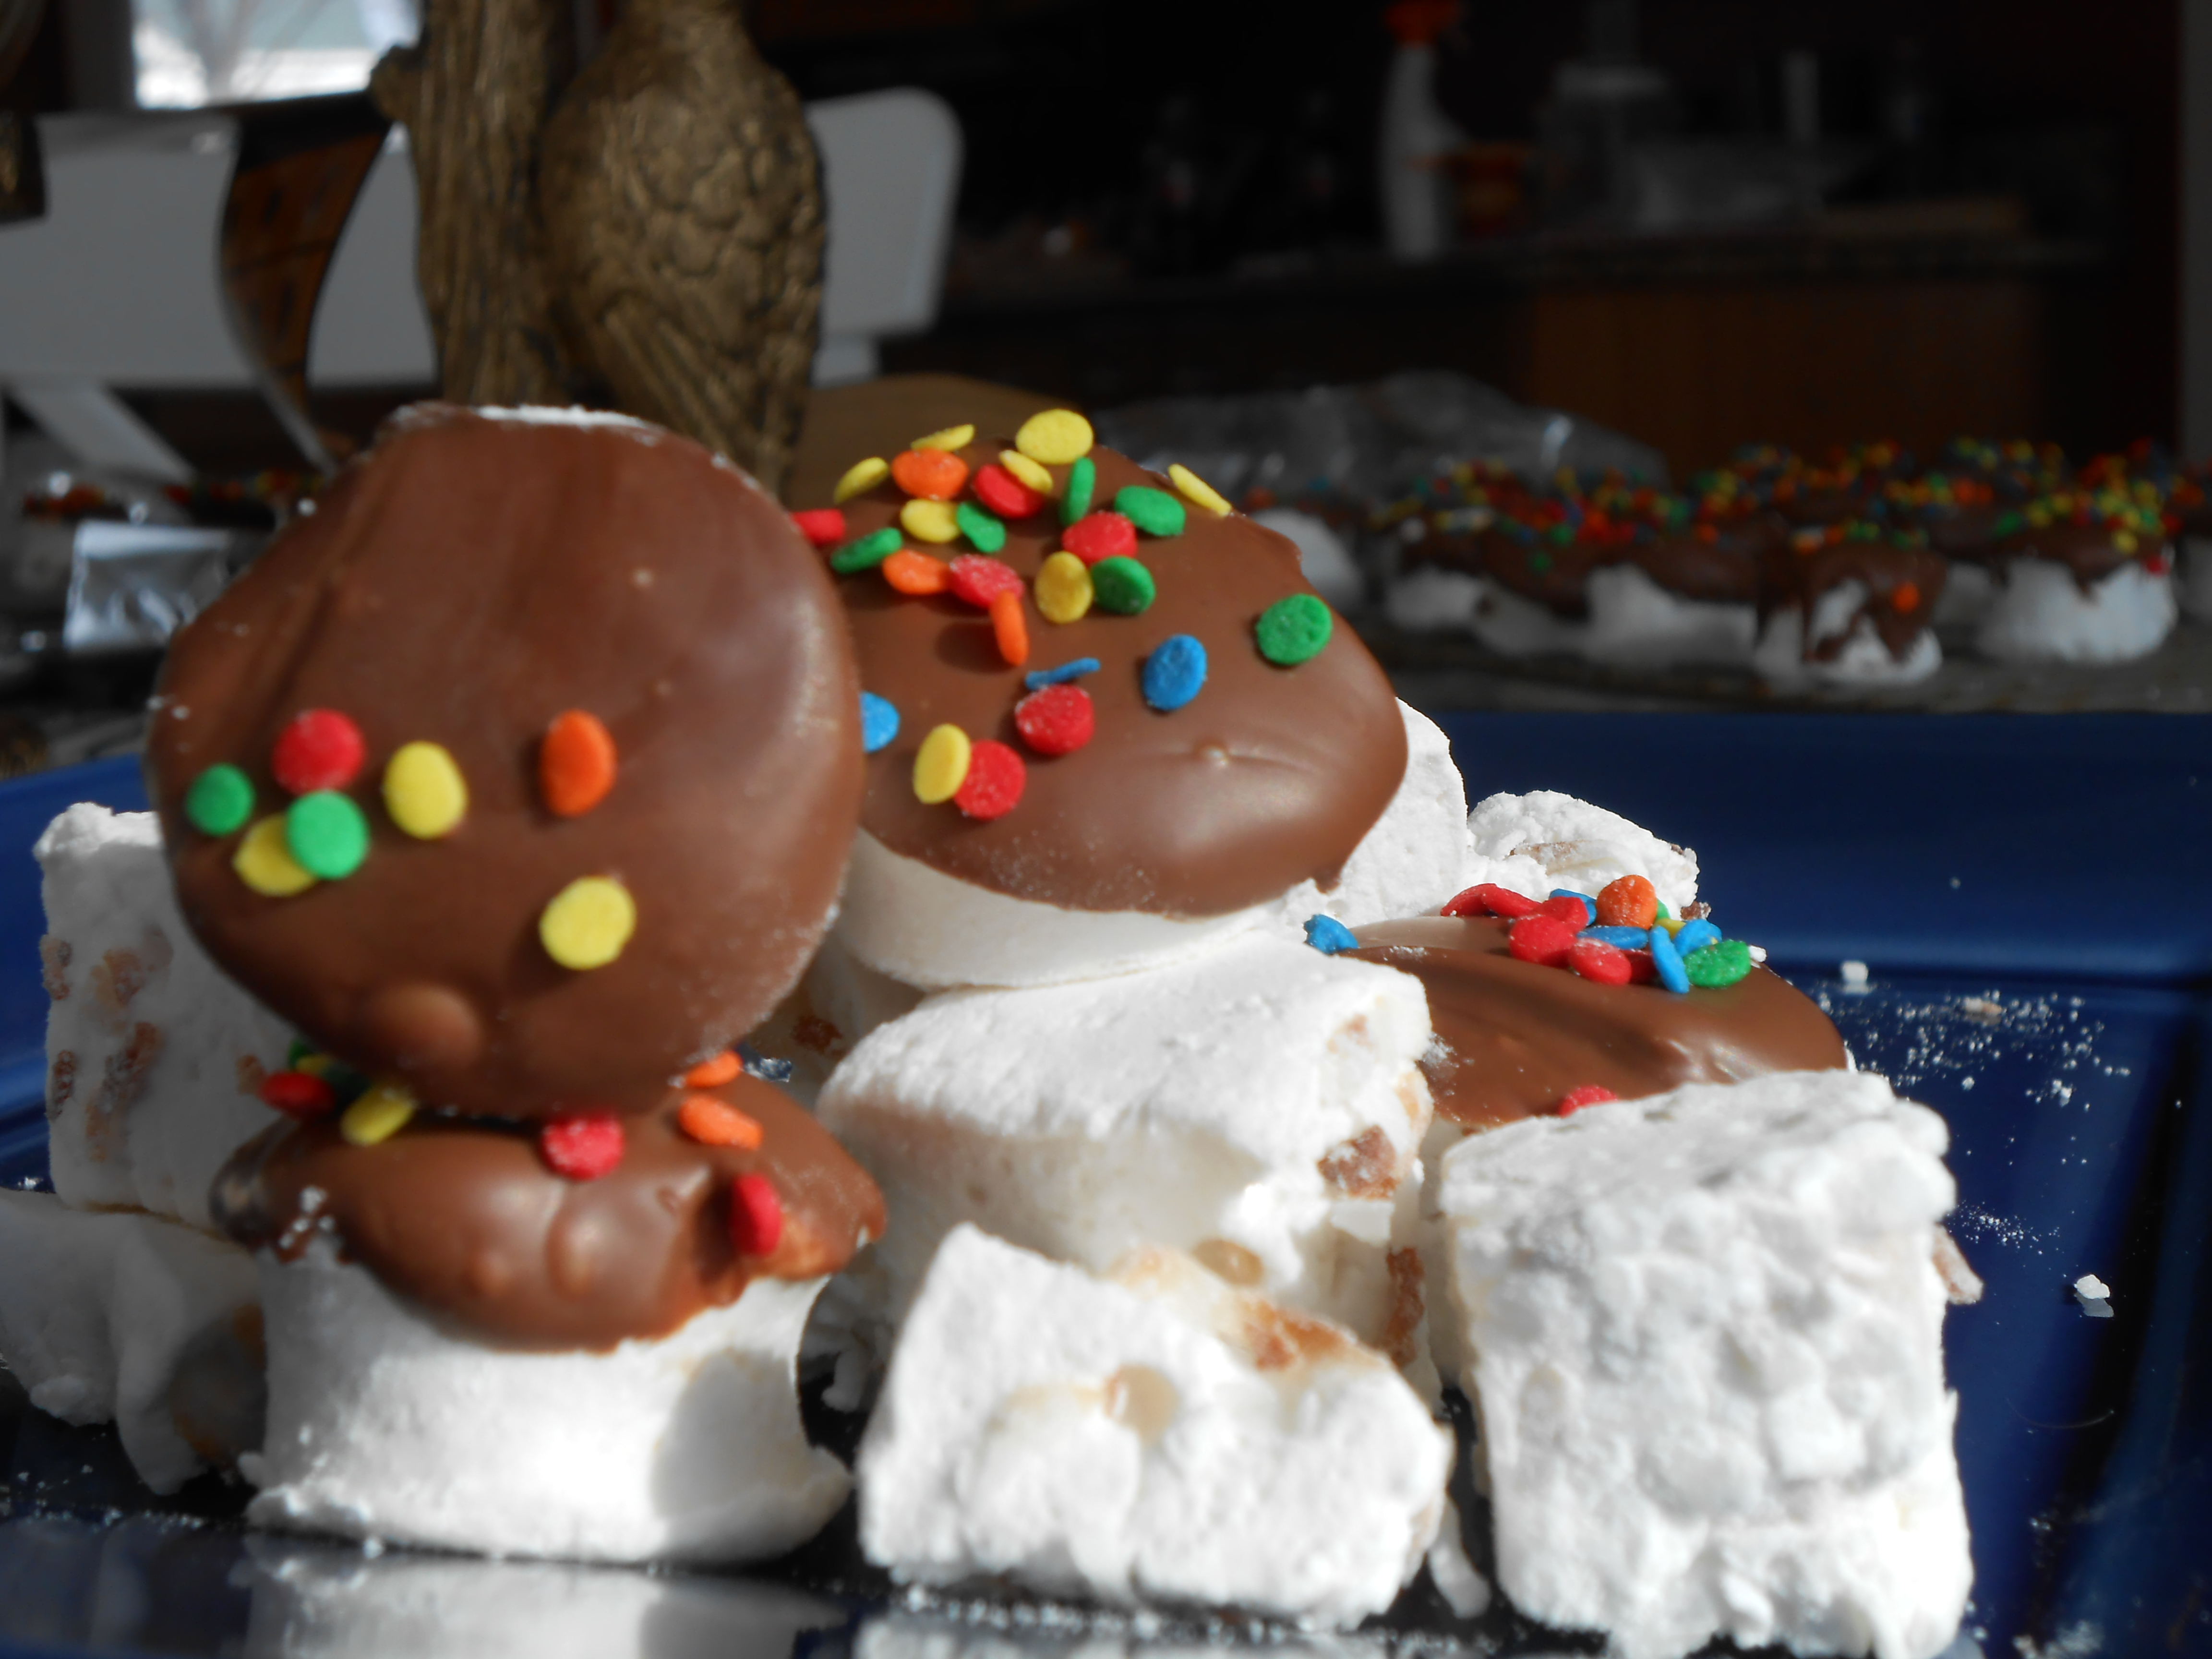
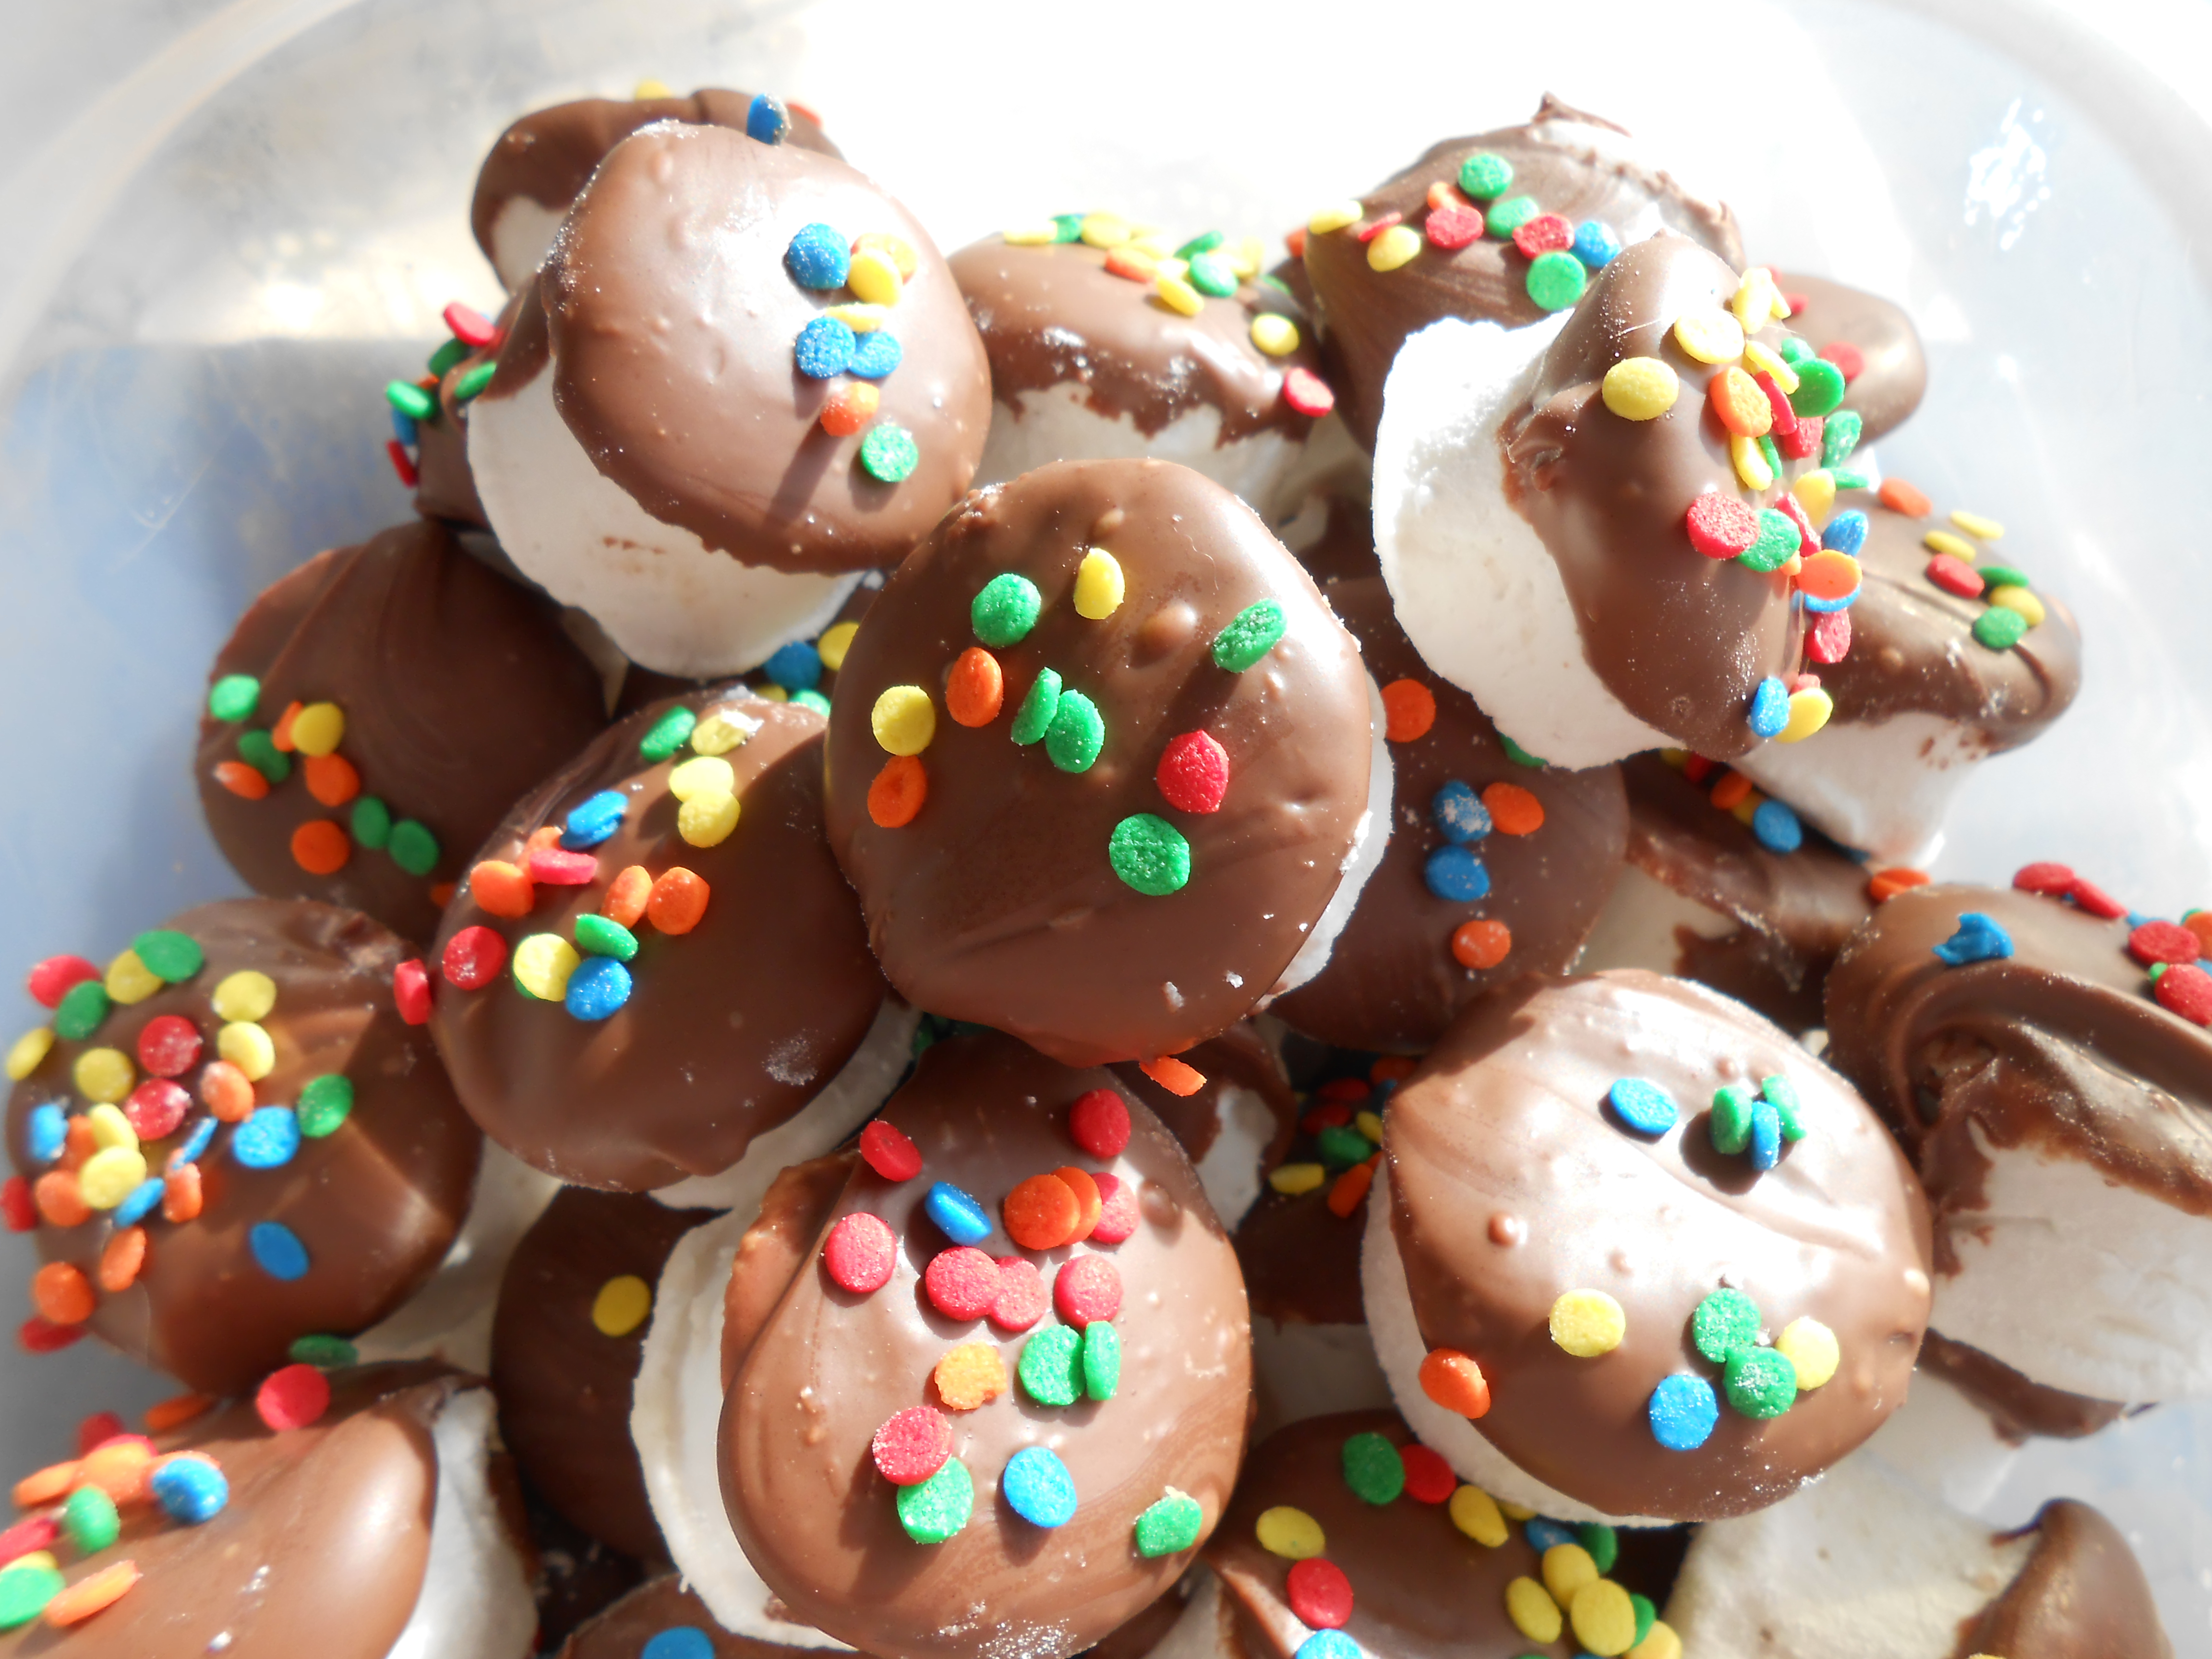
I melted about 7 ounces of milk chocolate, and carefully dipped each marshmallow into the chocolate. Do not do this with wet hands (it will dissolve the marshmallow)- and be careful not to get chocolate on your fingers, because then they look a bit messy (but then, those are for the cook- right???). Top with sprinkles (because you can) and enjoy with hot chocolate  Or by themselves.
- 3 packets unflavored gelatin
- 1 cup light corn syrup
- 1½ cups granulated sugar
- 1 teaspoon extract of your choice
- pinch salt
- powdered sugar (for coating/dusting)
- non-stick spray
- Water- 2 measures of ½ cup each.
- Prepare an 8x8 pan by spraying with non-stick spray and then coating in powdered sugar
- Put the gelatin and ½ cup of water into the bowl of the stand mixer (fitted with the whisk attachment) and allow to proof while cooking the sugars.
- Add to a medium saucepan the corn syrup, sugar, and the other ½ cup of water. Stir to dissolve, and cook over medium high heat until it reaches 240 degrees (as measured by a candy thermometer).
- Stream the hot sugar into the gelatin; start the mixer on low and move to high to whip the sugar/ gelatin. After a couple of minutes, stop the mixer to add in extract of your choice and a pinch of salt. Restart, and whip until the marshmallow forms stiff peaks- 7-12 minutes.
- Pour the marshmallow (aided by a spatula sprayed with non-stick) into the prepared 8x8 pan. Shake, giggle, etc to get it to be even in the pan; coat with more powdered sugar.
- Allow the marshmallow to cure, covered loosely with plastic wrap for 12 hours (overnight).
- Cut the marshmallow as desired. It may help to dust everything, including the knife, with powdered sugar. Toss cut marshmallows in more powdered sugar.
- Store in an airtight container; they last at least a week (but I've never had any leftover for long, so who knows).
- These are FANTASTIC for smores, hot chocolate, gifts, etc.


They look so yummy!