Hi, Mike again. Few things in the kitchen are better than really nice equipment. Today we’ll talk about the KitchenAid stand mixer – how not to break it, and how to fix it when you do.

We’ve had the KitchenAid Professional HD 475-watt 5qt stand mixer for about five years now, and it has been indispensable. Stand mixers are to kitchens what tractors are to a farm – they do the the hard work of many tasks you used to do by hand, to save you the time and energy to do something else. If you don’t have a good stand mixer, get one now.
I use our mixer all the time to mix and knead the dough when I make bread (that’ll be another post). If you’ve ever kneaded a firm dough by hand for the full 15 minutes, you’ll know this is a good demonstration of just how powerful these mixers have to be. But with great power comes great responsibility. The user manual says in small print not to knead dough on any speed higher than ‘2’, but they don’t really tell you why that’s important. We learned the hard way that they are not kidding – The motor is more powerful than it looks, and this machine will tear itself apart in an effort to do whatever you’ve asked of it.
Kneading dough on speed ‘4’ will appear to work OK, kneading twice as fast – but those soft groans you hear each time the hook presses on your dough ball are indicative of the gearbox wearing out all your gears. Once they’re finished wearing out, the mixer will just make awful clicks and grinding noises instead of stirring what’s in the bowl. Then it’s time for surgery.
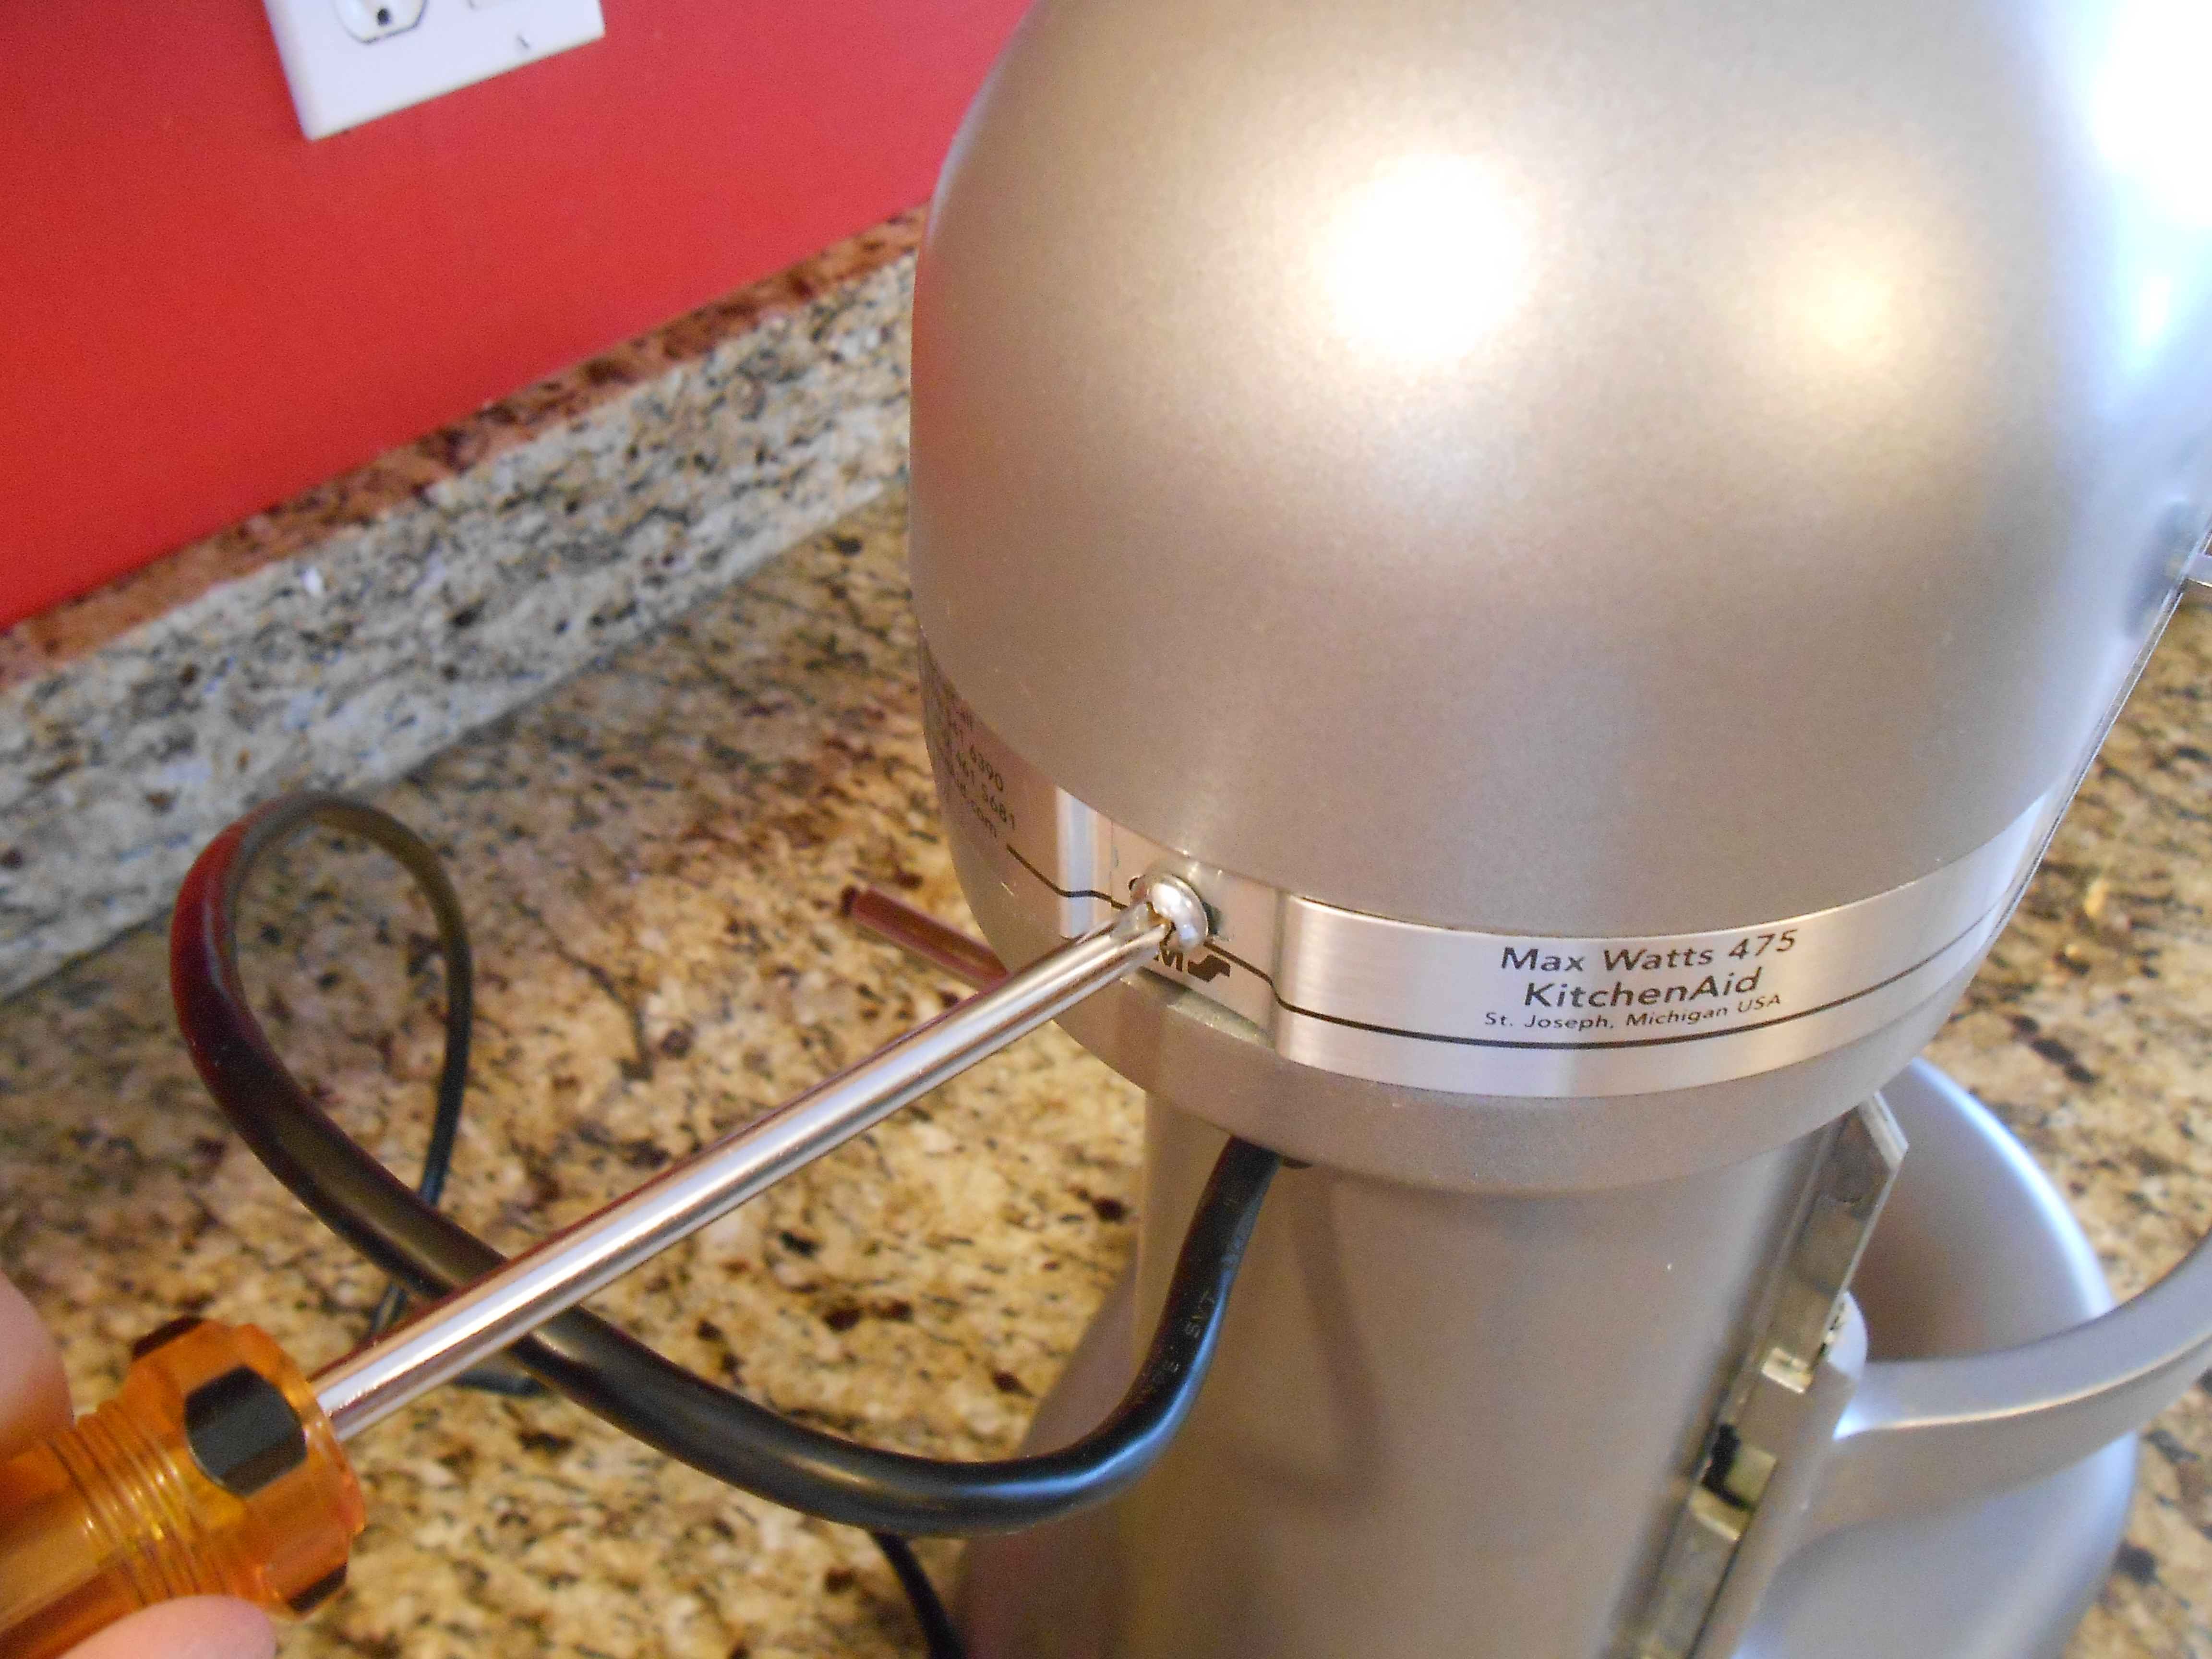
Unplug the mixer. There’s a little screw on the back that’s holding a steel band around the motor housing. Remove it.
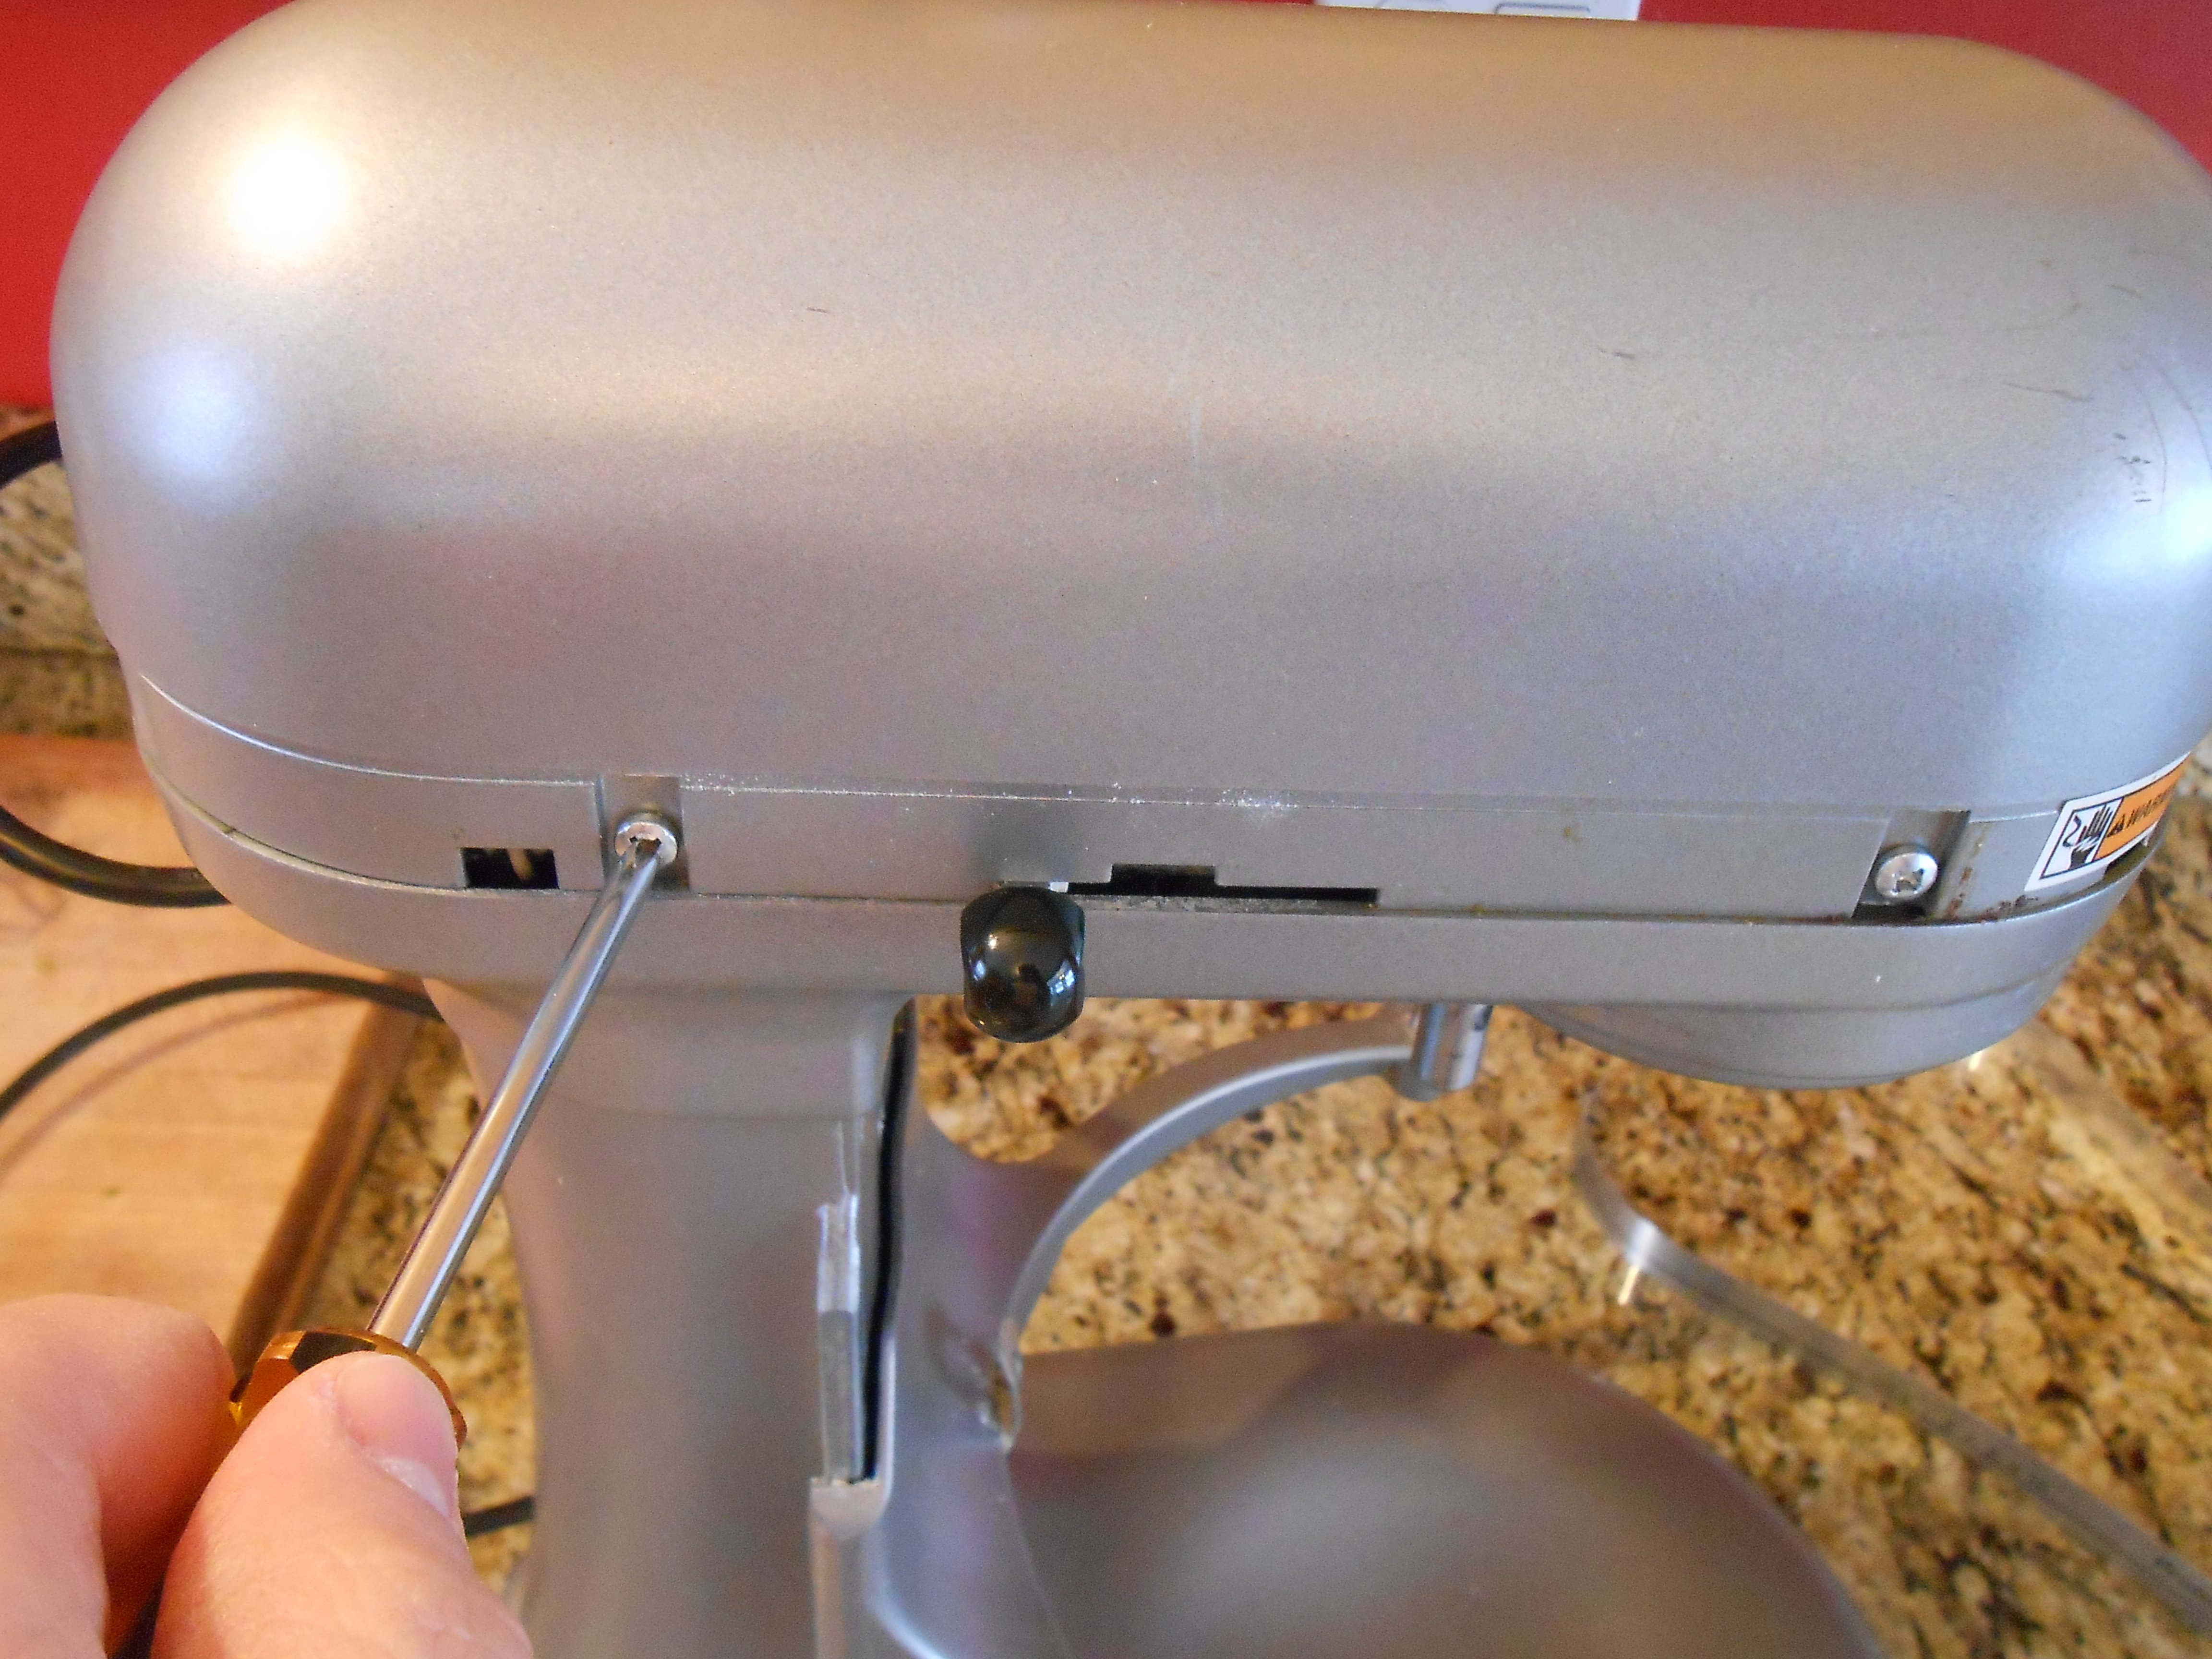
That will expose 4 screws, two on either side. Remove those.
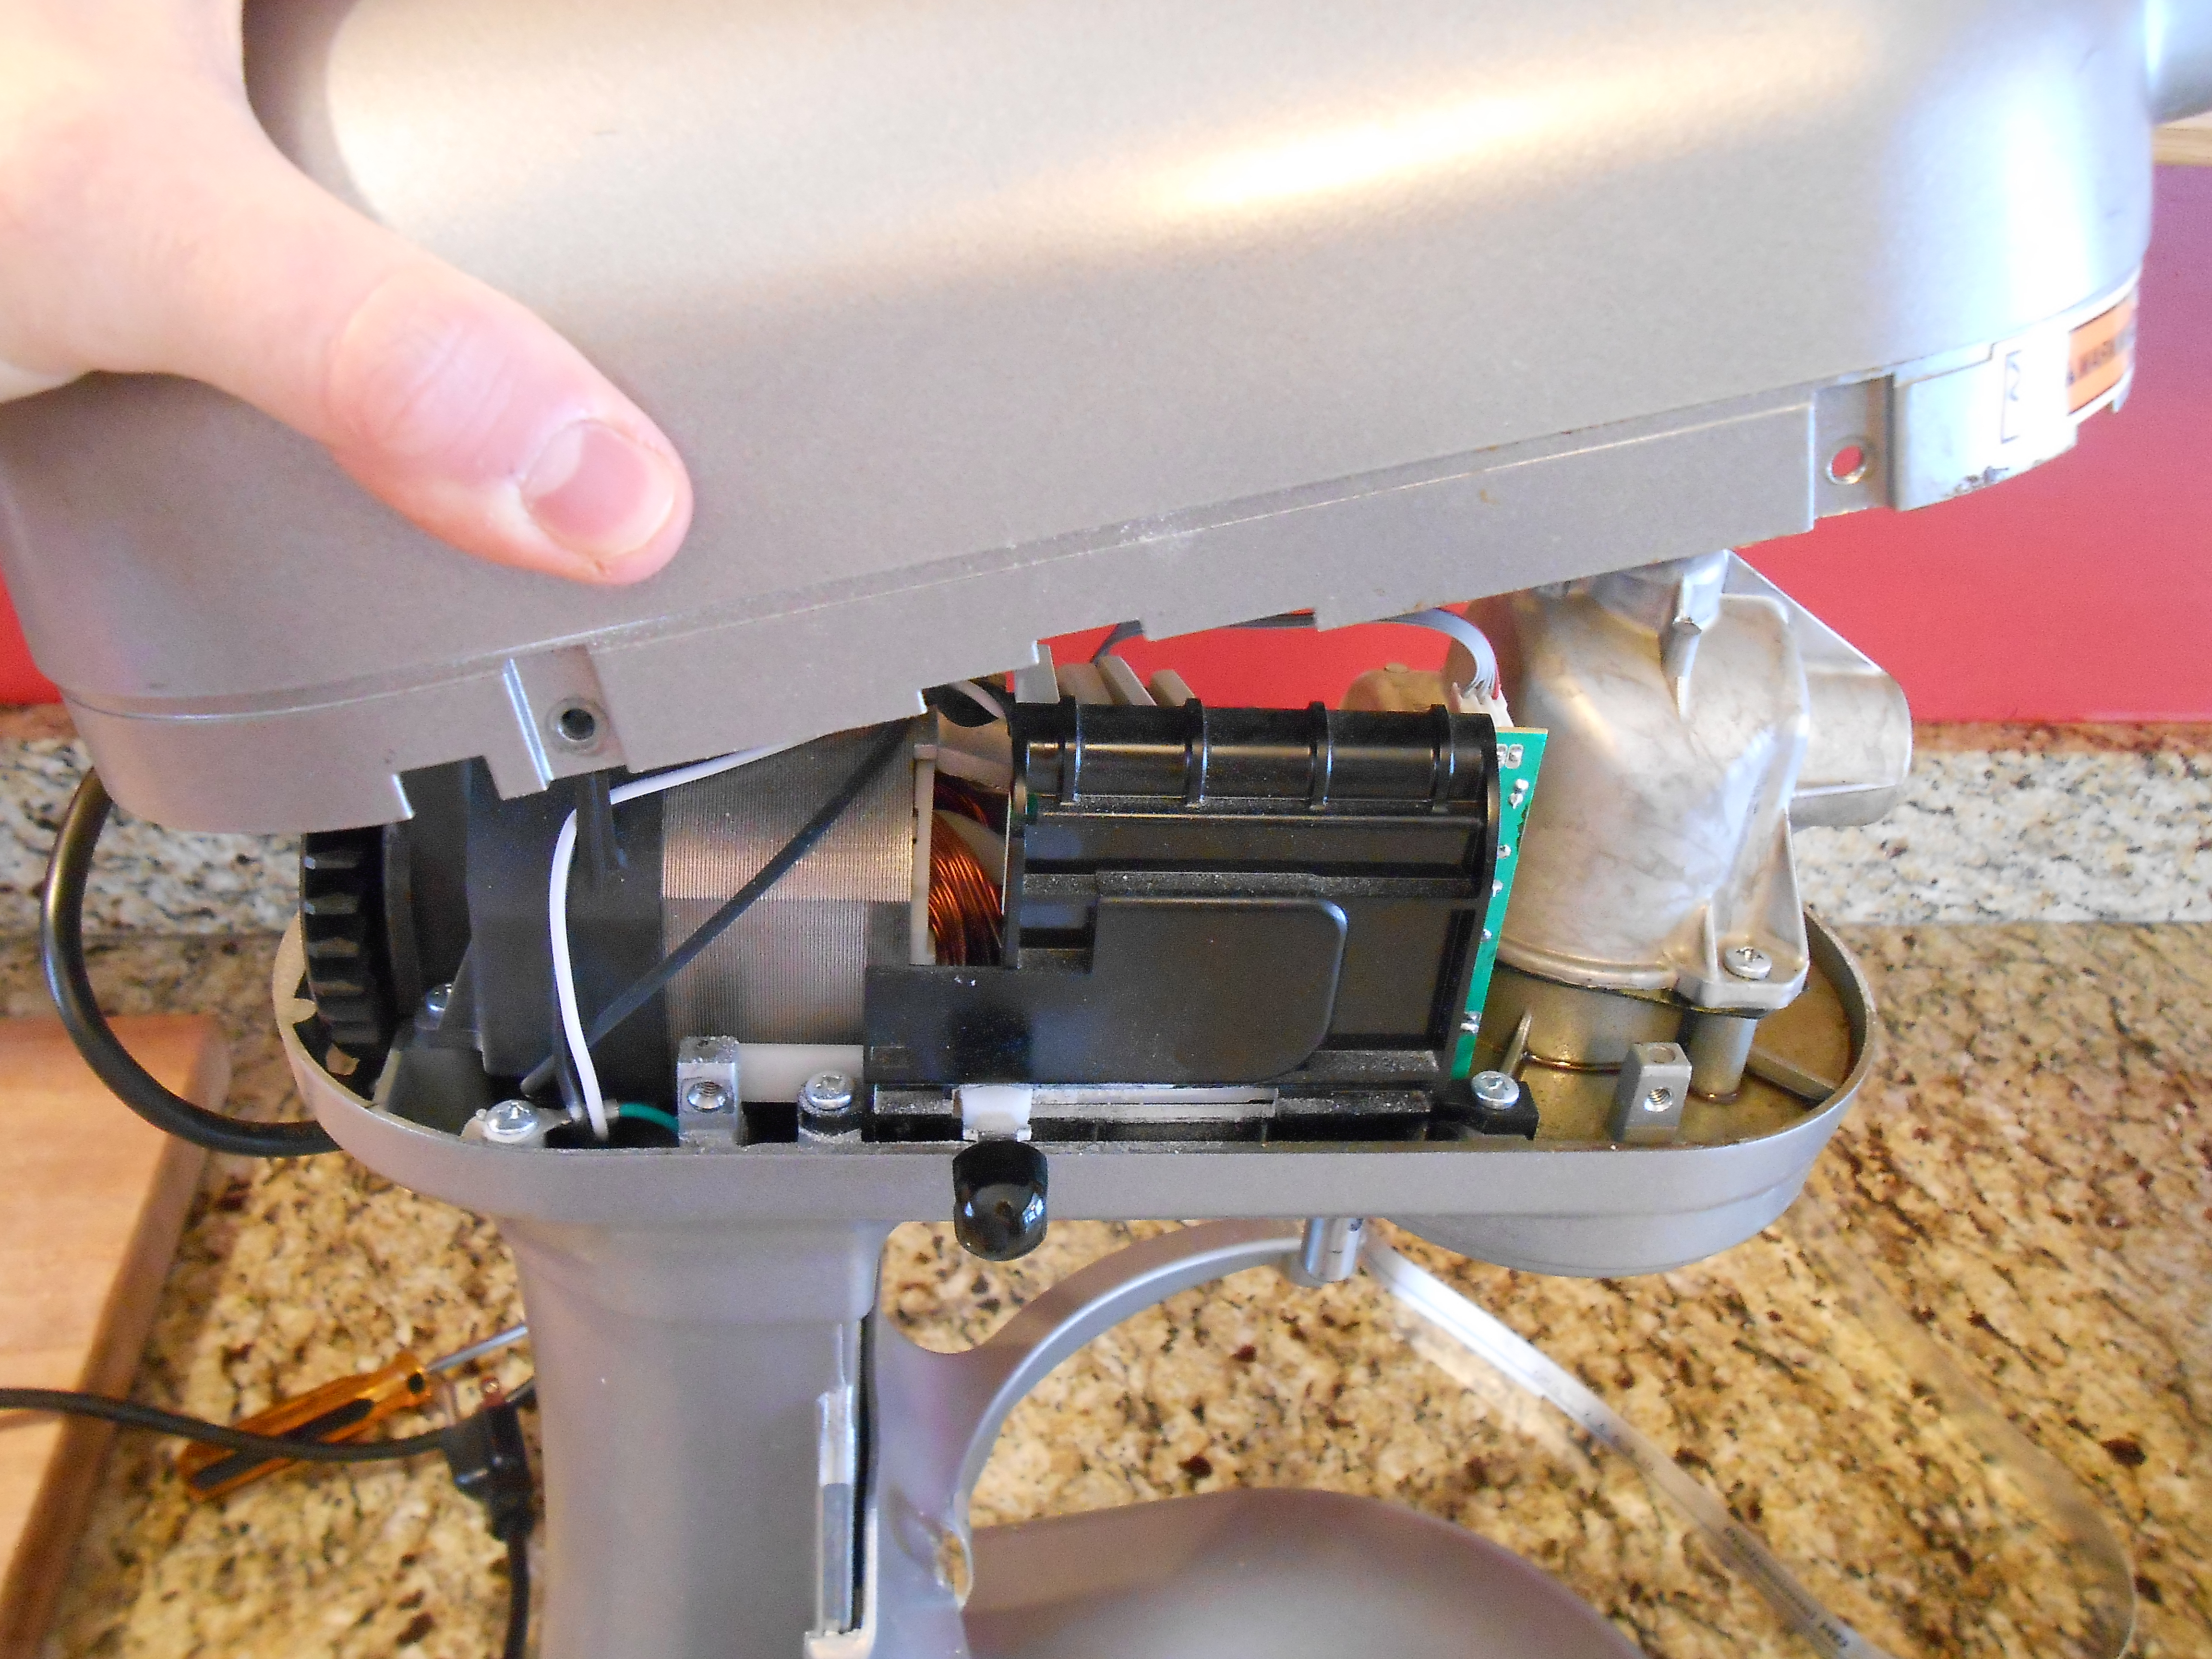
Now you can just lift the housing up, and put it somewhere off to the side.
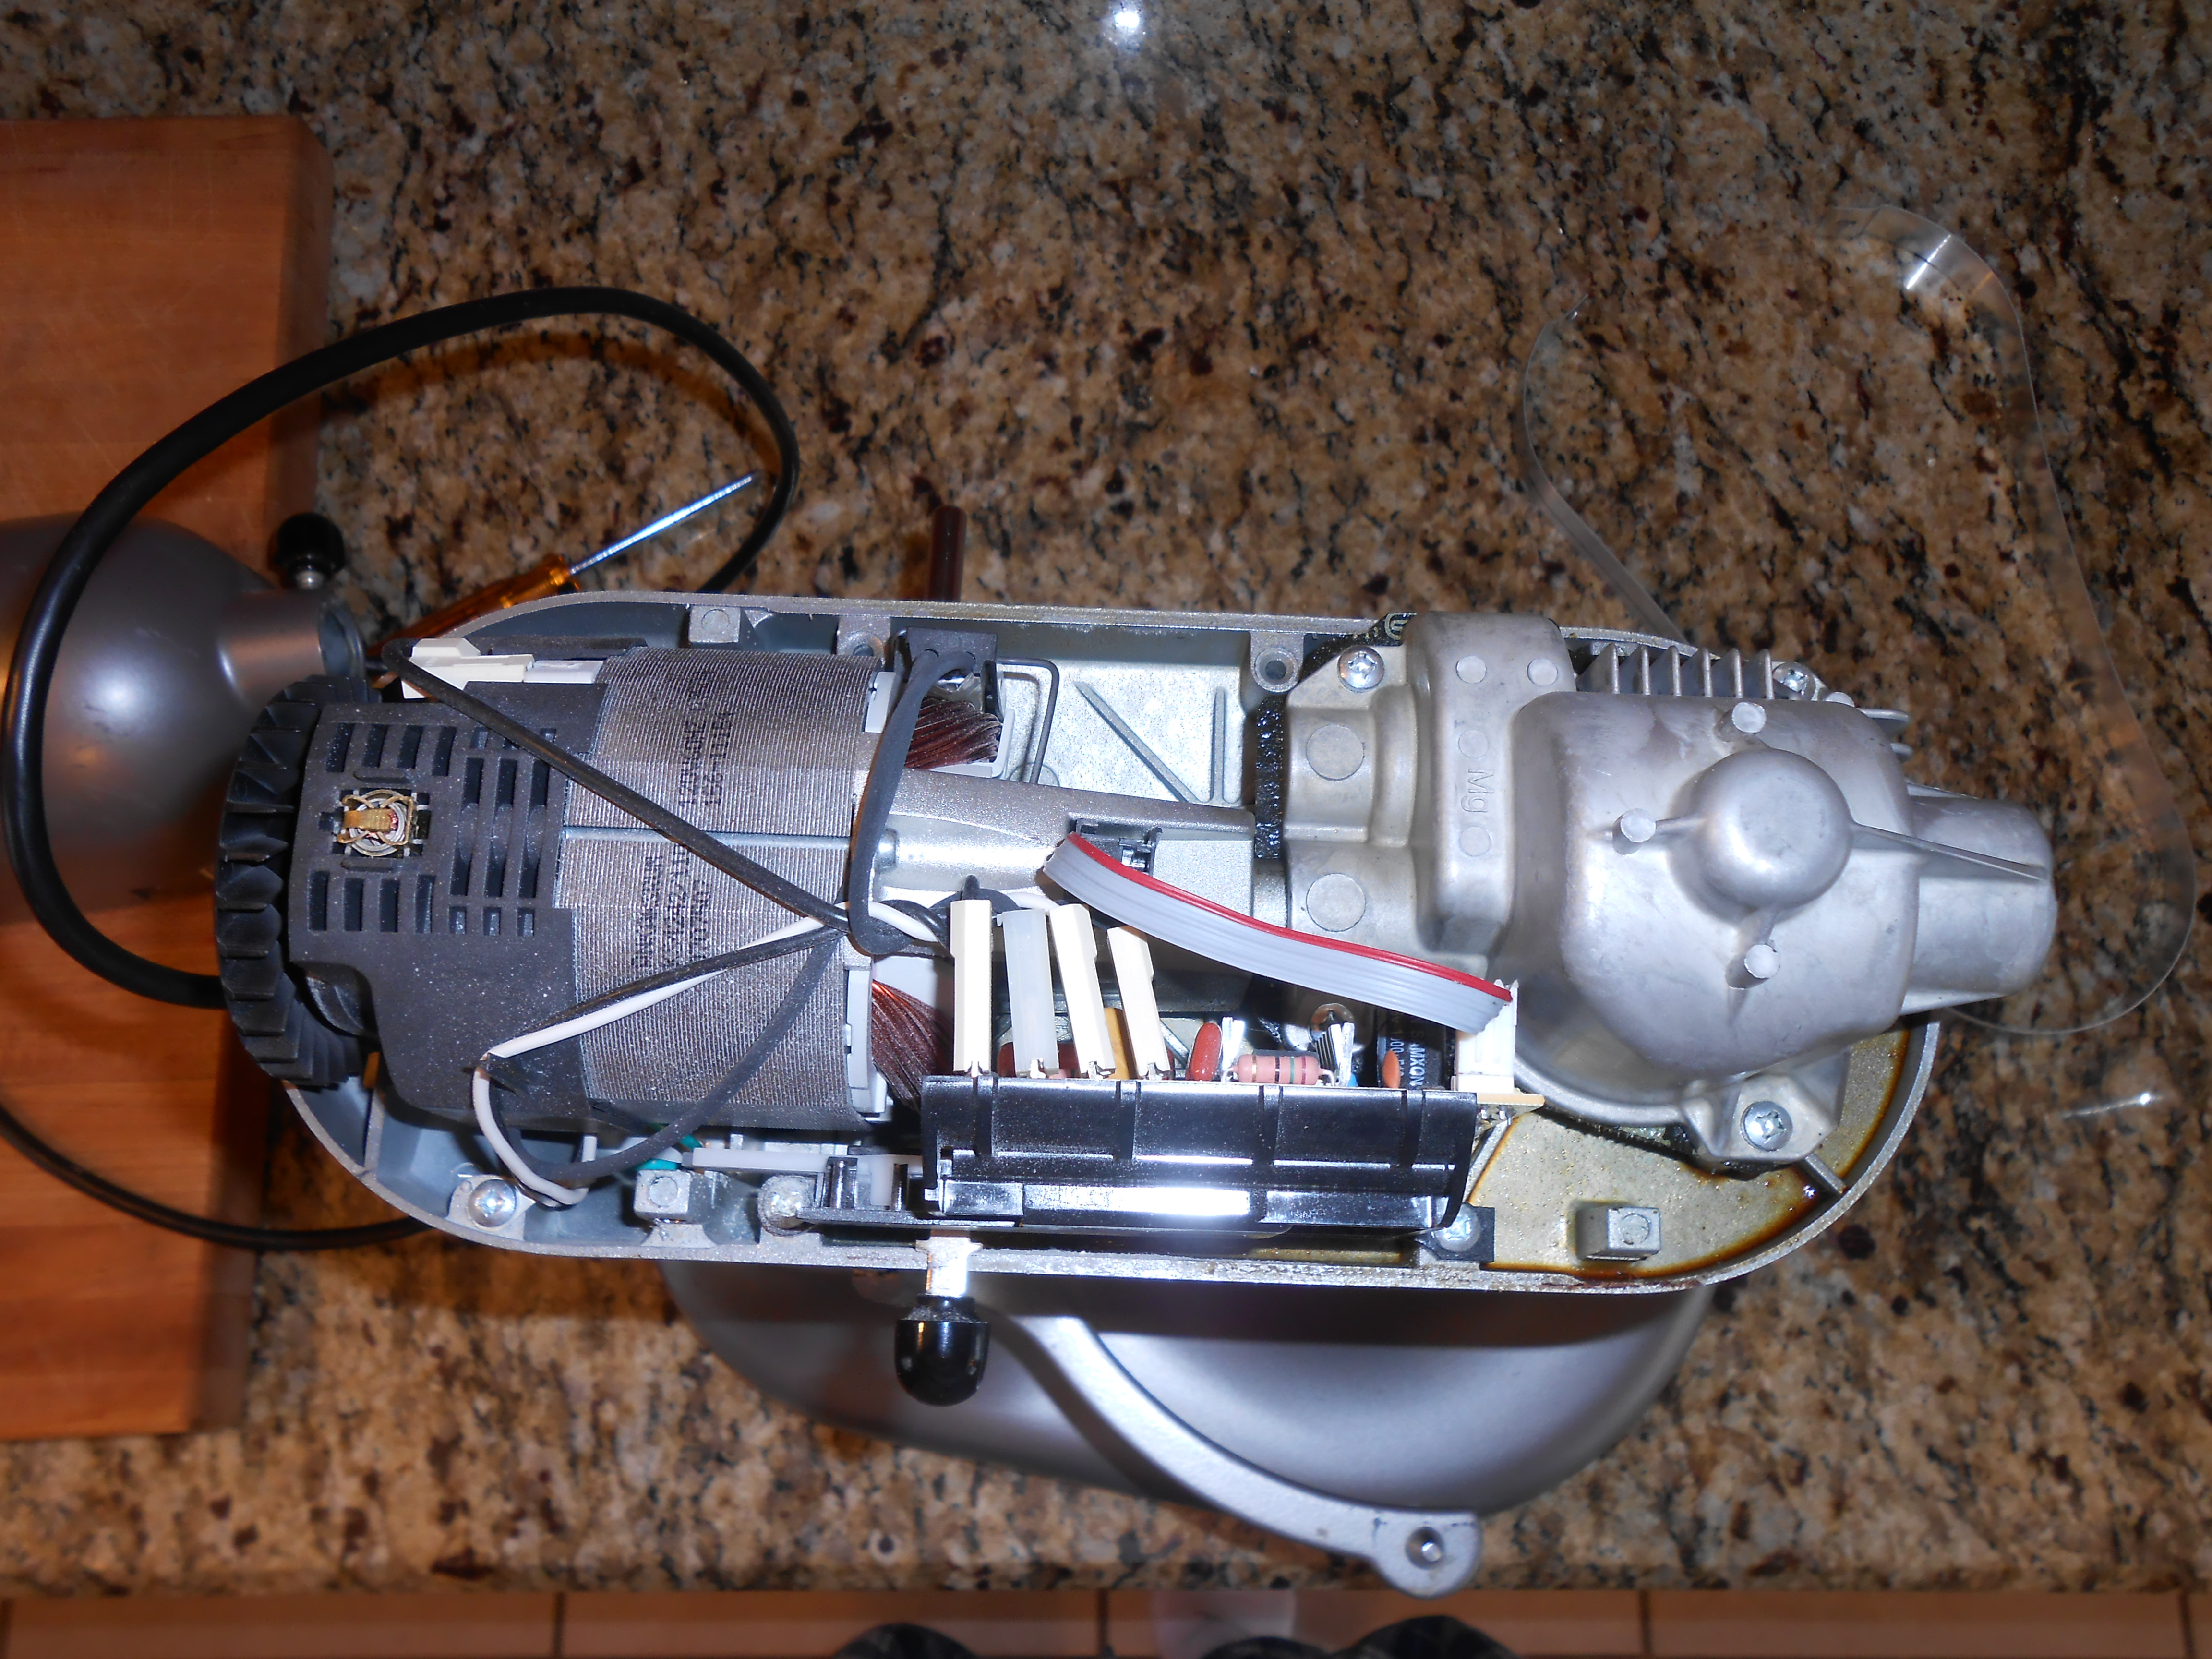 Looking down from the top, the motor is on the left and the gearbox is on the right. Remove the 4 screws that hold the cover on the gearbox and it should lift right off.
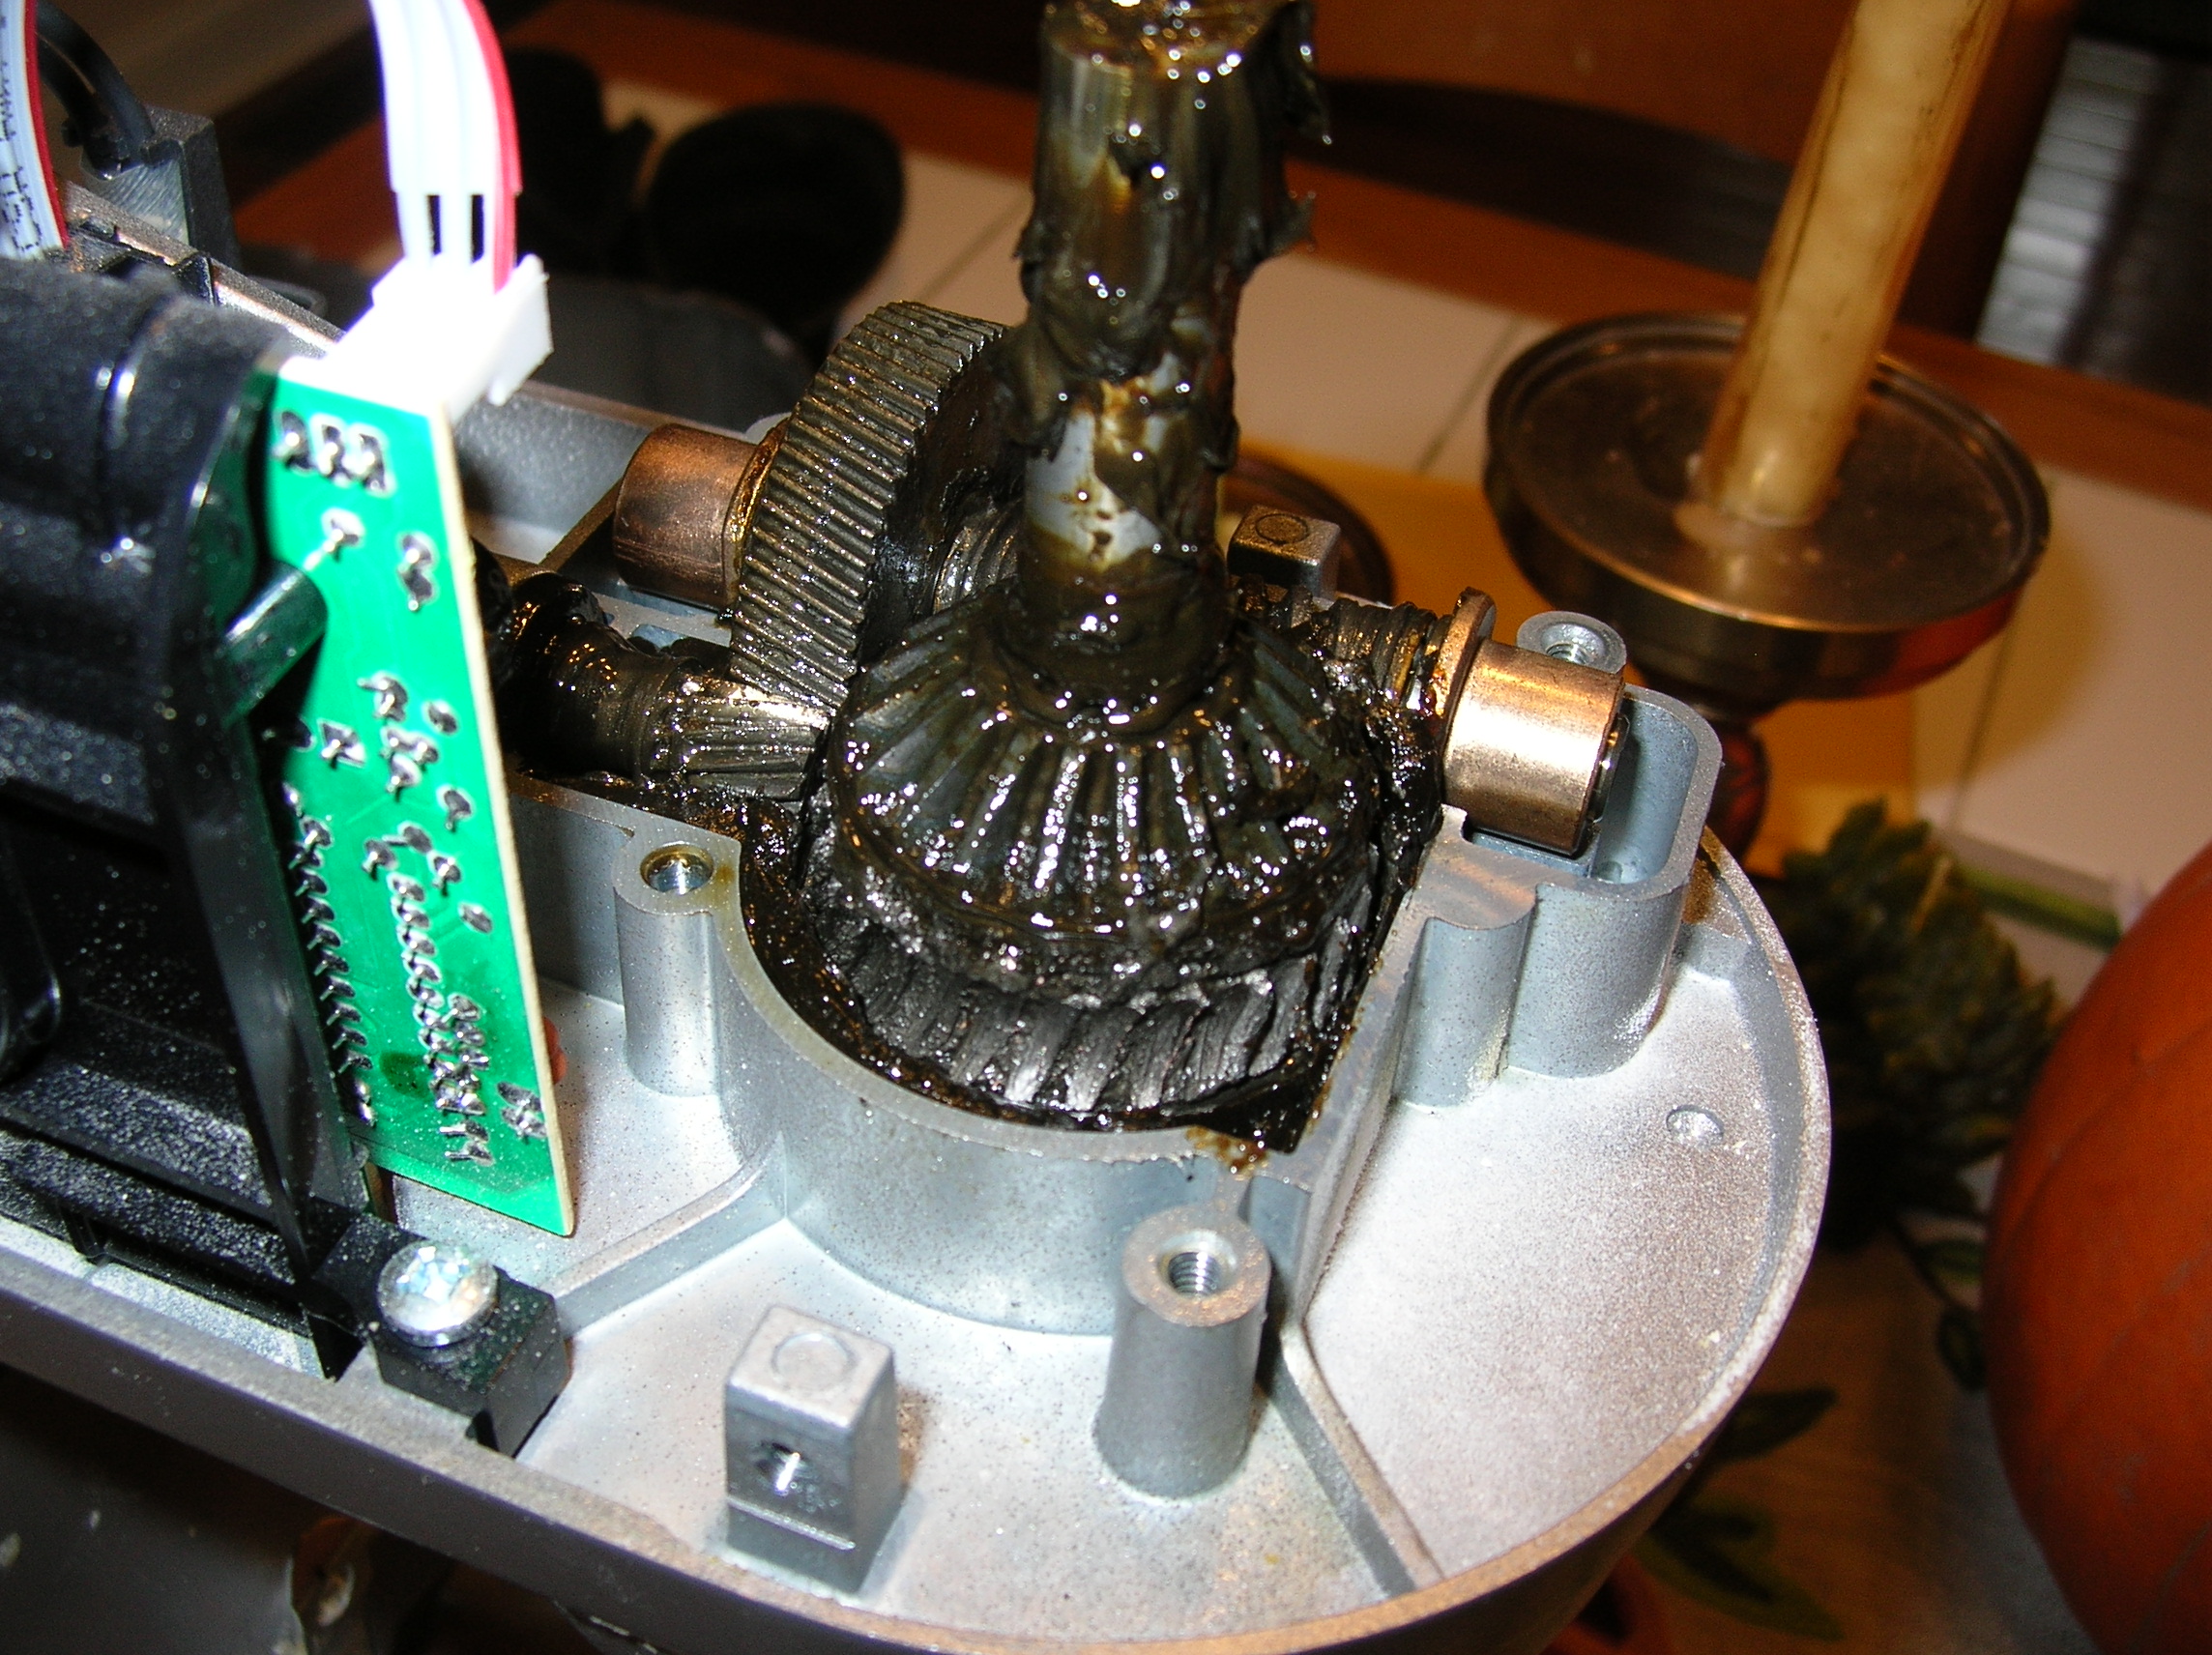 This is the inside of the gearbox. On the left is the motor shaft, which turns the larger vertical gear on the left. This turns a worm gear (towards the back, can’t see in this pic) that mates with the large helical follower gear in the center. You can see in this picture that the teeth on the follower gear are completely destroyed, so the worm gear just spins freely against it.
The only thing about disassembling the gearbox that I found tricky was that there’s a small clip on top of that beveled gear that holds it in place in a groove on the vertical shaft. They make a tool for removing the clip, which I do not have, so I used a needle-nosed pliers to spread the clip out of the groove, and a flat screwdriver to pry it upwards and off the shaft. Don’t destroy or lose this clip.
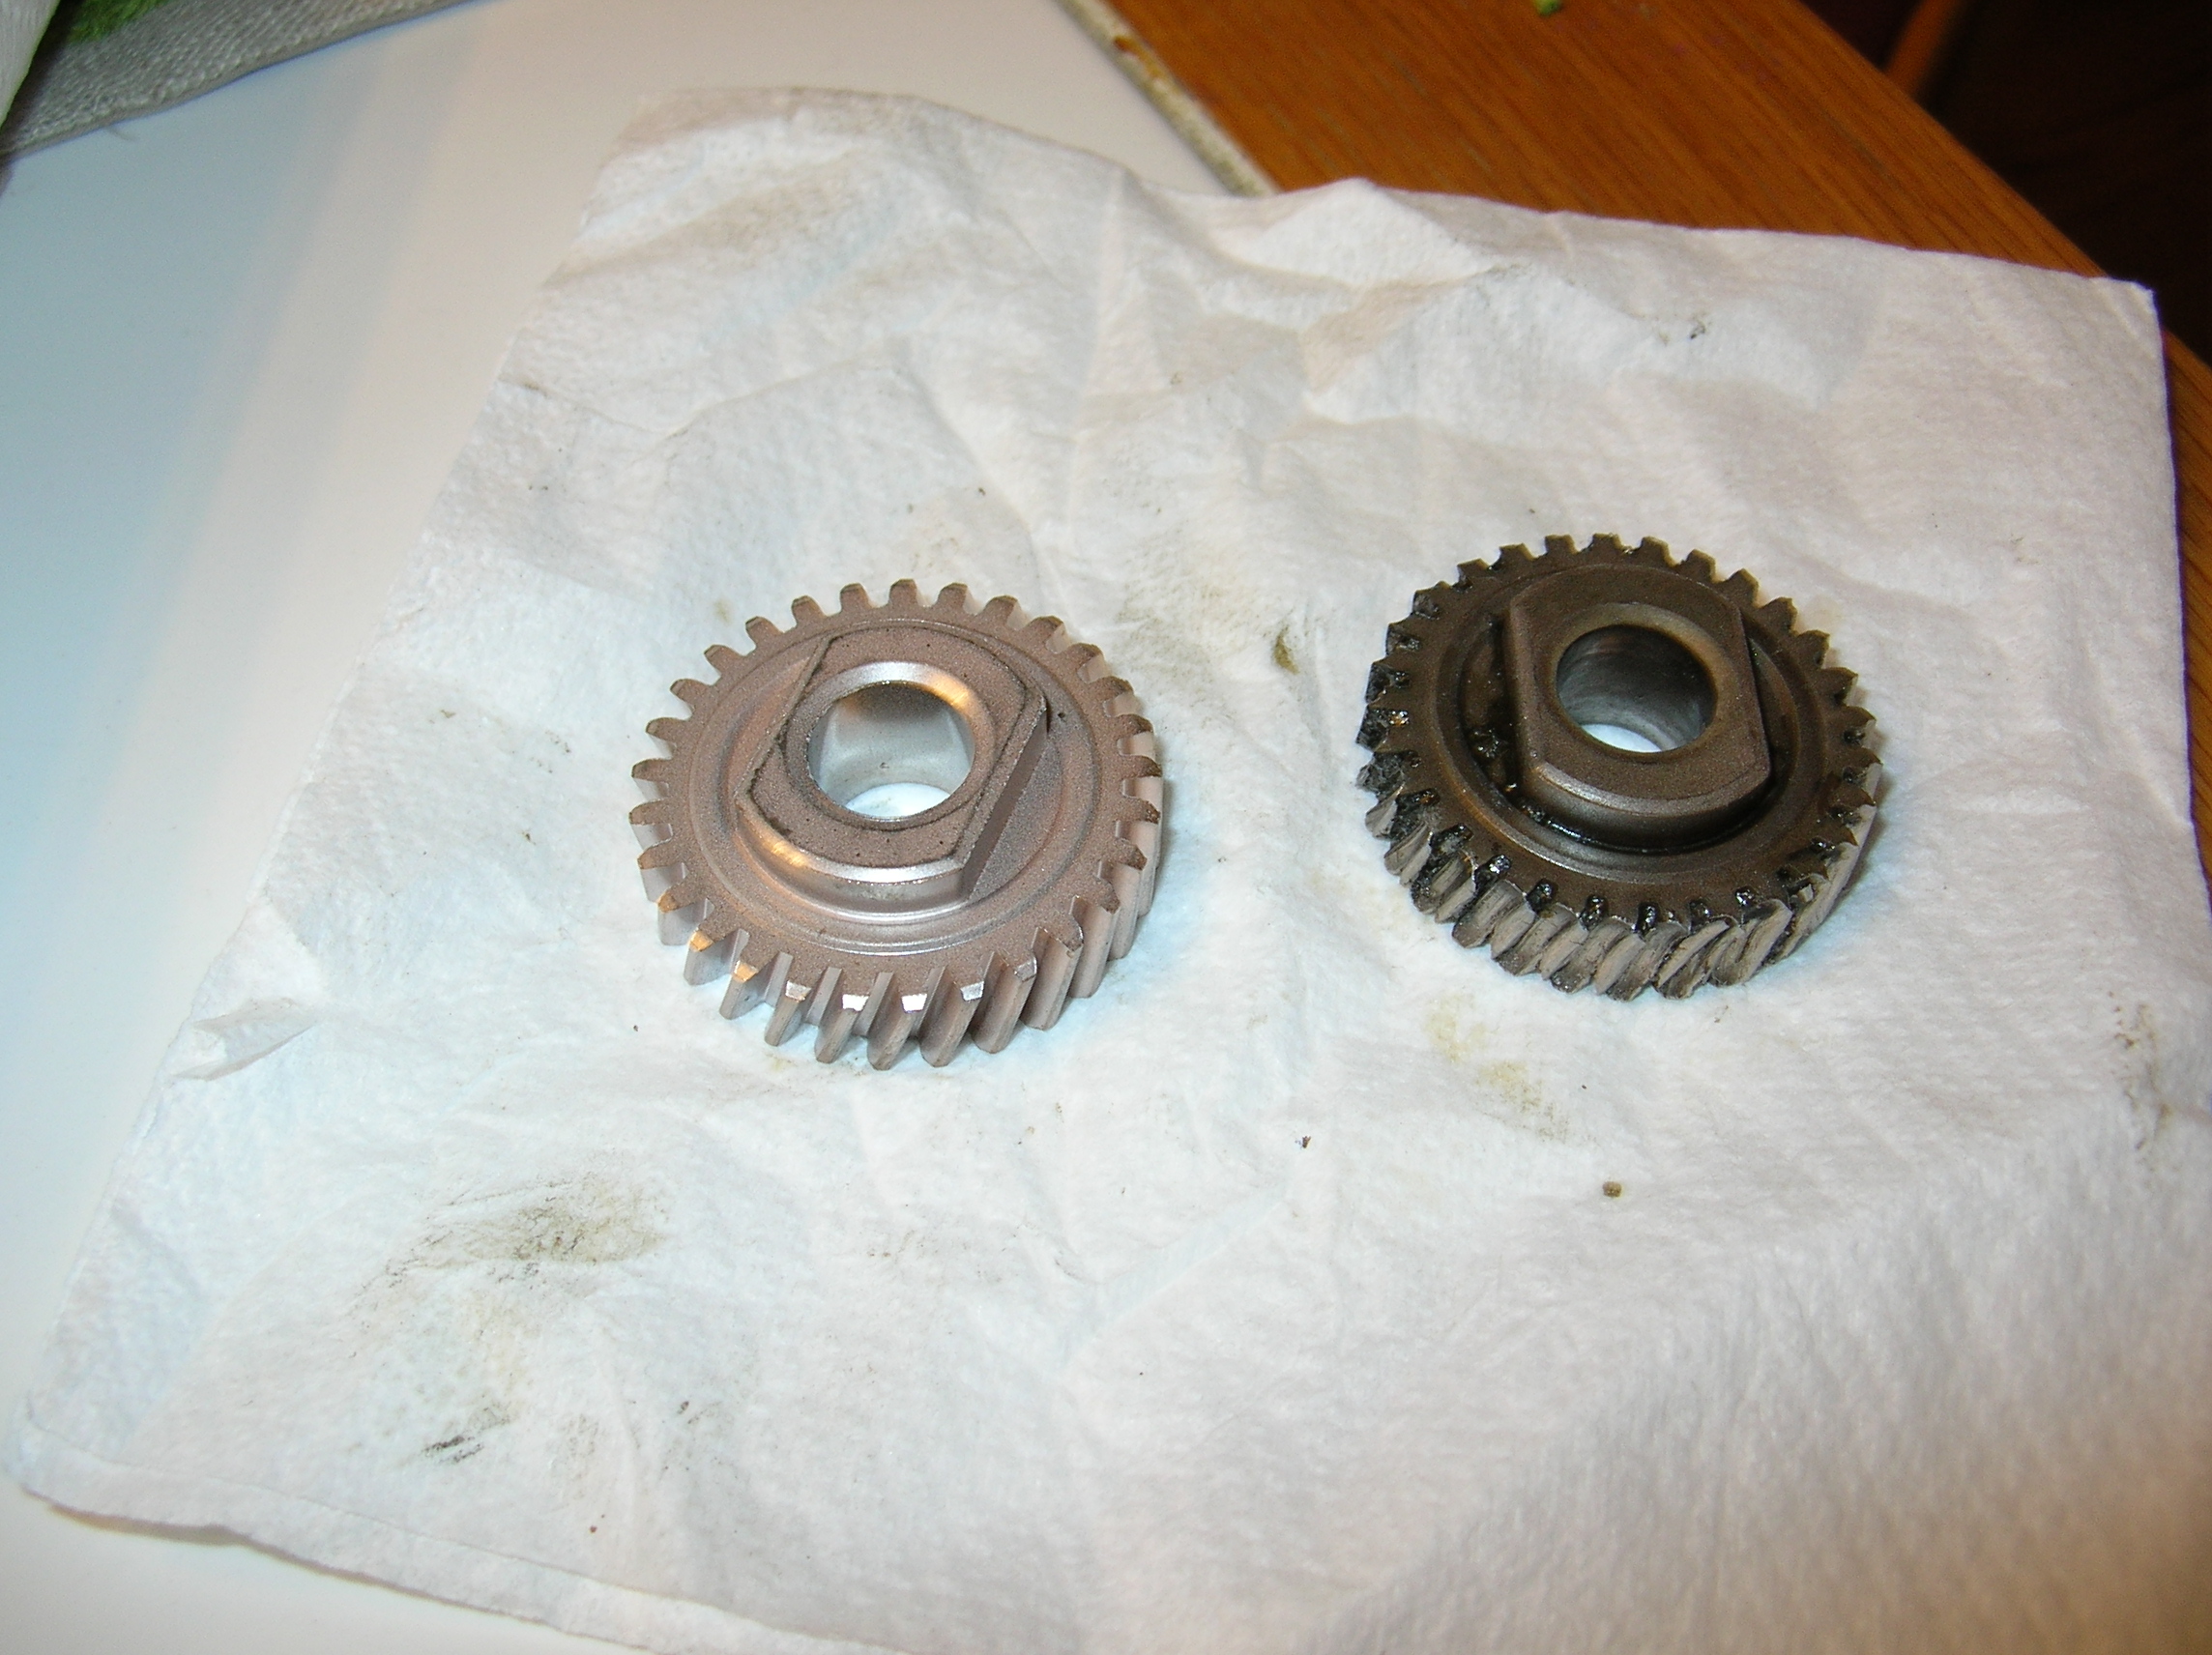 Once removed, the damage is more obvious when shown next to a new gear.
 Even the worm gear had a bit of wear in the center. I should have replaced it, but the part was out of stock at the time. So I reassembled it with the original worm gear and it is actually still working OK in the mixer.
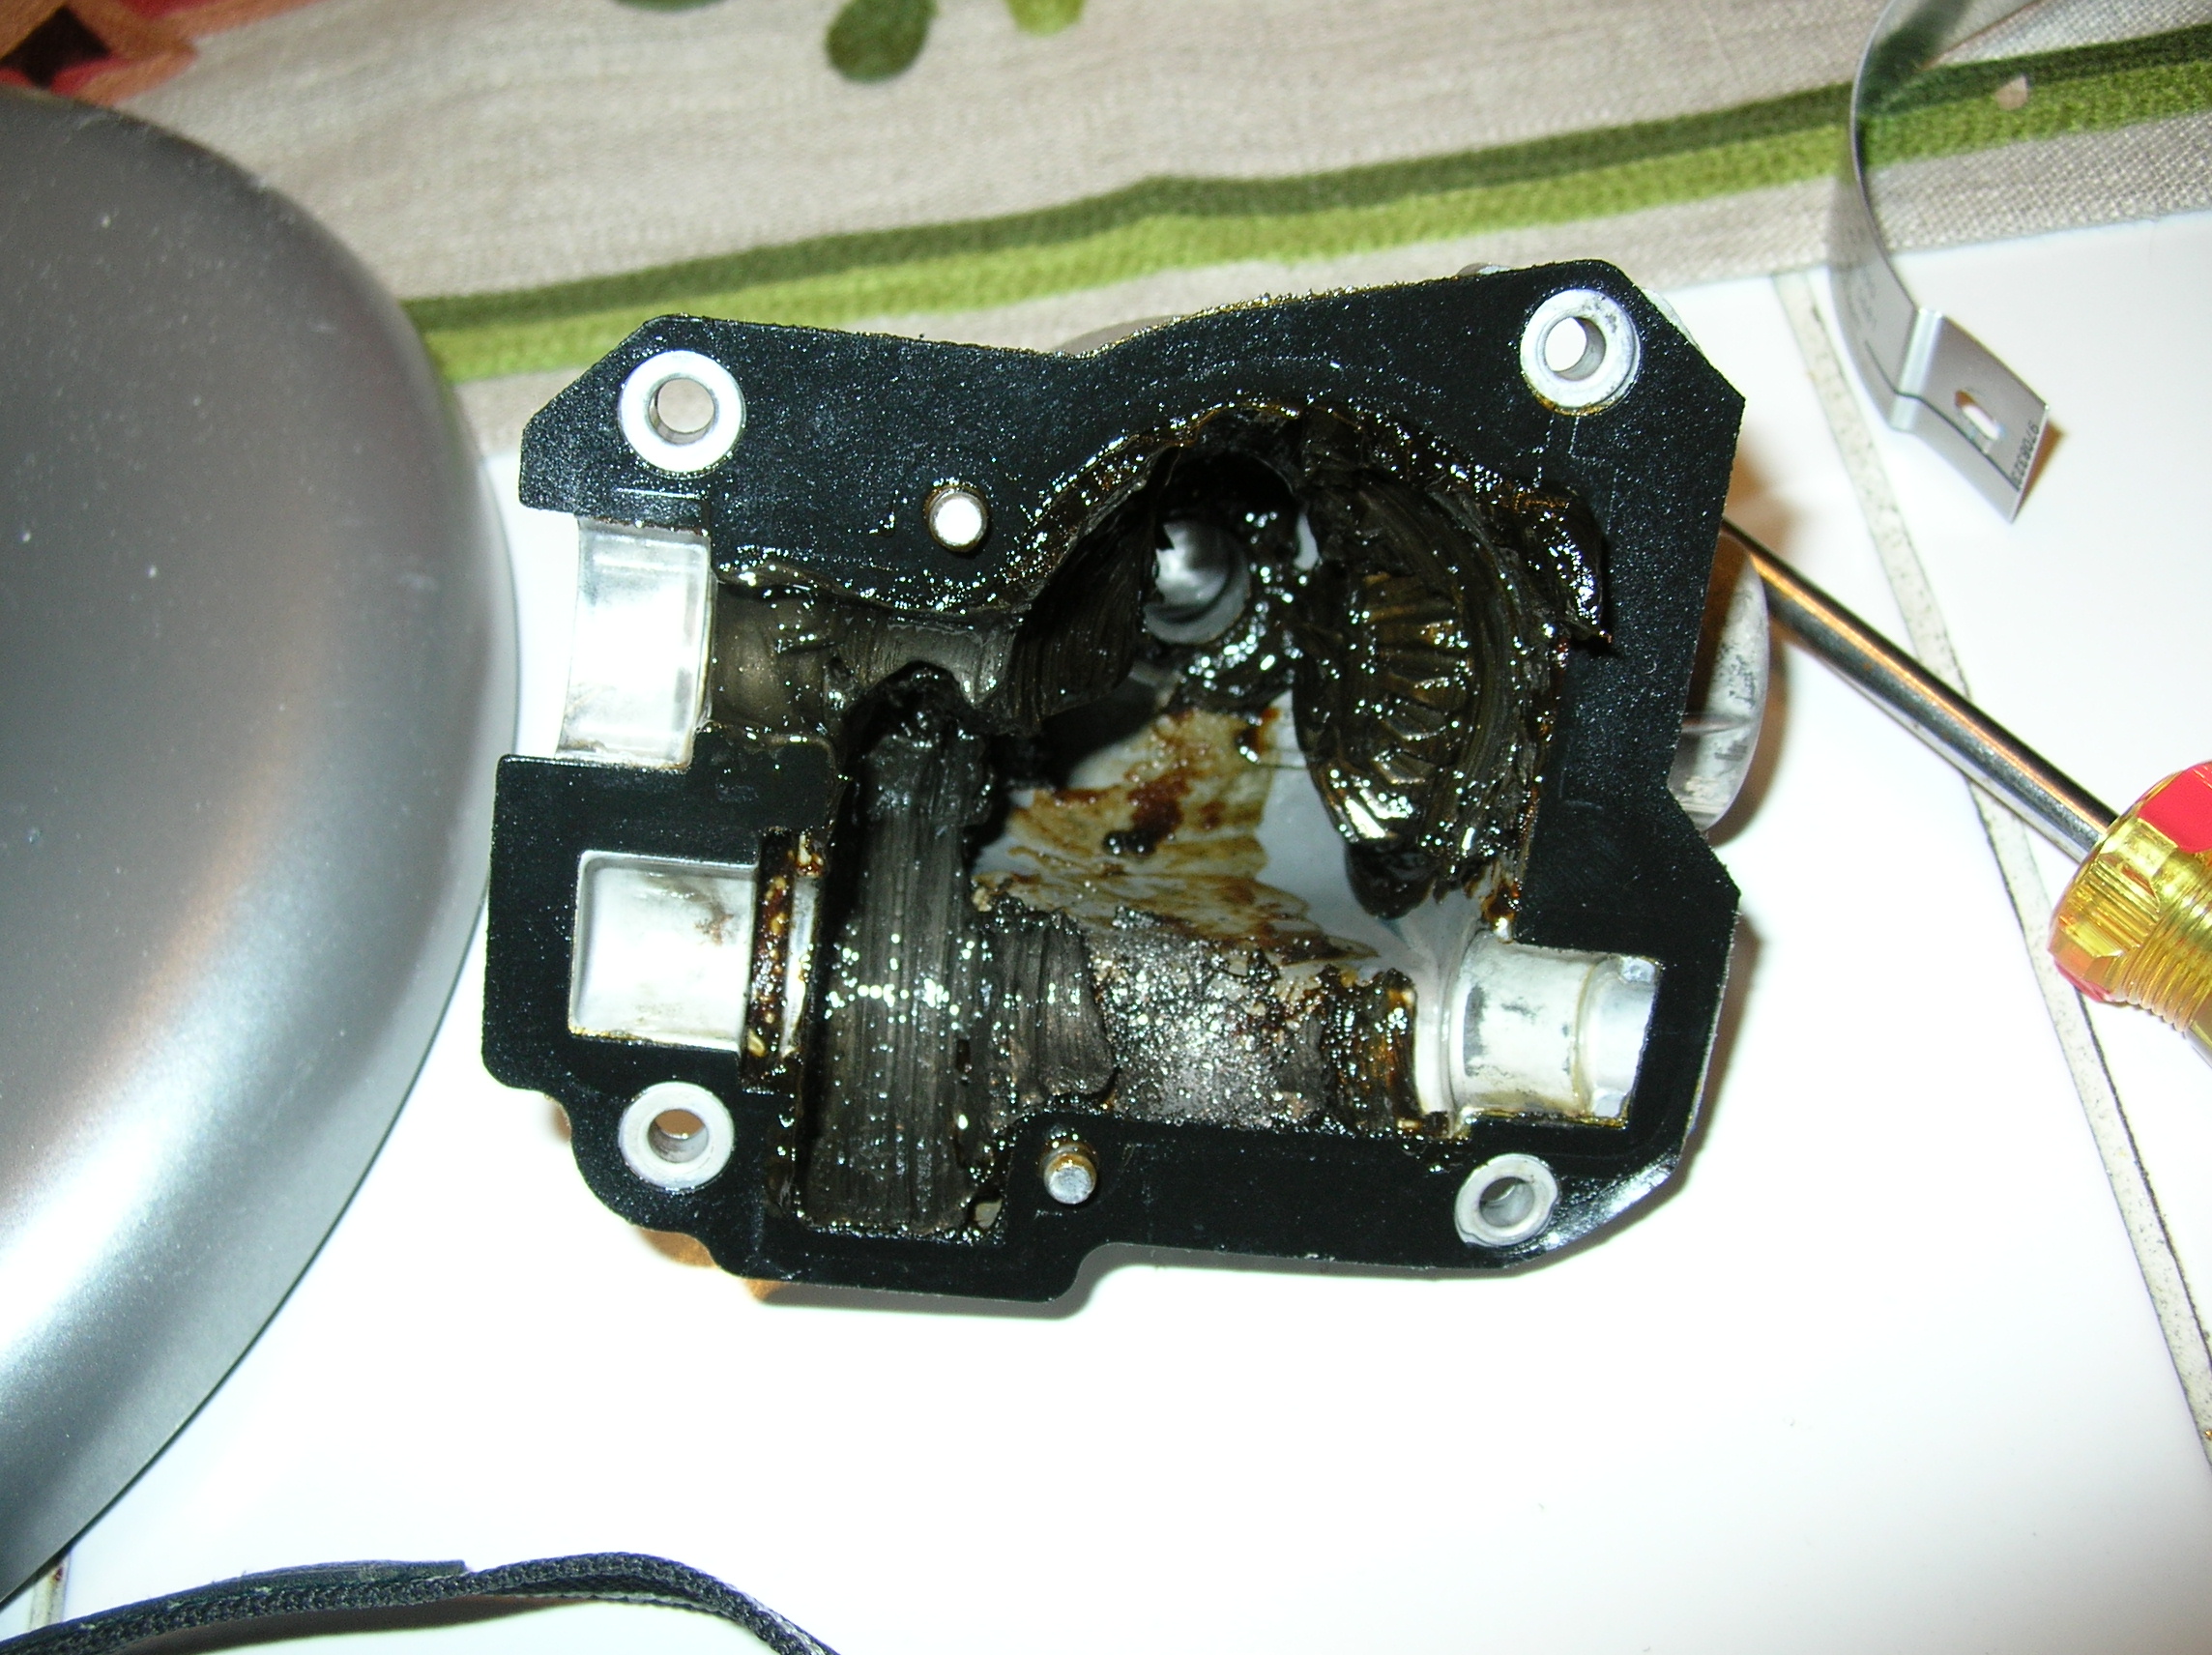 One side-effect of wearing out your gears is that it gets little bits of metal into the grease that’s left in the housing. You can see in this picture, where the grease looks sort of metallic instead of deceptively chocolately. Make sure to clean out all the old grease and replace it, so the metal bits don’t wear out your new gears. KitchenAid makes a food-safe grease specifically made for this. I bought a quart, which should be enough to repair this about fifty times.
Luckily these gears are pretty easy to find, such as on Amazon and are not expensive. Here are links to the parts I’ve bought for this particular mixer:
We broke our mixer twice in the first 2 years we had it. The first was just from repeated kneading of bread and pasta dough on speeds that were too fast, so the damage occurred over several months. The second time was from trying to mix a quadruple batch of gingerbread dough. Seemed like a good idea at the time – that quantity of hard dough would have been impossible to mix by hand, so why not let the mixer do it? On the lowest speed, it screamed to complete 3 or 4 stirs, then lots of awful clicking. Turns out that it forced the shaft upwards and sheared some of the teeth off of the bevel gear.
So the two lessons here are to only knead dough on speed ‘2’ or less, and if the mixer really seems like it’s struggling with something, go slower or put less in the bowl at a time. If you take good care of it, it should last many years, but even if you do break a gear, it’s not the end of the world.


I was so upset when the gingerbread broke the mixer. I think about it every time I think I hear mine struggle.
Well, that was cool. I think I will have to try making bread with my mixer, now that I know there is no kneading at all involved. I know what to avoid for sure.
And – maybe if I really had to , I might even be able to repair this with this explanation and with the photos. Pretty amazing, Michael!
Thanks!